111222

Amazon FBA Dangerous Goods Rules Every Seller Should Know

At some point, most Amazon sellers run into this question: Is my product considered hazmat?

It might be a simple cleaning spray. A supplement. A power bank. Nothing dramatic. But on Amazon, everyday products can fall under “dangerous goods” rules, and that changes everything.

If you use Amazon FBA, you’re not just shipping inventory. You’re entering a tightly regulated system with strict storage, labeling, and transport requirements. Get it right, and you’re fine. Get it wrong, and you’re dealing with shipment rejections, stranded inventory, or worse, account issues.

Let’s break down what actually matters so you can avoid expensive surprises.


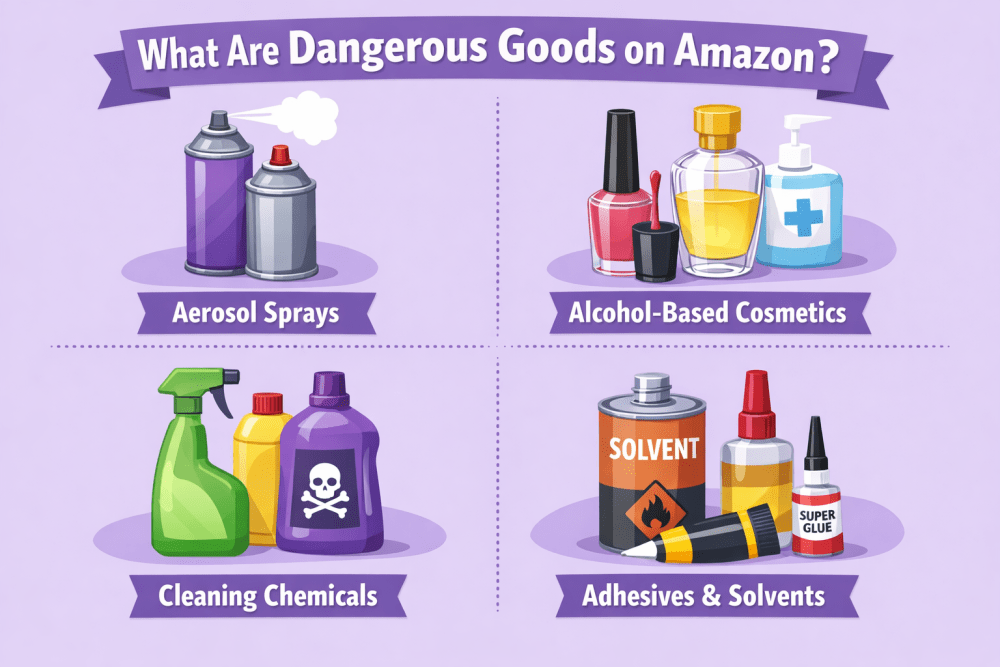
What Are Dangerous Goods on Amazon?

Dangerous goods, also called hazmat, are products that could pose a risk during storage or transportation. The risk might be fire, chemical reaction, leakage, pressure build-up, toxicity, or environmental harm.

That does not mean the product is illegal. It simply means it must be handled under specific rules.

Some common examples include:

  • Aerosol sprays such as deodorants or cooking sprays
  • Alcohol-based cosmetics and fragrances
  • Cleaning chemicals and disinfectants
  • Adhesives and solvents
  • Paints and coatings
  • Lithium-ion batteries and power banks
  • Supplements containing restricted ingredients
  • Certain automotive fluids
  • Pest control products

Many sellers are surprised to learn that a simple power bank or a bottle of cologne can trigger dangerous goods classification. The reason is transport risk. Air carriers, ground carriers, and warehouses must comply with safety regulations. Amazon enforces those standards inside its fulfillment network.

If your product is flammable, pressurized, corrosive, reactive, oxidizing, or battery-powered, you should assume it needs review.


Why Dangerous Goods Matter in FBA

When you use FBA, your products enter Amazon’s regulated logistics system, where safety rules are strictly enforced. Standard items are stored in general areas, while dangerous goods are kept in designated zones with special handling procedures.

Because of this, accurate classification is critical. If a product is misdeclared, shipments can be rejected, inventory can be blocked from sale, listings may be suppressed, and Amazon can request urgent compliance documents. Repeated issues may even lead to account warnings or suspension.

This is about operational safety and liability. As a seller, your responsibility is simple – classify your products correctly and provide accurate information before sending them to FBA.


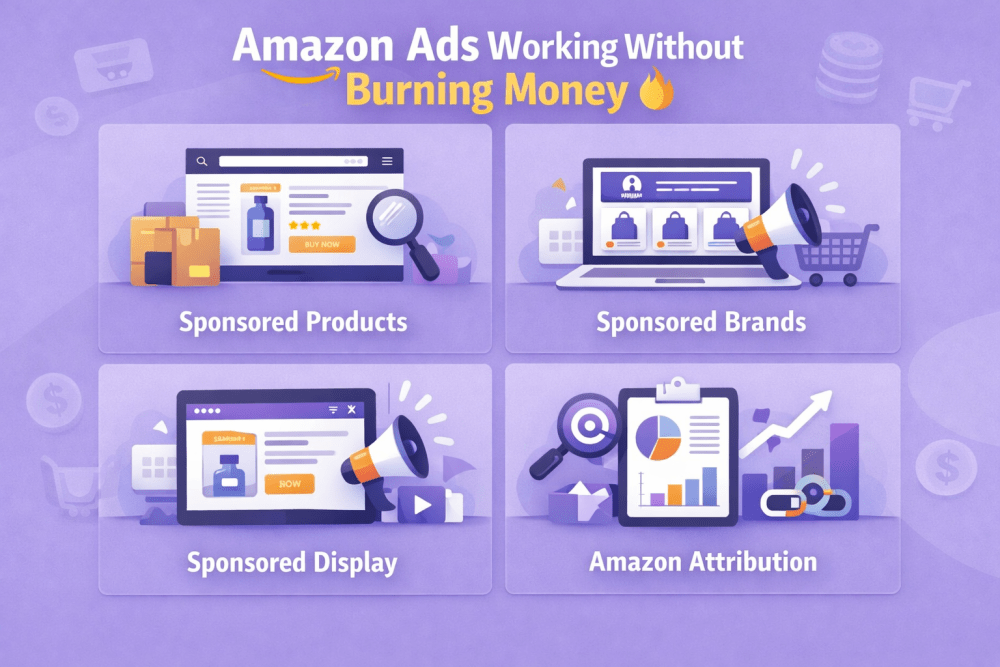
Turn Approved Products Into Revenue With WisePPC

Compliance is one side of the business. Sales are the other. Once your product is approved for FBA, it still needs traffic, visibility, and consistent performance to grow. That is where we come in.

WisePPC is a performance advertising platform built around pay per click campaigns. We give sellers the tools to launch, manage, and optimize ads with clear performance data in one place. Our service combines campaign automation, analytics, and reporting so you can see exactly where your budget goes and what it generates.

This matters even more for hazmat products. When storage limits, higher fees, or stock restrictions are part of your reality, every click needs to count. WisePPC helps you align ad spend with inventory levels, monitor performance trends, and scale campaigns without overspending.

You stay focused on compliance and operations. Our platform helps you turn approved products into predictable revenue.


The Nine Hazard Classes – What They Actually Mean

Dangerous goods are divided into internationally recognized hazard classes. You do not need to memorize all of them, but having a general understanding helps you spot potential compliance issues early.

Here is a simplified overview:

Class Category Examples FBA Status
1 Explosives Fireworks, flares Generally prohibited
2 Gases Flammable, toxic, or compressed gases, aerosols Restricted
3 Flammable liquids Paint, alcohol, solvents, some cosmetics Restricted
4 Flammable solids Matches, self-reactive materials Restricted
5 Oxidizers and organic peroxides Bleaching agents, reactive chemicals Restricted
6 Toxic and infectious substances Regulated toxic chemicals Highly restricted
7 Radioactive materials Radioactive products Prohibited
8 Corrosives Acids, strong cleaning agents Restricted
9 Miscellaneous dangerous goods Lithium batteries, eco-hazardous items Restricted


Most FBA sellers deal with Class 2, 3, 8, or 9 products. Lithium batteries, in particular, are extremely common and often misclassified.

Even small changes in formulation or battery specifications can shift a product into a different hazard class. That is why accurate documentation is not just paperwork. It directly affects how your product is stored, shipped, and approved for FBA.


How Amazon Identifies Dangerous Goods

Amazon does not rely only on what you declare. Its system evaluates multiple data points, including product titles and bullet points, ingredient information, SDS documentation, regulatory keywords, carrier requirements, and internal review checks.

If your listing includes terms such as flammable, aerosol, battery, solvent, or alcohol, it may be flagged automatically for review.

When that happens, the ASIN can be temporarily blocked until classification is completed.

Before sending inventory, check your product status in Seller Central using the Manage Dangerous Goods Classification tool. It takes minutes and can prevent weeks of delay.


Dangerous Goods Documentation and Review Process

If your product is classified as dangerous goods, Amazon requires proper documentation before it can be stored in FBA.


Safety Data Sheet

In most cases, you must submit a Safety Data Sheet (SDS). This document includes chemical composition, hazard identification, first aid measures, firefighting guidance, handling and storage instructions, transport details, and regulatory classification. It must comply with international standards such as the Globally Harmonized System.

The SDS must usually be issued within the last five years, match the exact product formulation, and come directly from the manufacturer. Generic or outdated documents are commonly rejected. If the information does not align with your listing, the review resets and delays approval.


Exemption Sheet

Some battery-powered products or items without hazardous chemicals may qualify for an exemption sheet instead of a full SDS.

This Amazon form requires accurate technical details such as battery type, watt-hour rating, packaging format, and chemical confirmation. Incorrect or estimated data can lead to rejection.


Review Process

After submission, Amazon reviews the documentation to verify hazard class, confirm packaging requirements, assign storage category, and determine FBA eligibility.

The review can take several days. If additional information is requested, provide complete and precise responses to avoid delays. Once approved, the product is cleared for FBA under assigned handling conditions.


Check Status Before Shipping

Before sending inventory, check your ASIN in the Manage Dangerous Goods Classification tool in Seller Central. Review the status and upload required documents if needed.

If creating a new listing, answer dangerous goods questions accurately during setup. This prevents shipment holds and listing blocks later.


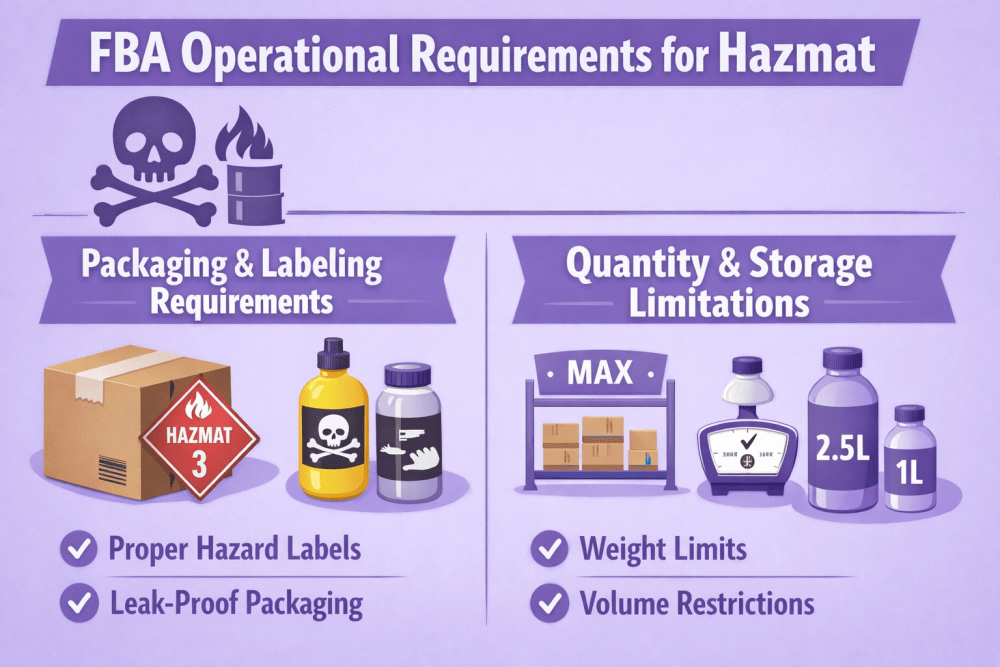
FBA Operational Requirements for Hazmat

Once your product is approved as dangerous goods, compliance does not stop at documentation. FBA has specific operational requirements that affect how your inventory is packed, shipped, and stored.


Packaging and Labeling Requirements

Hazmat products must be packaged according to strict safety standards. This is not flexible.

Packaging:

  • Durable outer packaging that can withstand transport
  • Leak-proof containers for all liquids
  • Secondary containment when required to prevent damage if the primary container fails
  • Absorbent material inside the box for flammable liquids

Labeling:

  • Clear and visible hazard labeling when applicable
  • Fully scannable FNSKU barcodes
  • Full compliance with carrier regulations, including weight and dimension limits

Not every shipping provider accepts dangerous goods. Always confirm that your carrier is authorized to transport hazmat items before creating a shipping plan.

If packaging does not meet Amazon’s standards, the shipment can be refused or repackaged at your expense.


Quantity and Storage Limitations

Approval does not mean unlimited storage. Some dangerous goods, especially flammable liquids and aerosols, must be shipped in limited quantities.

FBA sellers may face storage caps, hazmat waitlists, longer processing times, and higher storage or fulfillment fees. Dangerous goods inventory is stored in designated areas within fulfillment centers, and capacity can change.

If you are placed on a waitlist, you must wait until space becomes available. Because of these limits, inventory planning is more critical when selling hazmat products.


International Shipping and Customs Risks

If you ship products internationally, compliance becomes even more critical.

Customs authorities require:

  • Correct UN numbers
  • Accurate hazard class declarations
  • Transport documentation
  • Proper labeling

If product information is misdeclared:

  • Shipments can be held at customs
  • Carriers may refuse transport
  • Additional fees may apply
  • Products may be returned

International sellers often underestimate this layer of regulation. Hazmat rules do not stop at Amazon’s warehouse door.

Work closely with freight forwarders who understand dangerous goods transport. Do not assume standard shipping methods apply.


The Financial Side of Hazmat

Selling dangerous goods can be profitable, and many high-demand categories fall under hazmat rules. However, the cost structure is often different from standard products.

You may face higher FBA storage fees, additional fulfillment handling charges, documentation costs related to compliance, and increased freight rates for hazardous transport. These factors can directly affect your margins.

Before launching a hazmat product, include these expenses in your pricing model. Profit margins that work for standard goods may shrink under hazmat fee structures, so it is better to calculate everything in advance rather than adjust under pressure later.


Risk Management and Long-Term Compliance

Selling dangerous goods is not just about getting initial approval. It is about avoiding preventable mistakes and maintaining control over your compliance process.


Common Mistakes Sellers Make

Certain errors appear repeatedly. Sellers ignore hazmat classification until Amazon flags the listing. They upload outdated SDS documents or submit incomplete exemption sheets. Some ship inventory before approval, mislabel products to avoid review, or fail to update documentation after formula changes. Battery specifications, especially watt-hour ratings, are often overlooked. Storage limits are sometimes ignored.

Amazon cross-checks listing data, documentation, and shipment details. Small inconsistencies are rarely overlooked. Shortcuts usually create bigger delays later.


Ongoing Compliance Is Not Optional

Dangerous goods compliance is not a one-time event.

Formulas change. Suppliers switch manufacturers. Regulations update. Amazon revises policies.

Stay proactive:

  • Keep SDS files updated
  • Monitor Seller Central notifications
  • Review policy updates
  • Train your team on packaging standards
  • Recheck classification if product details change

A single oversight can block a well-performing listing.

Consistency protects momentum.


Should You Avoid Selling Hazmat?

Not necessarily. Many successful brands operate in categories that fall under dangerous goods rules, including cosmetics, supplements, cleaning products, electronics, and automotive items.

The difference between smooth operations and constant friction is preparation. When you understand classification, maintain accurate documentation, follow operational requirements, account for additional costs, and monitor compliance, hazmat becomes manageable.

It requires discipline, not avoidance.


Final Thoughts

Dangerous goods are not a problem if you handle them correctly. The issues usually come from assumptions, not from the product itself.

If you understand how classification works, submit accurate documents, follow packaging rules, and check your ASIN status before shipping, most risks are avoidable. Hazmat products simply require more attention to detail.

Treat compliance as part of your operations, not a last-minute task. That mindset alone prevents most disruptions.


FAQ

1. Do all battery products count as dangerous goods?

Not all, but many lithium-ion and lithium-metal batteries are reviewed. Classification depends on battery type and specifications. Always check your ASIN status before shipping.

2. Can I send inventory before hazmat approval?

No. If you ship before approval, your inventory can be rejected or held. Approval should come first.

3. What if Amazon reclassifies my product later?

Your listing may be blocked until you provide updated documentation. Sales can pause during the review.

4. Are hazmat products more expensive to sell?

Often yes. Storage, handling, and freight costs can be higher, so plan your margins carefully.

5. Can I sell dangerous goods internationally through FBA?

Yes, but you must meet carrier and customs regulations. Incorrect documentation can delay or stop shipments.

6. How often should I review my documentation?

Any time you change formulation, supplier, packaging, or battery specs. If something changes, recheck classification.

Amazon Brand Registry Roles: A Complete Guide

Amazon Brand Registry provides brand owners with tools to protect their intellectual property and manage their presence on the marketplace. A very important part of working with Brand Registry is the system of roles. These roles determine what a particular account can do with your brand – from reporting infringements to creating enhanced product content.

Roles in Brand Registry are divided into two main categories: protection roles and selling roles. Each category solves different tasks and has its own set of permissions. Understanding the differences between them helps brand owners properly organise work with employees, agencies and authorised resellers.


Protection Roles in Amazon Brand Registry

Protection roles regulate access to tools that help combat counterfeiting, infringement and other violations of intellectual property rights. These roles work at the level of the Brand Registry account (not the selling account).

When a brand is successfully enrolled, the account that submitted the application automatically receives two key protection roles at once.


Rights Owner Role

The Rights Owner role is the basic status of the trademark owner or their authorised representative. This role is assigned automatically to the account that successfully completed brand registration.

Holders of this role have access to the main protection tool – Report a Violation. Using this tool they can notify Amazon about suspected counterfeits, listing hijackings, misuse of brand assets and other violations.

In most cases the Rights Owner also has the ability to view detailed information about reports submitted for the brand.


Administrator Role

The Administrator role provides the highest level of control over brand settings in Brand Registry. Just like Rights Owner, it is automatically assigned to the enrolling account.

The main difference and key advantage of the Administrator role is the ability to manage other users:

  • Invite new accounts to the brand
  • Assign and remove protection roles
  • Change existing roles
  • Remove users from the brand completely

In practice this means that the Administrator can independently decide who gets access to brand protection tools.

It is strongly recommended to have at least two accounts with Administrator rights. This is an important safety measure in case the main account loses access (forgotten password, blocked account, employee leaving the company).


Registered Agent Role

The Registered Agent role is designed for third parties who are authorised to act on behalf of the brand owner when dealing with infringements.

Users with Registered Agent rights have access only to the Report a Violation tool. They cannot manage other users, change brand settings or access selling tools.

An important limitation exists: one account cannot simultaneously have Rights Owner and Registered Agent status for the same brand. This is a deliberate restriction by Amazon to separate the rights of the trademark owner from the rights of authorised representatives.


WisePPC: Advanced Analytics for Brands on Amazon

At WisePPC, we offer an Amazon Ads Verified Partner platform for PPC optimization and analytics, ideal for brands using Amazon Brand Registry to protect IP and manage listings. After assigning protection roles (e.g., Administrator, Rights Owner) for infringement handling or selling roles (e.g., Brand Representative) for A+ Content and promotions, our tools provide deeper insights.

We store extended historical data beyond Amazon’s limits, unify ad and sales metrics across Sponsored Products, Sponsored Brands, and more, and deliver real-time dashboards with bulk editing, trend analysis, and performance breakdowns (sales, ACOS, ROI, etc.). Teams get a single view to track trends efficiently – no manual reporting needed.

We don’t manage Brand Registry roles or settings; access is separate via WisePPC accounts. Our data reveals correlations around activities, not direct causation.

This version is about 40% shorter than the previous rewrite, remains factual/promotional, removes any ambiguity on role access, and flows naturally in the article’s context. No changes needed beyond this for accuracy.


How to Assign Protection Roles

Only users with Administrator rights can assign and manage protection roles.

The process is performed through the User Permissions section in the Brand Registry interface.

Here are the main steps:

  1. Log into your Brand Registry account
  2. Go to the gear icon (Settings) → User Permissions
  3. Click “Invite a user to your brand”
  4. Enter the email address associated with the target Brand Registry account
  5. Specify the contact name and preferred language
  6. Select the brand (if the account manages several brands)
  7. Choose the store/region
  8. Tick the required protection roles (Administrator, Rights Owner, Registered Agent)
  9. Send the invitation

The invited user receives an email with a link to accept the invitation. After acceptance the role becomes active.

If the user does not yet have a Brand Registry account, they must first create one. It is recommended to use the same email and password as for Seller Central if the person also works with selling functions.


Selling Roles in Amazon Brand Registry

Selling roles connect Amazon selling accounts (Seller Central) with the brand and unlock various opportunities for creating listings and promoting products.

Unlike protection roles, selling roles are assigned specifically to selling accounts (merchant tokens), not to Brand Registry accounts.

There are two main types of selling roles.


Brand Representative Role

The Brand Representative role is intended for internal sellers – those who are directly related to the brand (company employees, official distributors controlled by the brand).

When the brand owner uses the same account to register both Brand Registry and Seller Central, the Seller Central account automatically receives Brand Representative status after successful brand enrolment.

This role provides the fullest access to brand tools in Seller Central:

  • Creation and editing of product listings
  • Creation of A+ Content (enhanced product descriptions)
  • Building and managing Brand Stores
  • Access to Amazon Brand Analytics
  • Creation of promotions and coupons
  • Participation in other brand programmes (when eligible)

Because Brand Analytics and other tools provide access to sensitive commercial information, this role should be assigned with great care and only to trusted internal accounts.


Reseller Role

The Reseller role is created for authorised third-party sellers – distributors, wholesalers, retailers who have a legal right to sell the brand’s products but are not part of the brand’s internal team.

Reseller Access

This role provides more limited access compared to Brand Representative

  • Creation of new listings for the brand
  • Possibility to run some types of promotions
  • Creation of certain types of A+ Content (with restrictions)
  • Access to Sponsored Brands advertising (depending on the region)

Resellers do not get access

  • Amazon Brand Analytics
  • Full functionality of Brand Stores
  • Some advanced tools and reports

This limitation is deliberate – it protects the brand’s commercial data while allowing authorised partners to sell products on Amazon.


How to Assign Selling Roles

Assignment of selling roles is also performed by an Administrator through the Brand Registry interface, but in a separate section.

The main steps are:

  1. Log into Brand Registry
  2. Go to Manage → Manage selling accounts
  3. Click “Connect a selling account”
  4. Choose the type of role (Brand Representative or Reseller)
  5. Select your own account from the list or choose “Other account” and enter the merchant token
  6. Select the brand
  7. Confirm the connection

After this the seller receives an email invitation. Once the invitation is accepted, the selling role becomes active.

For Reseller roles, Amazon may additionally require proof of authorisation (distribution agreement, letter from the brand, invoice, etc.).


Administrators Can At Any Time:

  • View connected selling accounts
  • Disconnect previously added accounts
  • Review and process incoming requests from sellers


Key Differences Between Protection and Selling Roles

Protection roles and selling roles in Amazon Brand Registry serve entirely different purposes and work at different levels.

Protection roles apply to Brand Registry user accounts. They control access to tools for reporting and handling intellectual property violations – counterfeit products, listing hijacks, unauthorised brand usage. The core goal is trademark protection and brand integrity on the platform.

Selling roles connect specific Seller Central accounts to the brand. They unlock features for managing listings, creating enhanced content, running promotions and using advertising tools. The focus is on how the brand is presented and sold in the Amazon store.


Automatic Assignment of Roles

Upon successful brand enrolment, the Brand Registry account that submitted the application automatically receives Administrator and Rights Owner protection roles.

If the same credentials (email and password) are used for Seller Central, that selling account automatically gets the Brand Representative selling role. This linkage occurs only when the accounts are created with identical login details.


Access to Sensitive Commercial Data

Access to commercially sensitive information varies sharply between categories.

Brand Representative selling role provides complete access to Amazon Brand Analytics, search term reports, repeat purchase data and other metrics showing customer behaviour and competitor performance.

Reseller selling role excludes all such analytics. This restriction protects the brand’s private data while still permitting authorised third parties to create listings and sell products.


Intended Recipients for Each Role Category

Protection roles are assigned to people or entities directly responsible for brand security – internal employees dealing with IP issues or external agents (agencies, lawyers) authorised to submit violation reports.

Selling roles follow a different allocation logic. Brand Representative is reserved for accounts owned or tightly controlled by the brand itself or its internal team. Reseller is intended for legitimate external partners – distributors, wholesalers, retailers – who have formal agreements with the brand but do not need (and should not have) access to deep commercial insights.

These clear distinctions in scope, access level and target audience enable precise delegation of responsibilities while keeping sensitive information under strict control and minimising the chance of over-permissioning the wrong accounts.


Brand Registry Role Assignment Matrix: Strategic Access Management

Entity / User Type Recommended Roles Primary Purpose Risk Level
Business Owner Administrator + Rights Owner + Brand Representative Full strategic control, user management, and access to all commercial analytics. Critical
Internal Employee (Marketing/Sales) Rights Owner + Brand Representative Managing product listings, A+ Content, Brand Stores, and reporting violations. High
External Agency (IP Protection) Registered Agent Authorized to report intellectual property infringements without accessing sales data. Low
Wholesale Partner / Distributor Reseller Creating and linking listings to the brand while keeping sensitive analytics private. Minimal


Practical Recommendations for Working with Roles

When organising work with roles, several practical points should be considered.

First, clearly separate internal and external users. Internal employees should usually receive Administrator + Rights Owner + Brand Representative combination (if they also sell). External agencies that only deal with infringements should receive only Registered Agent.

Second, do not give Brand Representative rights to third-party sellers unless there is a very high level of trust and contractual obligations regarding data confidentiality.

Third, regularly review the list of connected accounts. Employees leave, agencies change, distributors stop working with the brand. Unused or outdated roles should be removed in a timely manner.

Fourth, create a clear internal policy regarding who can request which roles and under what conditions. This helps avoid chaotic assignment of rights and reduces security risks.


Conclusion

The system of roles in Amazon Brand Registry allows brand owners to flexibly organise both protection against infringements and work with product listings. Correct distribution of protection and selling roles helps maintain control over the brand, delegate routine tasks and at the same time minimise risks of data leakage or unauthorised actions.

The main principle is simple: each account should have only those rights that are objectively necessary to perform its tasks. Careful approach to assigning roles is one of the most important elements of professional brand management on Amazon.


FAQ

1. Can one account have multiple protection roles at the same time?

Yes, one account can have several protection roles simultaneously (for example, Administrator + Rights Owner). The only exception is the combination Rights Owner + Registered Agent for the same brand – it is prohibited.

2. Who can assign protection roles to other users?

Only users with the Administrator role can assign and change protection roles.

3. Is the Brand Representative role assigned automatically?

Yes, if the same account (same email and password) was used to create both Brand Registry and Seller Central, then after successful brand enrolment the Seller Central account automatically receives Brand Representative status.

4. Can a third-party seller get Brand Representative status?

Technically it is possible, but it is strongly not recommended. This role gives access to sensitive commercial data (Brand Analytics and others). For third-party sellers the Reseller role is intended.

5. How do I remove a user or selling account from my brand?

Administrators can do this in the corresponding sections: User Permissions (for protection roles) or Manage selling accounts (for selling roles). Select the account and remove the assigned roles or disconnect completely.

6. Can a brand have multiple Administrators?

Yes, there is no limit on the number of accounts with Administrator rights. It is even recommended to have at least two such accounts for safety reasons.

7. Does the Registered Agent role allow managing other users?

No. Registered Agent only gives access to the Report a Violation tool. This role does not provide rights to manage users or brand settings.

How to Sell Generic Products on Amazon – Simple Guide

A lot of people start selling on Amazon with unbranded products – normal everyday things that have no logo, no brand name, no label anywhere.

Examples: plain phone cases, silicone baking mats, fitness resistance bands, white t-shirts with nothing printed on them, basic kitchen spatulas, cheap phone chargers, etc.

These products are usually cheaper to buy, easier to start with, but also more competitive. Buyers mostly care about price, good photos, reviews, and fast shipping.

Amazon has special rules for these “generic” items – they’re quite different from normal branded products. If you don’t follow them, you’ll get errors, blocked listings, or even trouble with your account.

This guide explains everything in plain language: what’s allowed, how to create listings correctly, what mistakes to avoid, and whether it’s still worth doing.


What Counts as a “Generic” / Unbranded Product

A generic product on Amazon means there is absolutely zero branding anywhere on the item or its packaging. That includes no logo printed or stuck on the product itself, no brand name written on the box or bag, no label sewn inside clothing, and no tiny manufacturer mark hidden anywhere. Even one small “Made by…” sticker or logo disqualifies it – in that case the product is no longer considered generic, and you are not allowed to use the word “generic” in the brand field.

Typical examples that usually qualify as truly unbranded include:

  • Clear phone case with no writing, design or logo of any kind
  • Plain black resistance bands without any markings
  • White cotton t-shirt with no tag, print or label
  • Simple plastic kitchen spatula with nothing on it
  • Basic USB charging cable that carries no brand name at all

These kinds of items are mass-produced by hundreds of different factories, which is why they often look almost identical no matter who is selling them.


When Generic Products Make Sense (and When They Don’t)

Generic products can be a smart choice in certain situations, especially when the focus is on simplicity and price rather than brand identity.

They usually perform best in categories where the product itself is very straightforward. Buyers in these niches mainly care that the item works properly and costs little. Brand name plays almost no role in their decision – they are not looking for a story or reputation behind the product. At the same time, it should be possible to source large quantities at a very low price without any forced branding, logos or custom packaging. Another strong reason to go generic is when you want to test market demand quickly and with minimal upfront investment. You avoid spending money on trademark registration, logo design, branded boxes or any other elements that come with building a private label.


When Generic Selling Is Usually a Poor Fit

On the other hand, generic is often the wrong approach in many categories. Here are the main situations where it usually does not work well:

  • Most buyers in the category prefer well-known brands and are willing to pay extra for the trusted name
  • The product is connected to safety, health or legal liability (baby items, certain electronics, vitamins, supplements, car seats, helmets, etc.)
  • Your main long-term goal is repeat purchases and building customer loyalty
  • You plan to use advanced Amazon tools like A+ Content, enhanced brand protection, Sponsored Brands or other premium features


A Common Path Many Sellers Follow

Because of these realities, a large number of sellers treat generic products as a starting point rather than the final business model. They use unbranded items to learn how Amazon works, understand listing optimization, test demand, generate initial cash flow and gain experience with FBA or advertising. Once the process feels comfortable and some profit is coming in, many transition to creating their own branded products – adding logos, custom packaging, trademark registration and eventually enrolling in Brand Registry for more control, better margins and stronger long-term positioning.


The Most Important Amazon Rule for Generic Products

When you create a listing and write exactly generic (all lowercase, no quotes) in the Brand field, a special protection turns on.

What that means in real life:

  • Only you can edit that listing or add more stock to it
  • Nobody else is allowed to join your listing or change anything
  • If another seller wants to sell the exact same unbranded item, they have to make their own separate listing
  • Once you write “generic”, you can never change it later (even if you later make your own brand)
  • If you decide to add your own logo or brand name to the product, you must create a completely new listing

That’s why almost every seller ends up with their own separate generic listing – even when the products are identical. Buyers have to scroll through several similar listings and compare them.


Get More Out of Your Generic Product Sales with WisePPC

At WisePPC, we help Amazon sellers running generic products turn advertising into a real growth engine.

As an official Amazon Ads Verified Partner, we give you tools that go far beyond what Seller Central shows. You can track 30+ key metrics in real time, see hourly performance down to the individual target or placement, analyze years of historical data (not just the 60-90 days Amazon keeps), and make bulk changes to hundreds or thousands of campaigns and bids in a couple of clicks. Whether you’re scaling up winning generic listings or cutting losses on underperformers, features like gradient-highlighted tables, placement breakdowns, and on-the-spot bid editing help you spot opportunities and act on them fast. We’ve seen sellers move from barely breaking even to consistently profitable generic portfolios simply by using better data and quicker decisions.

If you’re serious about making generic selling work in 2026 and beyond, the difference often comes down to how well you manage and understand your PPC spend. That’s the part we help with every day.


How to Create a Proper Generic Listing: Step-by-Step

Creating a solid generic listing is literally the make-or-break moment when you’re selling unbranded stuff on Amazon. Unlike branded products where sellers can pile onto the same page, with generic you own the entire listing. Nobody can touch it, edit it, or add their offer. Full control in your hands – but that also means if you mess up even a small thing at the beginning, you’ll be fighting errors and rejections for days.

I’m walking you through every single step in plain English, like I’m sitting next to you explaining it over coffee. Follow this exactly and you’ll dodge 90% of the headaches new sellers hit.

Step 1: Log In and Kick Off a New Listing

Open your browser, head to Seller Central (sellercentral.amazon.com), and log in.

Double-check you’re in the right marketplace – amazon.com for US, amazon.co.uk for UK, etc. The layout changes a tiny bit depending on the country.

From the top menu, click Catalog, then Add Products.

You’ll see a few choices. Pick “I’m adding a product not sold on Amazon” (or something like “Create a new product listing”).

This opens a blank form where you build everything yourself from zero.

Important: Never search for an existing product or try to add to someone else’s ASIN. For generic items that’s a fast track to errors 5885, 5886, or 5887.


Step 2: Type the Brand Name the Right Way (This Is Critical)

Scroll down to the Vital Info or Offer tab and find the Brand field – it’s required.

Type exactly this: “generic”

All lowercase. No capital G. No spaces. No quotes. No “Generic Brand” or “Unbranded” or anything extra.

Amazon is picky about this – if you capitalize it or add anything, the special generic protection doesn’t kick in, and you lose the exclusivity.

Check it three times before moving on. Once saved, you can’t change it later without starting a whole new listing.


Step 3: Pick the Perfect Category

In the same form, select the Product Category and Subcategory.

Use the search bar or browse the tree carefully – pick the most specific match.


Step 4: Write a Title That Actually Gets Found

Title limit is 200 characters, but aim for 80-150 so it doesn’t get cut off on phones.

  • Write it naturally: start with the biggest search words, then add the key details.
  • Good formula: [Product Type] [Main Feature] [Material] [Size/Count] [Big Benefit]


Step 5: Upload Killer Photos That Prove It’s Unbranded

You need at least 6-9 images (Amazon requires one main + five more, but more helps).

The main photo must be clean: pure white background, product centered and filling the frame, nothing else-no text, props, hands, or people.

Other photos must show zero branding: front, back, sides, top, bottom, and packaging from all angles. Zoom in on edges, seams, corners, and any spots where a label could hide.

Add 1-2 lifestyle shots if possible (e.g., baking mat in use with cookies, phone case on a real phone) to help sell and build trust without a brand name.

Use bright, even lighting with no shadows, sharp focus, and at least 1000×1000 pixels resolution. Format: JPEG or PNG.

Extra close-ups of potential label areas prevent rejections-reviewers need to see clearly it’s unbranded. Upload, double-check, and proceed. Good photos are crucial for generic listings.


Step 6: Nail the Five Bullet Points

You get exactly five bullets – don’t leave any empty.

Each one should be 1-2 short sentences packed with real facts and benefits.


  1. Biggest selling point / main benefit 
  2. Material and quality
  3. Exact sizes and specs
  4. Compatibility or how to use
  5. Care and extras


Step 7: Write a Solid Product Description

This is the big text box under the bullets.

Use it to expand on everything and answer questions before buyers ask.

Simple structure:

  • Start with a short overview (2-3 sentences).
  • Break into paragraphs: features, how to use, materials, care tips.
  • Finish with what’s included and any compatibility notes. Example snippet: “This reusable silicone baking mat is made for everyday baking. It gives you a non-stick surface so you skip parchment paper and oil. Heat-safe up to 480°F, works in ovens, air fryers, microwaves. Dishwasher-safe and rolls up easy for storage.” Keep it simple, factual, short paragraphs. No hype or salesy language – just help the buyer decide.


Step 8: Stuff the Backend Search Terms

This is the hidden “Search Terms” or keywords field – super important for generic listings.

Add 200-250 bytes worth (about 200-250 words).


GTIN / Barcode Exemption – Almost Always Needed

Almost no unbranded products come with official UPC or EAN barcodes, so sellers usually need a GTIN exemption to create listings without a product ID.

The good news is that for truly generic and fully unbranded items in 2026, Amazon has made the process much smoother with automatic approval in most cases.

During listing creation in Seller Central, do the following:

  • Select the option “This product does not have a brand name” – this automatically sets the brand field to “generic”
  • Check the box for “I don’t have a product ID”

If your product qualifies as genuinely unbranded (no logos, labels, or barcodes anywhere), you’ll get auto-approval for the GTIN exemption right away – no need to upload photos or wait days for manual review.

After seeing the auto-approval message, wait about 30 minutes before finalizing and submitting the complete listing. This short delay gives Amazon’s systems time to fully sync the exemption and prevents temporary product ID errors that can pop up if you rush ahead.

The exemption applies only to that specific product category. If you later want to sell generic items in a different category, repeat the same quick steps – it should auto-approve again for truly unbranded products.


How to Make Your Generic Listing Actually Sell

Because there’s no brand name, your photos, title and description do almost all the selling.

The most important things:


Photos

Use bright, clean pictures on white background. Show the item from every side. Add 1-2 photos of the product being used. Make sure every picture proves there is no logo or brand name anywhere.


Title

Write normal sentences that contain the words people type into search. Example:

“Silicone Baking Mat Set of 2 – Non-Stick, Heat Resistant, Easy to Clean”

Don’t stuff 20 keywords – it looks bad and Amazon doesn’t like it.


Bullet Points

Use all five to explain different things: main benefit, material, exact size, what it fits, how to take care of it.


Price

Set a fair price – cheap enough to compete, but leave room for FBA fees, ads, and some returns. Too low usually means more complaints and bad reviews.


FBA or Dropshipping – Which Is Better for Generic Products?

Both ways are used, but they feel very different.


FBA (Fulfillment by Amazon)

You buy products, send them to Amazon’s warehouse, and Amazon does all the packing, shipping, returns, and customer messages.

Pros:

  • Prime badge – people trust it more and buy faster
  • Much better chance to appear high in search
  • Amazon handles almost all customer problems

Cons:

  • You need money upfront to buy stock
  • If things sell slowly, storage fees add up
  • Bad quality = lots of returns = pain


Dropshipping

You list the product but don’t keep stock. When someone buys, you order from your supplier and they ship directly to the customer.

Pros:

  • Almost no money needed to start
  • Can test many products quickly
  • No warehouse, no packing

Cons:

  • Shipping usually takes 2-4 weeks (customers hate waiting)
  • You have very little control over quality and packaging
  • Many accounts get suspended because of late delivery or bad reviews

Amazon allows dropshipping, but they hold you responsible for fast delivery and good experience. Most generic dropshipping accounts struggle because of slow shipping from China.


What to Realistically Expect in 2026

You can definitely make money selling generic products, but the profit margins are usually quite small. Competition is tough because many sellers offer almost the same item. To get any real visibility, you will most likely need to run Sponsored Products ads. Without your own brand, it’s difficult to build a group of loyal customers or raise your prices over time.

Most experienced sellers follow a similar path. They start with generic products to learn how everything works on Amazon and to earn their first profits. Once they have some cash flow and experience, they use that money to move into creating their own branded products. Branded items generally give better margins and open up more advanced tools on the platform.


Conclusion

Selling unbranded (generic) products remains one of the simplest ways to get started on Amazon.

All you really need is truly unbranded items, the exact word “generic” written correctly in the brand field, a GTIN exemption for the category, high-quality photos that clearly show the lack of branding, a clear and detailed description, and realistic pricing that leaves room for fees and competition.

This approach works especially well for basic, everyday items and is a practical way to test demand in the market without much risk. However, the profits are usually narrow, competition is intense, and there is almost no brand loyalty to fall back on. Because of that, generic selling is rarely a strong long-term plan for serious growth. Most sellers who succeed in the long run treat it as an entry point – a first step that helps them learn the platform, generate initial cash flow, and eventually move into private label products with better margins and more control.


FAQ

1. Can I Change a Generic Listing to My Own Brand Later?

No. Once it’s “generic” you can’t change it. You have to make a whole new listing.

2. Do I Need GTIN Exemption for Every Generic Product?

Usually yes. Almost all unbranded items have no barcode, so you need an exemption for each category.

3. Can Several Sellers Share One Generic Listing?

No. Everyone must create their own separate listing.

4. Is Dropshipping Generic Items Allowed?

Yes, but Amazon expects fast delivery and good customer experience. Slow shipping or bad quality often leads to account suspension.

5. What Should I Do If I Get Error 5885, 5886 or 5887?

In most cases you can’t fix it – just create a new listing from scratch.

6. Do Generic FBA Products Get the Prime Badge?

Yes – if you use FBA, your generic items become Prime-eligible and that helps a lot.

7. Is Selling Generic Products Still Worth It in 2026?

Yes, in niches with decent margins and not crazy competition. But it’s more of a starter method – long-term most sellers move to their own brand for better profits and control.

Powerful Ecommerce Marketing Ideas for Amazon Sellers

Amazon remains one of the most competitive ecommerce environments. Success depends heavily on how well sellers understand and apply marketing techniques that are either built into the platform or work effectively alongside it. The goal is rarely to invent completely new approaches; instead, the strongest results usually come from executing proven tactics with precision and consistency.

This article covers realistic marketing ideas that Amazon sellers use to increase visibility, improve conversion rates, and generate repeat purchases. All strategies discussed are based on standard platform functionality and common seller practices.


Understanding How Marketing Works on Amazon

Amazon is very different from having your own online store (like on Shopify or WooCommerce). Almost all the traffic comes from inside Amazon itself – people searching in the Amazon search bar, browsing categories, or seeing products that Amazon recommends (“customers also bought”, “frequently bought together”, personalized suggestions). Very little traffic comes from Google, Instagram, or links from outside.

That one big difference changes everything about how you should do marketing here.

You don’t have full control over how your shop looks or how the customer moves through the buying process – Amazon decides what shows up where, in what order, and who sees it. Your main places to fight for attention are:

  • How good your product looks in search results and inside categories
  • How much Amazon recommends your product to people (in those “also bought”, “similar items”, personalized rows)
  • How you keep in touch with customers after they already bought from you

When you get these three things working together well, good things happen:

  • Your product starts ranking higher in search without spending crazy money on ads
  • The ads you do run become cheaper and bring better results
  • Customers come back and buy from you more often (higher lifetime value)

That’s basically the whole game on Amazon in plain words.


Core Tactics Every Amazon Seller Should Master First

The foundation of any profitable Amazon business lies in getting the basics right – especially how your products appear and perform in Amazon’s ecosystem. Here are the essential steps that create a strong starting point:

  • Craft concise, search-friendly titles focused on buyer intent
  • Lead with benefit-driven bullet points in the top positions
  • Include at least 7–9 professional images (main + lifestyle + infographics)
  • Activate brand registry and use A+ Content when available
  • Track external sources properly with Amazon Attribution
  • Establish a consistent, policy-compliant review request routine

These core elements are non-negotiable. Skip or half-do them, and even well-funded advertising campaigns or viral promotions tend to underperform. Prioritize listings that quickly build confidence and reduce buyer hesitation.


WisePPC: Work Smarter with Third-Party Amazon Ads Tools

At WisePPC we see the same frustrations every day from Amazon sellers we work with: the native Amazon Ads console only keeps 60–90 days of history, making bulk changes extremely slow once you’re running many campaigns, and trying to spot meaningful long-term trends usually ends up feeling like guesswork.

We’re an official Amazon Ads Verified Partner, so we use direct integrations and follow all the rules – but we give you much deeper visibility. Our platform keeps years of historical data (even on the basic plan), so you can compare this year’s Prime Day or Black Friday to the same period one or two years ago and actually see how seasonality or bid changes played out over time.

We built the features we use ourselves every day: fast filters to quickly find the campaigns, keywords or targets that matter, bulk edits for bids, budgets or statuses in seconds, inline editing right in the tables, color highlights that instantly show what’s dramatically over- or under-performing, and charts that let you overlay several key metrics on one timeline with day/week/month/year views.

This doesn’t replace solid listings, smart pricing or knowing your product. It just removes hours of repetitive manual work and gives you clearer, longer-term context – so the decisions you already want to make can happen much faster and with more confidence.


Idea #1: Make Your Product Page Actually Sell

Your product page on Amazon is basically the most important thing you have. Even if your listing ranks well in search, a crappy page means people just keep scrolling.


Title

Amazon gives you 200 characters, but the first 80–100 are what really matter (especially on mobile). Most experienced sellers put in there:

  • The main search phrase people actually type
  • Brand name (if it means anything to anyone)
  • The biggest benefit or what makes your product different
  • Size, color, pack quantity if it matters

If you stuff the same keyword 6 times, the title looks awful and Amazon can even hide it sometimes.


Bullet Points

You get 5. The first 2–3 show up right away on both desktop and phone – make them count. Start each one with a real benefit, not just a feature list.

The last couple can be technical stuff – materials, specs, how to use – but keep them short and useful.


Description & A+ Content

The regular description box lets you use basic formatting. People use it to explain benefits in more detail, answer common questions and slip in a few extra keywords naturally.

If your brand is registered, turn on A+ Content – that’s when you can add nice layouts, comparison tables, lifestyle photos, step-by-step pictures. Good A+ really lifts conversion. The best modules usually are:

  • Before/after shots
  • Size or compatibility charts
  • Step-by-step how-to graphics
  • Nain benefits with little icons

Don’t make A+ another sales pitch. People scan fast – clear layout and visuals beat long text every time.


Photos & Video

Amazon wants at least 6 photos, but serious listings have 7–9. The first one must be pure white background. The rest should show different angles, scale (hand holding it), call-outs on features, real-life use.

Video (30 seconds to 2 minutes) shows up very prominently. Videos that actually demonstrate use, unboxing or zoom in on details keep people watching longer and help them buy more often.


Idea #2: Get Amazon Ads Working Without Burning Money

Ads are the fastest way to get seen and start selling. Amazon has a few different types – each does something slightly different.


Sponsored Products

This is the main one. Shows up in search results and on other product pages. Most people start with automatic campaigns to see which search terms actually work. Then they move the good ones into manual campaigns, add negative keywords and control bids better.

You can choose dynamic bids (Amazon adjusts them up or down) or fixed bids you set yourself.


Sponsored Brands

These appear at the top of search with your logo, custom headline and several products. They work best when your brand is already somewhat known or when you want to push a whole line instead of just one item.


Sponsored Display

These show up all over – product pages, cart, search results, even outside Amazon sometimes. One of the strongest uses is retargeting people who already looked at your stuff or bought from you before.


Amazon Attribution

If you send traffic from outside (Instagram, email, influencers), you can add special tracking links. Then you’ll see exactly how many sales came from those channels inside Amazon.


Idea #3: Collect Reviews the Right Way

Reviews make a huge difference – they affect your search ranking and whether people decide to buy. Amazon is super strict about how you can ask for them (they don’t want any manipulation or pressure), but there are still safe, allowed ways to get more.

The safest and most reliable method is the “Request a Review” button in Seller Central. It sends an automated, neutral message from Amazon asking the buyer to leave a review (and seller feedback). You can use it once per order, usually 5–30 days after delivery – that’s the official window. Many sellers aim for 7–10 days, when the person has had time to use the product but it’s still fresh in their mind.

If you have a registered brand and some budget, Amazon Vine is another option. It lets vetted, trusted reviewers (“Vine Voices”) get your product for free in exchange for an honest review. It costs a fee (based on how many units you enroll), but those reviews show up labeled as “Vine Customer Review of Free Product” and often carry more weight with buyers.

Always make sure the star rating and the best reviews are visible right on the page – it helps hesitant shoppers feel confident and hit “Buy Now”. Listings that hold steady above 4.3 stars almost always convert better than ones stuck at 4.0 or lower.


Idea #4: Get People to Buy From You Again

Amazon actually makes repeat purchases pretty easy if you use the built-in tools.


Subscribe & Save

Perfect for things people buy regularly – pet food, diapers, coffee pods, vitamins. You offer a small discount for subscription, they set up auto-delivery, you get steady orders and better inventory planning.


Amazon Stores

Registered brands can create their own branded page right on Amazon. You can tell your story, show the full product range, run seasonal collections – it feels more like a real website inside Amazon.


Your Own Email & SMS List

Amazon doesn’t give you buyer emails, but you can collect your own list with freebies, guides, discounts for signing up. Later you can tell them about new products or bring back people who haven’t bought in a while.


Idea #5: Run Promotions to Get Momentum and Better Ranking

Amazon has several promo tools that can create quick sales spikes and help with long-term ranking.

Lightning Deals and Best Deals give short, deep discounts and create urgency – good for big volume in a few hours, but you need to watch margins carefully because discounts are serious.

Percentage-off coupons show as a badge on the listing and in search – they attract people looking for deals and help new listings get early traction.

The biggest visibility usually comes during Prime Day, Black Friday or other huge Amazon events – but getting a spot is very competitive.


Idea #6: Bring Traffic From Outside to Help Amazon Growth

Most sales happen inside Amazon, but outside traffic can seriously speed things up.

Make helpful content – blog posts, YouTube videos, TikTok demos showing how to use the product. These often rank for long-tail searches. Add tracked Amazon links (via Attribution) and you can see exactly how many sales came from them.

Micro-influencers with an audience that matches your product usually work better than big celebrities. Their posts feel more real and get higher engagement.

Instagram and TikTok shopping features let you link directly to your Amazon page – conversion is normally lower than organic Amazon traffic, but it’s still extra people seeing your product.


Advanced Amazon Marketing Strategies

To grow beyond the basics and compete more effectively, most online sellers add layers of marketing that reach customers at different stages of their journey. Here are three powerful approaches that work well together:


Social Media Marketing

  • Share user-generated content (photos and videos from real customers) to build trust and social proof
  • Create shoppable posts on Instagram, TikTok or Pinterest so people can buy directly from the feed
  • Engage actively – reply to comments, run polls, answer questions to keep the audience connected
  • Run targeted paid ads on social platforms to reach lookalike audiences or people who already showed interest


Email Marketing

  • Segment your list (by purchase history, location, interests) so messages feel personal and relevant
  • Send automated abandoned cart emails with a gentle reminder and small incentive to complete the purchase
  • Build loyalty programs – reward repeat buyers with points, exclusive discounts or early access to new products
  • Send personalized recommendations based on what people viewed or bought before 


Content Marketing

  • Optimize product pages and category descriptions with keywords people actually search for
  • Write blog posts, buying guides or how-to articles that solve real customer problems and rank in Google
  • Include internal links to product pages so readers move naturally toward buying
  • Focus on technical basics: fast loading speed, mobile-friendly design and clean site structure to help search engines understand your store better

These advanced Amazon strategies work together to strengthen organic visibility, make advertising more efficient and turn one-time buyers into repeat customers. The most important part is testing small changes often and scaling what the data proves works for your products and category.


Conclusion

Marketing on Amazon combines platform-specific optimization with general ecommerce principles. The most successful sellers treat listings as living assets that require continuous testing and refinement. Small improvements in title structure, image quality, pricing strategy, advertising efficiency, and post-purchase follow-up compound over time.

No single tactic guarantees success. Results come from layering multiple approaches: strong organic listings, disciplined PPC management, steady review accumulation, repeat-purchase incentives, and selective use of external traffic sources.

Sellers who track performance weekly, adjust based on real data, and maintain consistent execution usually see the most sustainable progress.


FAQ

How long does it take to see results from optimizing my Amazon listing?

It depends on your category and competition, but most sellers start seeing better organic rank and higher conversion within 2–6 weeks if they fix titles, bullets, images and A+ content properly. The first big jump usually comes after 50–100 new sales at the improved listing, because Amazon’s algorithm loves fresh velocity and good conversion data.

Should I start with automatic or manual Sponsored Products campaigns?

Start with automatic. It lets Amazon find which search terms actually bring sales without you guessing. Run auto for 1–2 weeks, then pull the best search terms into manual campaigns where you can control bids and add negatives. That way you avoid wasting money on bad keywords early on.

Do I really need A+ Content if I’m just starting out?

If you can register your brand (it’s free and quick), yes – turn on A+ Content as soon as possible. Even basic modules (good photos, simple comparison tables, benefit icons) usually lift conversion by 5–20%. It’s one of the highest ROI things you can do without spending extra money on ads.

How many reviews do I need before my listing starts converting well?

There’s no magic number, but the sweet spot most sellers aim for is 15–30 reviews with an average above 4.3 stars. Once you pass 10–15 honest reviews, hesitant buyers trust the listing much more and conversion usually jumps noticeably. After that, keep collecting steadily to protect your rank.

Is it worth running Lightning Deals or coupons when my product is new?

Yes, but only if your margins allow it. Lightning Deals and coupons create fast sales velocity, which helps Amazon push your listing higher in organic search. For new products, a small coupon (10–20%) or a short Best Deal often gives the strongest early boost. Just make sure you can handle the extra orders without stockouts or bad feedback.

Can outside traffic (from TikTok, YouTube, email) really help my Amazon ranking?

Yes – indirectly but powerfully. Every sale that comes from outside (tracked with Amazon Attribution) counts as real velocity and good conversion, which Amazon rewards with better organic rank. It’s slower than PPC, but it compounds over time and makes your listing look stronger to the algorithm.

How often should I check and change my Amazon ads?

At least once a week when you’re growing. Look at ACOS, ROAS, top search terms, and placement reports. Pause losers, lower bids on expensive keywords, move winners to manual campaigns, add new negatives. Small weekly tweaks prevent budget bleed and keep performance climbing.

What’s the biggest mistake new Amazon sellers make with marketing?

They try to do everything at once – chase 100 keywords, run 10 types of ads, post on every social platform. Pick 1–2 things (usually listing optimization + automatic PPC + review requests) and get really good at them first. Master the basics before adding more layers – that’s how most sellers go from losing money to profitable.


Complete Guide: How to Sell Video Games Online in 2026

Selling video games online in 2026 remains a straightforward way to clear out collections or build a side income. The core steps stay the same: evaluate your inventory, pick platforms, set prices based on real data, create solid listings, pack securely, ship reliably, and maintain a good seller profile. These apply whether you’re moving a handful of retro cartridges or handling newer titles regularly.


Getting Started: Preparation Basics

Before you list or sell anything, take time to organize your collection properly. This makes everything easier and helps you get better prices. Sort your games into clear groups:

  • Old (retro) games and consoles
  • Newer (current) games
  • Special or limited editions
  • Accessories (controllers, headsets, cables, etc.)

Condition matters a lot. Games with the full original box, manual, inserts, and no big damage sell for much more. Dirty discs, deep scratches, missing parts, or broken items bring lower prices.

Clean everything before taking photos. Wipe dust from consoles with a soft cloth, clean discs from the center outward with a microfiber cloth, gently clean cartridge contacts if needed, remove stickers carefully, and dust boxes and manuals. Clean games look much better in photos and sell faster, even if the condition is the same underneath.


Make a Simple Inventory List

Write down everything to stay organized and avoid mistakes:

  • Game title and platform
  • Condition (very good / good / fair / poor)
  • What’s included (box, manual, inserts, etc.)
  • Any problems (scratches, missing parts, untested)
  • Rough price from recent sold listings

This list becomes your quick reference for pricing, listing, and tracking what you’ve sold.


Where to Sell in 2026

Different sites reach different buyers.

Big general marketplaces like Amazon have millions of people and work for almost any game: used, new, consoles, or some rare ones. Amazon has a games section, lets you sell new or used, and buyers trust it. Fulfillment by Amazon (FBA) means Amazon stores, packs, and ships for you – good for bigger sales, but check the fees and rules first.

Gaming-only sites bring in real fans who care about condition and completeness. They usually do better for retro and collectible games.

Local apps let you sell to people nearby – no shipping, cash or transfer right away. Great for heavy consoles or big bundles.

Special retro sites are for collectors. Buyers there pay more for rare games, original boxes, and perfect condition.

Many sellers list the same game on 2–3 sites at once (Amazon + retro site + local app). When it sells, remove it from the others fast. This gives more chances and shows which place works best for your games. Start with 1–2 sites that fit your stuff, then add more.


WisePPC: Scale And Sell Video Games Smarter

We created WisePPC because we saw how hard it is to grow a serious video game business on Amazon using only the built-in Seller Central reports. Amazon gives you basic numbers, but the real picture – trends over years, which placements actually convert, why certain keywords suddenly stop working – stays hidden or disappears after 60-90 days. That’s why we built a tool that keeps every important metric for as long as you need it.

With WisePPC you can track 30+ key indicators, compare performance across years, spot seasonal spikes in retro or new-release games, bulk-edit thousands of bids and budgets in seconds, and see exactly which ad placements and keywords bring real sales instead of just clicks. Whether you’re flipping a few dozen cartridges a month or running a full-time storefront with hundreds of SKUs, the extra visibility usually pays for itself pretty quickly – especially when you stop wasting budget on underperforming targets.


Best Steps and Ideas for Selling

These are the key actions that actually help move your games and bring in money. Do them consistently – the results add up quickly.


Step 1: Build a Strong Seller Profile

Buyers almost always choose sellers they feel safe buying from. A strong profile with high ratings and lots of positive feedback does three big things: your listings climb higher in search results, more people click on them, and serious buyers (especially those looking for expensive or rare games) trust you enough to pay good money. On most platforms your seller score is public – low ratings or few sales make buyers hesitate or pick someone else.

Why Reputation Matters More Than You Think

On large marketplaces like Amazon or eBay the algorithm favors sellers with strong history. High feedback percentage (ideally 98–100%) and hundreds of successful transactions make your items appear earlier in search, even if your price is a bit higher. Collectors and people buying $100+ retro games often sort by “highest rated sellers only”. A weak profile means your game sits unseen, while a good one sells faster and sometimes at a premium.


Step 2: Find More Stock to Sell

After you clear your own collection, keep the flow going by sourcing new inventory cheaply. Look for undervalued games and consoles you can flip for profit. Check thrift stores, garage sales, flea markets, local Facebook groups, or Craigslist-style sites for bulk deals. Online: watch eBay “Buy It Now” listings with low prices, clearance sections, liquidation sales. Talk to other collectors – they often sell duplicates or unwanted items. Buy only what sells well in your niche or on your platforms.


Step 3: Stay On Top of Market Trends

The gaming market shifts fast – prices can double or halve in weeks. Knowing trends lets you buy cheap, price accurately, time listings for high demand, and avoid holding items that lose value.

What Moves Prices

New releases, remakes, or anniversaries lift prices of older games in the same series. Holidays (Christmas, Black Friday) boost demand for gifts and nostalgia pieces. Retro platforms or genres spike when collectors hype them. New console launches can temporarily lower prices on older systems as people upgrade.

Where To Check

Reddit: r/gamecollecting and r/retrogaming for early hype and price talk. YouTube flip/review channels for rising trends. PriceCharting for sales-based trend graphs and hot lists. X searches with #retrogaming, #gamecollecting, or game name + “price” for real-time chatter. News sites like IGN, Kotaku, Nintendo Life for remake/port announcements.

How To Apply It

Spend 20–30 minutes monthly: scan Reddit/X for hot topics, check PriceCharting trends, read one news roundup, note 3–5 games to watch or list soon. When a trend hits (big anniversary or holiday), price related stock higher or hold if you expect more rise. Sell older items before a new console softens prices.


Step 4: Optimize Your Listings Over Time

Early listings are tests. Improvement comes from reviewing sales and tweaking.

Practical checklist for improving listings after each sale:

  • What to check after every sale: which photos got most views/clicks, which keywords/titles brought buyers, how fast it sold vs similar items, feedback on photos/description/shipping, dashboard stats (views, click-through, conversion).
  • Small changes to test: add “CIB” or “with manual” to title start, add 2–3 extra photo angles/label close-ups, bundle items, improve shipping note (“bubble wrap + tracking”), slightly adjust price.
  • What to keep or drop:more photos mean faster sales, keep them; positive feedback on detailed descriptions, continue; no views from blurry photos or weak titles, fix immediately.
  • Results timeline: after 10–20 sales patterns appear; after 50+ listings become optimized (quicker sales, fewer questions, less effort).
  • Tracking tip: after sale note briefly: “Sold in 4 days, 12 photos best, ‘CIB’ in title helped clicks”. Build your own playbook over time.


Extra Tips for Old (Retro) Games

Old games need special attention.

Check that the game is real, especially rare or expensive ones. Fake copies exist.

Test every retro game and console to make sure it works. Write clearly if anything is broken or does not work perfectly.

Original boxes, manuals, and inserts make a big difference in price. Games sold as “complete in box” usually get much more money.

Serious collectors sometimes pay extra for professionally graded games (sealed and scored by a grading company).

  • Check if rare games are real
  • Test and write about how well it works
  • Include original box and manual when possible
  • Know that collectors pay more for perfect items


Conclusion

Selling video games online includes these main steps: organize and clean your games, choose good places to sell, set fair prices based on real sales, create clear listings with good photos, pack everything safely, ship with tracking, and treat buyers well. Old retro games need extra care with authenticity and condition checks. Every sale teaches you something new. If you keep doing these steps carefully, you can sell both small collections and larger amounts successfully.


FAQ

1. Which platform is best for selling rare retro games?

Specialized retro marketplaces and auction-style general platforms usually produce the highest prices for authentic, well-preserved rare titles.

2. Should original boxes and manuals always be included in listings?

Including original packaging and manuals significantly increases value. Listings without them should clearly state what is missing.

3. How important is cleaning games before selling?

Clean items photograph better and appear more professional. Thorough cleaning often leads to higher buyer confidence and better offers.

4. Is it necessary to provide tracking on every shipment?

Tracking is strongly recommended on all shipments. It protects both seller and buyer and reduces disputes.

5. Can the same game be listed on multiple platforms at once?

Yes. Many sellers list items on several platforms simultaneously and remove listings from other sites after a sale.

6. How should damaged or incomplete items be described?

Condition must be described accurately and in detail. All flaws, missing parts, and damage should be clearly stated to avoid returns and negative feedback.

7. Does season affect video game prices?

Yes. Demand and prices for certain titles often increase around holidays, major game releases, anniversaries, and special gaming events.

Mastering Amazon Automate Pricing Rules: A Practical Guide

Amazon Automate Pricing serves as a built-in tool in Seller Central for Professional sellers. It handles automatic price adjustments for listed products based on defined rules. The system responds to changes in the marketplace, such as shifts in the Featured Offer price or other reference points. This approach reduces the need for constant manual updates across a catalog.

The core function revolves around pricing rules. These rules dictate the conditions under which prices change. Sellers define parameters, apply rules to specific SKUs, and set boundaries to control outcomes. Without rules assigned to products, no adjustments occur.

The tool operates in near real-time for most triggers. It applies only to designated SKUs rather than the full inventory automatically. Sellers retain control through minimum prices, which remain required, and optional maximum prices.


What Automate Pricing Rules Actually Do

Pricing rules define the logic that controls when and how your product prices change automatically. The system watches for specific events (such as updates to the Featured Offer price or the lowest offer price) and adjusts your price according to the parameters you set – but only if the result stays within your defined limits.

Each rule controls these main elements:

  • Comparison point: the price the rule monitors (Featured Offer price, Lowest price, Lowest external price on Amazon, or External reference price)
  • Price action: what to do relative to that price (Match exactly, Beat by a set amount/percentage, or Stay above)
  • Adjustment size: the exact difference to apply (fixed amount like $0.10 or percentage, usually with minimum 1% / $0.10 and maximum up to 90%)
  • Minimum price: mandatory floor that prevents prices from going unprofitably low
  • Maximum price: optional ceiling to limit how high the price can go
  • Built-in safeguards: even without a maximum, the system avoids extreme jumps far above recent historical prices to protect Featured Offer eligibility and customer perception

This structure lets sellers automate repricing with clear boundaries while still responding to real-time market changes.


Main Types of Pricing Rules

Amazon Automate Pricing offers several categories of rules, each designed for different pricing goals and market conditions.

Here are the main types:

  • Competitive Rules: the largest group, adjust price based on direct comparison with other live offers in the marketplace
  • Competitive Featured Offer Rules: track current Featured Offer (Buy Box) price and let you match exactly, go below by amount/percentage, or stay slightly higher
  • Competitive Lowest Price Rules: compare against the lowest offer for the ASIN (often filtered by FBA/FBM); match, beat, or stay just above the lowest price
  • Competitive External Price Rules: factor in prices of the same/similar products on other websites to stay competitive outside Amazon
  • Sales-Based Rules: ignore competitors and lower price automatically if sales fall below a set number of units in a chosen time period
  • Business-Oriented Rules: for Amazon Business sellers; auto-update business prices based on consumer price changes and manage quantity discounts/tiered pricing
  • Predefined Rules: ready-made Amazon templates with recommended defaults for quick setup (basic Featured Offer match, lowest-price competition, global selling, etc.)
  • Custom Rules: maximum flexibility; select type from dropdown then manually set comparison point, action, adjustment size, filters, min/max prices

Choose the type that best fits your current priorities and product behavior.


Why Use Amazon Automate Pricing?

Amazon Automate Pricing solves several everyday problems that come with manual price management. It runs continuously and reacts to market changes without requiring constant attention from the seller.


Saves Time on Routine Tasks

The tool adjusts prices automatically around the clock according to the rules you define. Sellers no longer need to check competitor prices multiple times a day or update hundreds of listings manually.


Maintains Competitiveness Automatically

It responds to shifts in the Featured Offer or lowest price in near real-time. This helps keep your offers visible and relevant even when you are focused on other parts of the business.


Improves Chances of Winning the Featured Offer

Specific competitive rules can be tuned to position your price exactly where it needs to be to increase Buy Box eligibility. Targeted adjustments often lead to more consistent visibility and higher sales potential.


Protects Profit Margins Effectively

Every rule requires a minimum price setting, which acts as a hard floor. An optional maximum price adds extra control, preventing prices from dropping too low or rising unexpectedly during volatile periods.


Reduces Risk of Lost Sales from Missed Changes

Manual monitoring can miss sudden competitor price drops, leading to days of lower rankings and fewer orders. Automation catches these shifts quickly and applies your predefined response.


Supports Different Strategies Across Products

You can run varied rules at the same time. Some products might use aggressive competitive settings while others focus on margin protection or sales velocity adjustments.


Handles Large Catalogs Efficiently

Rules apply to individual SKUs or entire groups through bulk assignment. This makes the tool practical for sellers managing thousands of products without overwhelming manual work.


Helps Preserve Customer Trust

Built-in safeguards stop extreme upward price jumps even without a maximum limit set. Prices stay reasonable compared to recent history, avoiding complaints about sudden increases.


WisePPC: Empowering Smarter Pricing Decisions on Amazon

At WisePPC, we provide an advanced analytics and PPC optimization platform tailored for Amazon sellers (with support for Shopify and multi-channel operations). Our real-time dashboards, years of historical data storage, and unified views of advertising, sales, organic performance, and conversions give you the clarity needed to make informed choices.

We excel in supporting pricing strategy through robust Average Selling Price (ASP) tracking: we automatically calculate ASP from all sales data, allowing analysis as a total value or with moving averages (3, 7, 14, or 30 days) to uncover trends, profitability shifts, and differences between advertised and purchased product prices. By clearly separating ad-driven revenue from organic reach, we help you evaluate how price adjustments truly impact performance – such as driving more organic sales alongside strong ad clicks or failing to lift conversions – ensuring you avoid wasting budget on underperforming items.

Our tools deliver actionable insights for manual pricing decisions aligned with ad efficiency, margins, and long-term trends. While we do not yet offer automated pricing rules or live dynamic repricing, our planned “Dynamic Repricing Based on Market Trends” feature will automatically adjust pricing strategies based on competitor activity once released.

In beta, we focus on delivering precise, data-backed visibility today to help you optimize pricing smarter – join us for free access, lifetime perks, and a chance to shape upcoming features.


Setting Up a Custom Pricing Rule Step by Step

Setting up a custom pricing rule in Amazon Automate Pricing is straightforward once you are in Seller Central. The process lets you define exactly how your prices should adjust automatically. Follow these steps carefully to get it right the first time.


Step 1: Get into Automate Pricing

Log in to Seller Central and navigate to Pricing in the main menu, then select Automate Pricing.

If this is your first time, you will see a Get Started button. Click it to begin.

If you have used the tool before, look for the Create a new pricing rule option on the main Automate Pricing page and click that.


Step 2: Pick the Rule Type

A dropdown menu appears right away. Choose the type of rule that fits your goal.

The main options include:

  • Competitive Featured Offer
  • Competitive Lowest Price
  • Competitive External Price
  • Based on sales units
  • Business Competitive Featured Offer
  • Business Price and Quantity Discounts

Competitive types respond to other sellers’ prices. Sales-based ones react to your own sales speed. Business types handle B2B-specific pricing.


Step 3: Give the Rule a Name

Enter a short but clear name in the Name your rule field.

Something like “Featured Offer – $0.10 below” or “Sales slow drop 5 units” makes it easy to find later when you have many rules running.


Step 4: Select Marketplaces

Check the boxes for the Amazon stores (marketplaces) where this rule should run.

You can pick one or several at once, like US, UK, or Germany.

Important note: you have to set the details separately for each marketplace you select, so plan accordingly.


Step 5: Choose the Reference Price

Decide what price your rule will watch and compare against.

The usual choices are:

  • Featured Offer price (the Buy Box price)
  • Lowest price (the cheapest offer on the page, often with filters)

This is the anchor point that triggers any changes.


Step 6: Decide the Price Action

Tell the system how to position your price relative to the reference.

Options are typically:

  • Match (exactly the same)
  • Beat (go lower by the amount you set)
  • Be above (stay higher by the amount you set)

Pick one from the dropdown next to the reference price field.


Step 7: Set the Adjustment Amount

Specify how much difference you want.

You can use a fixed dollar amount (minimum usually $0.10) or a percentage (minimum often 1%, maximum up to 90% depending on the rule).

Enter the value in the box provided.


Step 8: Add Filters (If Needed)

Filters let you narrow down which competing offers the rule considers.

Common ones include:

  • Fulfillment method (only FBA, only FBM, etc.)
  • Seller rating (e.g., 90%+ feedback)
  • Condition (New only)
  • Shipping options

Check the boxes for the filters you want. This makes the rule more precise and avoids bad matches.


Step 9: Check the Rule Summary

At the bottom, a plain-text summary appears showing exactly what the rule will do.

Read it carefully – something like “Your price will be $0.15 below the Featured Offer for FBA offers from sellers with 4+ stars.”

This is your last chance to catch mistakes before saving.


Step 10: Save and Move to SKUs

Click Save and select SKUs (or the similar button).

The rule saves even if you do not add products right away.

The system takes you to the SKU assignment screen where you can start adding individual items or use bulk upload for many at once.

Once SKUs are assigned and repricing is started, the rule begins working automatically. Test on a few products first if you are new to this – small changes can reveal a lot.


Assigning SKUs and Managing Rules in Bulk

After creating a pricing rule, it remains inactive until you assign SKUs to it. You can add products one by one directly from the inventory list or the SKU management screen inside Automate Pricing. For large catalogs the fastest way is bulk upload: download the template file for the chosen marketplace from the Manage SKUs via file upload section, fill in the SKUs and any required fields, then upload it through the interface. After the upload, check the processing status in the Monitor Automate Pricing file upload area and refresh the page if necessary to confirm which SKUs were successfully added. A rule only reprices the products that are actively assigned to it – any SKU without an assigned rule continues to use its manually set price and is not affected by automation. From the list of rules in Automate Pricing you can pause an active rule, edit its settings (comparison point, action, adjustment size, min/max prices, filters) or completely delete it. Custom rules allow full editing, while predefined rules usually permit only limited changes, such as adding or removing SKUs. When a listing is set to Inactive, every pricing rule linked to its SKU is automatically paused and stays paused until the listing is reactivated.


Key Parameters and Guardrails in Rules

These parameters and built-in protections are what give you real control over how aggressive or safe your automated repricing will be. Without them, rules could run wild and cause problems like lost profits or customer backlash. Setting them thoughtfully is one of the most important parts of using Automate Pricing effectively.


Minimum Price

The minimum price is a required field in every pricing rule.

It sets a hard floor that the system will never go below, regardless of how aggressive the repricing logic becomes.

This parameter protects against unprofitable sales during strong downward pressure from competitors.


Maximum Price

The maximum price is an optional setting.

When defined, it limits how high the system can push your offer price.

It provides additional protection against extreme upward adjustments in unusual market situations.


Filters

Filters let sellers narrow down which competing offers the rule takes into account.

Most commonly used filters include fulfillment method (FBA or FBM only), seller performance rating, product condition, and shipping speed.

Applying filters makes the comparison more targeted and prevents matching against irrelevant or low-quality listings.


Internal Safeguards

The tool includes built-in logic that operates beyond the user-defined parameters.

Even when no maximum price is set, the system avoids raising prices dramatically above recent historical levels on or off Amazon.

This behavior helps preserve Featured Offer eligibility and prevents customer complaints about sudden large increases.


Marketplace-Specific Configuration

When a rule is applied to multiple marketplaces at once, all parameters are configured separately for each one.

This means minimum prices, maximum prices, filters and other settings can differ across regions.


Business Rules Specifics

Business pricing rules often work differently from standard consumer rules.

In many configurations they automatically sync business-only prices or quantity discounts with changes made to the corresponding consumer prices.

This creates a direct relationship between the two pricing tiers.


Practical Considerations When Using Rules

Aspect Recommendation / Key Point Why it matters / Risk if ignored
Product & Rule Alignment Match rule type to product behavior (competitive rules for high-competition items, sales-based for slow movers) Wrong rule type → poor results or unnecessary price drops
Performance Monitoring Regularly check history views: Buy Box win %, sales velocity, price change impact (e.g. last 30 days) You won’t notice if the rule is losing money or not working
Starting Approach Begin with simple, conservative rules on small number of SKUs (10–50 items) Aggressive rules on full catalog → fast margin damage
Minimum Price Setting Set carefully above real landed cost (fees + shipping + returns) Too low minimum → profitable sales become losses
Price Fluctuations Expect volatility from competitor actions, stock changes, rule interactions Sudden drops or spikes can hurt brand, margins or ranking
Listing Inactivity Behavior Rules automatically pause when listing is Inactive, resume when Active Prevents unwanted repricing during stock-outs or vacations
Large Catalog Management Use bulk upload for assigning / changing / pausing rules across hundreds/thousands SKUs Manual management of large inventory is slow and error-prone


Common Challenges with Automate Pricing Rules

Automate Pricing is a powerful tool, but like any automated repricing system, it comes with several practical limitations and potential pitfalls that sellers frequently encounter.

Here are the most common challenges:

  • Adjustments can behave unexpectedly when reference prices (Featured Offer or lowest price) change very rapidly – the system may lag slightly or react in ways that feel inconsistent
  • Without a maximum price set, built-in safeguards prevent extreme upward spikes, but these protections depend on recent historical data and can still allow higher prices than some sellers expect
  • Overly narrow filters may exclude important competing offers, causing the rule to ignore the actual main competitors and produce suboptimal pricing decisions
  • Sales-based rules can trigger unnecessary price drops if the sales threshold and time period are not carefully chosen – too aggressive settings often lead to premature discounts
  • Business pricing rules apply to assigned SKUs – always double-check the assigned products to avoid unintentionally changing prices across unrelated items
  • Effective troubleshooting almost always requires comparing the current rule parameters directly against real-time market data (current Featured Offer, lowest prices, active filters, etc.) – guessing usually wastes time

Most of these issues can be minimized with careful initial setup, conservative testing, frequent performance checks, and keeping minimum prices realistic.


Conclusion

Amazon Automate Pricing rules provide a structured way to handle dynamic price adjustments. The system relies on defined comparisons, actions, and boundaries to respond to marketplace events. Competitive, sales-based, and business types cover main scenarios. Setup involves creating rules, assigning SKUs, and applying limits. Effective use requires attention to parameters and ongoing monitoring. The tool suits sellers seeking automation without third-party solutions, though results depend on proper configuration and market conditions.


FAQ

What is required to use Amazon Automate Pricing rules?

A Professional selling plan and an active product catalog in Seller Central are necessary. Products must meet eligibility criteria for pricing adjustments.

Can I apply multiple rules to the same SKU?

No, each SKU can have only one active pricing rule at a time. Assigning a new rule replaces the previous one.

What happens if the calculated price hits the minimum limit?

The price stops at the minimum. No further downward adjustment occurs until market conditions change or the rule updates.

Do rules work across different Amazon marketplaces?

Yes, but parameters must be set separately for each selected marketplace during creation.

How do sales-based rules determine price changes?

They monitor units sold over a defined period. If sales drop below the threshold, the price decreases according to the rule settings.

Is there a way to stop a rule temporarily?

Rules can be paused through the actions menu. They also pause automatically if associated listings become inactive.

Small Business Loans and Financing for Amazon Sellers

Growing on Amazon takes more than strong listings and solid reviews. At some point, most sellers run into the same wall. Demand is there. Ads are working. Customers are buying. But cash flow is tight.

Maybe you need inventory ahead of Prime Day. Maybe you want to launch a new product. Maybe your ads are profitable, but scaling them requires upfront capital.

If you sell in the US store, you may have access to funding through the Amazon Lending program. While Amazon no longer issues loans directly, it connects eligible sellers with third-party financing providers offering term loans, merchant cash advances, and revolving credit lines.

Here’s how it works in 2026 and what you should know before accepting any offer.


What Is Amazon Lending?

Amazon Lending is an invitation-based program inside Seller Central. If your account qualifies, you may receive financing offers from third-party providers.

Instead of going through a traditional bank process, eligible sellers can review prequalified offers directly in Seller Central. In many cases, decisions are quick. Some sellers receive approvals within hours.

Important Details

  • Offers come from third-party providers, not Amazon directly
  • Eligibility is based largely on sales performance
  • Some offers may not require a traditional credit check
  • Funds are deposited into your business bank account

The program is designed to use real marketplace performance data rather than relying only on traditional lending metrics.


How Eligibility Works

There is no open application page. If you’re eligible, you’ll see an invitation under Growth → Lending inside Seller Central.

Eligibility can vary by provider and offer, but typically includes:

  • Sales history and revenue stability
  • Account health
  • Customer feedback
  • Business performance trends
  • In some cases, credit profile

If you don’t see an offer today, that doesn’t mean you never will. Seller accounts are reviewed regularly, and invitations can appear as your business grows.

If you want to improve your chances, focus on keeping your account metrics clean and avoiding policy violations. Steady, predictable sales tend to carry more weight than sudden spikes, and consistent customer satisfaction plays a big role as well. Over time, that kind of stability makes your business more attractive from a lending perspective.


How to Apply

If you receive an invitation, the process is fairly simple. Everything starts inside Seller Central, and you can move forward only if you decide the offer makes sense for your business.

Here’s what typically happens:

  1. Open the Lending Section in Seller Central. Go to Growth → Lending to view any active invitations. If you have an offer, you’ll see the amount, estimated cost, and repayment structure clearly outlined.
  2. Review Offer Details Carefully. Take your time here. Look at the total repayment amount, not just the funding size. Pay attention to APR or fixed cost, repayment frequency, and how payments are collected.
  3. Start the Application With the Third-Party Provider. When you’re ready, click to begin the application. You’ll be redirected to the financing partner’s platform to continue the process.
  4. Provide Any Additional Requested Information. Depending on the provider, you may need to confirm business details, banking information, or ownership data before final approval.

In many cases, you’ll also be asked to consent to sharing your Amazon sales data with the financing partner. This step allows them to evaluate your revenue history and structure the offer appropriately. Data is only shared with your explicit approval.


Types of Financing Available

As of 2026, Amazon Lending connects eligible sellers with three primary types of funding. Each option is structured differently, and the right choice usually depends on how stable your revenue is and what you actually need the money for.


Term Loans

A lump sum paid upfront with fixed repayment terms. Best suited for planned investments like large inventory orders, equipment purchases, or expansion projects where you know the budget and timeline.


Merchant Cash Advances

Funding repaid as a percentage of future sales. Payments rise and fall with your revenue, which can feel more flexible during slower periods. Often used for inventory restocks, advertising pushes, or short-term growth opportunities.


Business Lines of Credit

A revolving credit limit you can draw from as needed. You only pay interest on what you use. This option works well for ongoing operational needs or covering temporary cash flow gaps.

The key difference comes down to structure and flexibility. If your revenue is consistent and predictable, a term loan might offer clarity and stability. If sales fluctuate seasonally, a merchant cash advance can adjust with your volume. If you want access to capital without committing to a full loan, a line of credit may offer the most control.


Term Loans: Structured and Predictable

A term loan provides a lump sum upfront. You repay it over a fixed period with interest or a fixed cost.

Monthly payments are usually consistent, which makes budgeting easier.


Lendistry Term Loan

  • Loan amounts: $25,000 to $5,000,000 (with $10,000 to $250,000 specifically for the Amazon Community Lending program).
  • Terms: up to 3 years
  • Fixed interest structure
  • Equal monthly payments
  • APR depends on business performance


Uncapped Term Loan

  • Loan amounts: up to $10 million
  • Terms: up to 18 months
  • Fixed cost model
  • No early repayment penalty
  • Early payoff may reduce total cost


QuickBooks Capital Term Loan

Available to eligible QuickBooks Online users.

  • Loan amounts: $1,500 to $200,000
  • Terms: 6 months, 1 year, or 2 years
  • APR typically ranges from 9.99% to 36%

Term loans work well if you need a large inventory order, equipment purchase, or long-term expansion investment.


Merchant Cash Advances: Payments That Move With Sales

A merchant cash advance, or MCA, works differently from a traditional loan.

You receive a lump sum and agree to repay a fixed total amount. Instead of fixed monthly payments, repayment is tied to a percentage of your sales.

For example, if you receive $10,000 with a factor rate of 1.5, you repay $15,000 total. If your payment rate is 9% of sales, you pay more when sales are strong and less when they slow down.


Parafin Merchant Cash Advance

  • Funding amounts up to $2 million
  • Repayment tied to a percentage of gross sales
  • No personal collateral required
  • Eligibility based largely on sales performance
  • Possible partial rebate for early repayment

This option can make sense for sellers with seasonal revenue patterns or fluctuating cash flow.

However, always calculate the total cost carefully before accepting.


Business Lines of Credit: Flexible Access to Capital

A business line of credit works much like a credit card. You’re approved for a limit, draw funds when needed, and pay interest only on what you use. As you repay, the credit becomes available again.

As of early 2026, Amazon’s primary partner for revolving credit lines in the US is Slope, a fintech company backed by JPMorgan Chase. Slope focuses on AI-driven credit lines with fast approvals and dynamic limits based on business performance. Uncapped continues to concentrate mainly on term loans and working capital products.

A line of credit can make sense if inventory, advertising spend, or supplier payments fluctuate throughout the year. It offers flexibility without committing to a full lump-sum loan. As always, review rates and repayment terms carefully to make sure it supports steady, profitable growth.


Uncapped Business Line of Credit

  • Pre-approved revolving credit line
  • Typically structured as a one-year term
  • Fixed rate on drawn balance
  • Renewable in many cases
  • Credit limit may increase with revenue growth

This option is often useful for short-term inventory gaps, advertising pushes, or unexpected expenses.


Make Every Ad Dollar Work Harder With WisePPC

If you’re scaling ads, increasing inventory, or considering financing, decisions can’t be based on gut feeling. You need clean data and full visibility. That’s why we built WisePPC.

As an Amazon Ads Verified Partner, WisePPC connects through official integrations and delivers deeper insight than Seller Central alone. The platform stores long-term historical data, tracks 30+ key metrics, and provides granular performance visibility down to placements and keywords.

Sellers can analyze up to six KPIs on a single chart, apply bulk changes in minutes, and quickly identify wasted ad spend using advanced filtering and visual performance highlights. No spreadsheets. No manual exports. Just structured data ready to act on.

WisePPC also separates ad-driven revenue from organic sales, giving a clear view of what’s actually driving growth. When making budget or capital decisions, that level of clarity makes a real difference.


When Financing Makes Strategic Sense

Funding can be a smart tool if it supports a clear goal. It works best when it’s tied to something measurable, not just a general feeling that you need more cash in the account.

Common use cases include:

  • Increasing Inventory Ahead of Peak Season. Stocking up before Prime Day or Q4 can prevent missed sales and lost ranking. Running out of inventory at the wrong time can cost more than the financing itself.
  • Launching New Products. Product development, initial manufacturing runs, and early advertising all require upfront investment. Financing can help you test new SKUs without draining working capital.
  • Expanding Into New Marketplaces. Entering additional Amazon regions or launching on other channels often requires inventory, localization, and marketing spend before revenue catches up.
  • Scaling Advertising. If your campaigns are already profitable, increasing budget can drive faster growth. Funding can give you room to scale without interrupting cash flow.
  • Hiring Staff. Bringing on operations support, marketing help, or a warehouse team member can improve efficiency, but payroll needs to be covered consistently.
  • Managing Supply Chain Upgrades. Investing in better logistics, packaging, or storage solutions can improve margins long term, even if the upfront cost feels heavy.

Many sellers use financing ahead of major sales events to avoid stockouts and lost momentum. Others rely on it to smooth out slower months when inventory payments and ad spend still need to be covered.

The difference between smart leverage and unnecessary risk usually comes down to planning. Before borrowing, it helps to know exactly where the money is going and how it will generate return.


Additional Considerations Before Accepting an Offer

Before moving forward with any financing option, slow down and look at the full picture. Start with the total repayment amount, not just the funding size. The real cost matters more than the headline number.

Understand whether the offer uses an APR or a fixed cost structure, and how that affects what you’ll actually pay over time. Pay close attention to repayment frequency as well. Weekly or bi-weekly debits can feel very different from monthly payments, especially if your sales fluctuate.

It’s also worth checking the early repayment terms. Some providers allow you to save on cost if you pay early, while others collect the full amount regardless of timing. Finally, run conservative projections. Ask yourself how repayment would feel during a slower month, not your best one.

If your margins are already tight, borrowing can create pressure instead of progress. Financing should strengthen profitable growth, not patch over weak fundamentals.


How to Increase Your Chances of Receiving an Offer

If you haven’t received an invitation yet, the best move isn’t chasing lenders. It’s strengthening the fundamentals of your business. Amazon Lending is performance-driven, so the cleaner and more consistent your metrics are, the more attractive you become to financing partners.


Improve Sell-Through Rates

Inventory that moves efficiently signals healthy demand and solid forecasting. Strong sell-through shows that your capital isn’t sitting idle on warehouse shelves.


Reduce Return Rates

High return rates can raise concerns about product quality or listing accuracy. Keeping returns under control improves overall account performance and builds trust in your brand.


Maintain Strong Customer Feedback

Consistent positive reviews and ratings reflect reliability. Lenders look at stability, and satisfied customers are part of that picture.


Avoid Performance Notifications

Policy violations, late shipments, and account health warnings can limit eligibility. Keeping your account in good standing matters more than short-term sales spikes.


Keep Inventory Levels Stable

Frequent stockouts or overstock issues create volatility. Balanced inventory management demonstrates operational control, which supports lending confidence.

In short, predictable performance beats sudden growth bursts. The more stable your business looks over time, the more likely you are to see an offer appear in Seller Central.


Final Thoughts

Access to funding can change the trajectory of an Amazon business. But it is leverage, not a shortcut.

If your products sell consistently and your margins are healthy, capital can help you scale faster. If your fundamentals are unstable, borrowing can create stress.

Check Seller Central under Growth → Lending to see if you have an invitation. If you don’t, focus on strengthening performance metrics and building predictable revenue.

Growth on Amazon rarely happens overnight. Sometimes the right funding at the right time helps you move to the next stage. Just make sure the decision is strategic, not reactive.


Frequently Asked Questions

Is Amazon Lending still available in 2026?

Yes. Amazon Lending is active, but Amazon no longer issues loans directly. Instead, eligible sellers receive invitations to apply for financing from third-party providers inside Seller Central.

How do I know if I’m eligible?

If you qualify, you’ll see an invitation under Growth → Lending in Seller Central. There is no public application form. Eligibility is reviewed regularly and based largely on your sales performance and account health.

Do I need a credit check?

It depends on the provider and the type of financing. Some offers rely more heavily on your Amazon sales data rather than traditional credit scores. Others may still consider your credit profile as part of the approval process.

How fast can I receive funds?

Timelines vary by provider, but many sellers receive decisions within hours or a few days. Once approved, funds are typically deposited directly into your business bank account.

What’s the difference between a term loan and a merchant cash advance?

A term loan provides a lump sum with fixed repayment terms. A merchant cash advance is repaid as a percentage of future sales, so payments fluctuate based on revenue. The right option depends on how predictable your cash flow is.

12 Training Videos Every New Amazon Seller Should Watch

Starting on Amazon can feel like stepping into a control room with too many buttons.

There’s Seller Central. Listings. FBA. Pricing rules. Performance metrics. And everyone online seems to be shouting a different strategy at you. Before you get pulled in ten directions, slow down and start with the basics.

Seller University is Amazon’s own training library. It’s free. It’s practical. And it explains how the marketplace actually works. If you take the time to understand these twelve core videos, you’ll avoid a lot of beginner mistakes and move forward with more clarity.

No shortcuts. Just a solid foundation.


Top Essential Videos for New Amazon Sellers

Think of this as a practical roadmap. You don’t need to watch them all in one sitting. Start with the basics, then move deeper based on where your business is today.


1. How Selling on Amazon Works

What This Video Covers

This is the big-picture overview. It explains:

  • Account setup
  • Creating product listings
  • Fulfilling orders
  • Getting paid
  • Core seller programs

It also introduces Fulfillment by Amazon, Brand Registry, and Account Health.

If you’re unclear about how the entire ecosystem connects, this is where that confusion usually disappears.


2. Getting to Know Seller Central

Seller Central is your control panel. Everything happens there.

This Walkthrough Explains

  • The homepage dashboard
  • Inventory management
  • Orders and returns
  • Performance metrics
  • Settings and permissions

Many sellers operate in only a small corner of Seller Central. This training helps you understand the full layout so you’re not guessing where things live.


3. Introduction to Product Listings

This video explains what a product listing actually is and how Amazon structures it.

It Covers

  • Required product information
  • Matching existing listings
  • Creating new detail pages
  • Single and bulk uploads

Listings are not just text. They are structured data that feeds Amazon’s search engine. That distinction matters.


4. Guidelines to Source Products to Sell on Amazon

Sourcing isn’t just about finding something cheap and reselling it. It’s about proving that your supply chain is legitimate.

In this video, Amazon explains what qualifies as a valid source of inventory and what doesn’t.

What This Video Covers

  • How to validate suppliers before placing large orders
  • Why building direct relationships with brands matters
  • What counts as acceptable proof of purchase
  • The difference between wholesale sourcing and retail arbitrage
  • Why retail-to-retail drop shipping is prohibited

This is one of the most important mindset shifts for new sellers. Amazon is strict about authenticity and product traceability. If you cannot prove where your inventory came from, your account is at risk.


5. Intro to Amazon Business Reports

If sourcing is the foundation, business reports are the steering wheel.

This video explains how to access and interpret your business reports inside Seller Central.

What This Video Covers

  • Where to find business reports
  • The difference between traffic metrics and sales metrics
  • How to analyze sessions, page views, and conversion rates
  • How to track unit session percentage
  • How to use data to guide pricing and advertising decisions

Many new sellers focus only on revenue. But revenue alone doesn’t tell you what’s happening.

This training teaches you how to stop guessing and start using data to guide decisions.


6. Overview of Fulfillment by Amazon (FBA)

This Video Explains How Amazon

  • Stores inventory
  • Picks and packs orders
  • Ships products
  • Manages returns
  • Handles customer service

It also introduces services like partnered carriers and multi-channel fulfillment.

FBA gives you Prime eligibility. But it also adds fees and inventory planning responsibilities. This training helps you weigh that tradeoff.


7. Pricing Products Competitively

Pricing on Amazon is not static.

This Training Covers

  • Competitive pricing
  • Lowest price concepts
  • Automated pricing rules
  • How pricing affects visibility

With repricing tools widely used in 2026, understanding how price impacts your eligibility and sales velocity is critical.


8. Becoming the Featured Offer

The Featured Offer is the default Add to Cart position.

This Training Explains How Amazon Evaluates

  • Price competitiveness
  • Fulfillment method
  • Shipping speed
  • Account performance
  • Inventory availability

It’s not simply about being the cheapest seller. Operational reliability plays a role.


9. Understanding Account Health

Every seller has an Account Health dashboard.

This Video Explains

  • Order defect rate
  • Late shipment rate
  • Policy compliance
  • Cancellation rate

Ignoring these metrics can lead to restrictions or suspension. Monitoring them should become routine.


10. Introduction to Amazon Advertising

This Overview Introduces

  • Sponsored Products
  • Sponsored Brands
  • Sponsored Display
  • Cost-per-click bidding

It explains how ads appear in search results and on product pages, and how sellers control budgets and bids.

Advertising is not mandatory, but for most competitive categories it becomes necessary.


11. Amazon Brand Registry Benefits

If you own a brand, Brand Registry unlocks additional tools.

This Training Explains

  • Brand protection mechanisms
  • A+ Content
  • Brand Analytics
  • Sponsored Brands
  • Enhanced listing control

In a marketplace with shared listings, brand ownership changes what you can control.


12. Getting Started with Amazon Global Selling

This Video Walks Through

  • International marketplace options
  • Cross-border logistics
  • Tax and compliance considerations
  • How to activate global selling inside Seller Central

Selling globally is more accessible than it used to be, but it still requires planning and margin analysis.


A Smarter Way to Manage Your Ads from Day One With WisePPC

When you’re new to Amazon, the hardest part isn’t launching. It’s understanding what’s actually working.

That’s why we built WisePPC.

The platform, as an Amazon Ads Verified Partner, connects through official integrations and gives sellers full visibility into performance from the start. WisePPC tracks over 30 key metrics, stores long-term historical data beyond Amazon’s standard retention window, and clearly separates ad-driven revenue from organic sales.

Instead of jumping between multiple reports, everything lives in one structured dashboard. Campaigns can be filtered in seconds. Bids and budgets can be edited in bulk. Up to six KPIs can be compared on a single chart. Visual highlights make wasted spend stand out immediately.

For new sellers, clarity changes everything. When you can clearly see what’s driving profit and what’s draining budget, decisions become faster and far more confident.


No spreadsheets. No guesswork. Just structured growth from day one.


Final Thoughts

Seller University won’t guarantee success. No training can do that.

What it will do is help you avoid the most common early mistakes, clarify how Amazon actually evaluates sellers, and show you where the important tools live inside Seller Central. It shortens the learning curve and removes a lot of unnecessary trial and error.

It’s free. It’s practical. And it comes directly from the platform you’re building on. If you’re serious about creating a stable, long-term Amazon business, this is the right place to start.


Frequently Asked Questions

Is Seller University really free?

Yes. Seller University is completely free for Amazon sellers. You can access most of the training content inside Seller Central, and many videos are also available on Amazon’s official YouTube channel.

Do I need to watch all the videos before I start selling?

No. You don’t need to complete everything upfront. Start with the basics like how selling works, Seller Central navigation, and listings. Then watch other videos as you reach those stages in your business. Learning in context usually works better than trying to absorb everything at once.

Is Seller University useful for experienced sellers?

It can be. Even experienced sellers sometimes skip foundational knowledge or miss updates to tools and policies. Revisiting certain trainings can clarify processes or highlight features you’re not fully using.

How long does it take to go through the core trainings?

Most overview videos are short, typically between 5 and 15 minutes. You can cover the core foundation content in a few hours total. The key is applying what you learn rather than rushing through everything.

What should I focus on first as a new seller?

Start with understanding how selling works, then move to listings and Seller Central navigation. After that, focus on fulfillment, pricing, and account health. Advertising and global expansion can come once your foundation is stable.

How to Use Amazon Seller Dashboards and Tools to Grow Smarter

If you sell on Amazon, your dashboards are more than reporting screens. They’re decision tools.

Inside Seller Central, every tab exists for a reason. Performance alerts signal risk. Business Reports reveal trends. Inventory pages quietly show you where cash is stuck. Most sellers log in to check sales and move on. The smarter approach is different. You use the dashboards to spot patterns, fix small issues early, and adjust before problems grow.

When you understand how each tool fits into the bigger picture, Seller Central stops feeling overwhelming. It starts feeling organized. And once that happens, running your Amazon business becomes far more intentional and far less reactive.


What Seller Central Really Is

Technically, Seller Central is not one dashboard. It’s a collection of dashboards, tools, and shortcuts tied together in one interface.

From the homepage, you can access:

  • Account Health
  • Business Reports
  • Inventory management
  • Orders and returns
  • Brand tools
  • Advertising performance
  • FBA insights

You can customize what you see, adjust settings, create user permissions for your team, and shape the workspace around how you operate.

If you’re on a Professional selling plan and enrolled in Brand Registry, you unlock more advanced tools like Brand Analytics and A+ Content.

Think of Seller Central as your operations hub. Once you treat it that way, it becomes much easier to navigate.


How to Use Seller Central as a Real Operating System

Seller Central is not just a backend panel. It’s where your business health, growth signals, and risks all show up first. If you learn where to look and what to check consistently, you stop reacting late and start managing proactively.

Let’s break it down in a practical way.


1. Start With Account Health. Always.

Before you focus on scaling, ads, or launching new products, make sure your foundation is stable.

Under the Performance tab, the Account Health dashboard shows whether you’re meeting Amazon’s standards. It’s not exciting, but it’s critical.

What to Monitor Regularly

  • Order defect rate
  • Late shipment rate
  • Policy violations
  • Customer service metrics
  • Product compliance issues

If something slips, this is where you’ll see it first.

A listing suspension or account warning costs far more than a temporary dip in sales. Check this dashboard weekly. It takes a few minutes. Ignoring it can cost you months.


2. Go Deeper Than the Homepage Sales Summary

The homepage shows revenue and units sold. Helpful, yes. Complete, not even close.

For real insight, open Business Reports under the Reports tab.

Here You Can Analyze

  • Sales by ASIN
  • Traffic and conversion rates
  • Buy Box percentage
  • Session data
  • Category performance

If you’re enrolled in Brand Registry, Brand Analytics adds another layer. You can review customer search terms, repeat purchases, demographic trends, and product comparison behavior.

This is where patterns start to appear.

  • Which keywords drive traffic but fail to convert?
  • Which products are frequently bought together?
  • Where are competitors quietly outperforming you?

Raw data does nothing on its own. But interpreted properly, it tells you exactly where to adjust.


3. Improve Listings With Evidence, Not Assumptions

Many sellers tweak listings based on instinct. A better approach is using the Listing Quality dashboard under the Catalog tab.

It Highlights

  • Missing attributes
  • Weak content areas
  • Conversion-related gaps
  • Opportunities to improve detail pages

If you have Brand Registry, A+ Content gives you more control over presentation. You can add comparison charts, enhanced visuals, lifestyle images, and structured brand storytelling.

A strong listing is not about decoration. It improves conversion rate, lowers returns, and builds trust.

Sometimes tightening bullet points or adding a comparison module makes more impact than increasing ad spend.


4. Manage Inventory Before It Turns Into a Cash Flow Issue

Inventory problems rarely explode overnight. They quietly drain margin.

Under the Inventory tab, Manage Inventory allows you to:

  • Edit pricing
  • Adjust stock levels
  • Perform bulk updates
  • Filter SKUs
  • Track stranded listings

If you use Fulfillment by Amazon, the FBA dashboard gives you deeper visibility into inbound shipments, stock levels, and overall inventory health.

Professional sellers also receive an Inventory Performance Index (IPI) score.

What IPI Reflects

  • How well you balance stock
  • Excess or aged inventory levels
  • Sell-through performance

A low score can limit your storage capacity. A healthy score gives you flexibility, especially during peak seasons.

Inventory management is not just about avoiding stockouts. It’s about protecting working capital.


5. Stay on Top of Orders and Customer Experience

Under the Orders tab, the Manage Orders dashboard shows everything currently in motion.

You Can Review

  • Pending orders
  • Shipped and unshipped orders
  • Cancellations
  • Refund requests
  • Buyer messages

Fast responses matter. Clean fulfillment matters more.

Customer experience directly affects your reviews, your performance metrics, and your Account Health score. Small delays or missed messages add up faster than most sellers expect.


6. Use Product Opportunity Explorer to Validate Ideas

If you’re planning to expand your catalog, avoid guessing.

Product Opportunity Explorer helps you spot high-demand niches, uncover lower competition segments, track emerging trends, and analyze search volume patterns. Instead of launching products based on assumptions or copying competitors, you can validate demand using Amazon’s own marketplace data.

Timing on Amazon matters more than most sellers realize. Entering a growing niche early feels completely different from fighting for visibility in a crowded category where ten established brands already dominate the first page.


7. Treat Reviews as Research, Not Just Social Proof

The Customer Reviews tool inside Seller Central lets you monitor feedback and ratings in one place.

Reviews are not just public validation. They’re free product research. Common complaints reveal weaknesses. Repeated praise shows what customers truly value.

If you sell to business customers, Amazon B2B Central provides additional insight. You can compare B2B and consumer sales and analyze which industries are buying from you.

That kind of context can influence packaging, pricing structure, and messaging in ways most sellers overlook.


8. Keep Control Even When You’re Away

The Amazon Seller app makes daily management easier when you’re not sitting in front of your dashboard. And realistically, you won’t always be.

From Your Phone, You Can

  • Track real-time sales performance
  • Respond to buyer messages
  • Adjust pricing on the go
  • Scan barcodes to check listings
  • Create new product listings
  • Monitor inventory levels
  • Receive performance notifications

It’s not meant to replace full reporting or deep analysis. You’re not going to run strategic reviews from a five-inch screen. But it keeps you connected to what’s happening in your account.

Quick responses reduce negative feedback. Fast price adjustments protect margins. Catching an issue early can prevent a policy warning or delayed shipment metric.

On Amazon, small delays add up. Staying responsive, even when you’re away from your desk, often protects your performance metrics more than people realize.


Smarter Advertising Insights With WisePPC

We created WisePPC because serious sellers need more than surface-level reports. Seller Central gives you data, but not always the depth or flexibility to act fast and confidently.

As an Amazon Ads Verified Partner, WisePPC connects through official integrations and tracks over 30 advanced performance metrics with long-term historical storage. Instead of losing insights after 60 to 90 days, sellers can analyze trends across months or even years and clearly see what is actually driving revenue.

With bulk actions, advanced filtering, placement-level analysis, and real-time visibility into ACOS, TACOS, CTR, and profit, the platform shows how advertising influences both paid and organic sales. Campaigns can be edited instantly, wasted spend becomes easier to identify, and strategy adjustments can be made without exporting files or switching between tools.

The focus is not just more data, but better clarity. Faster decisions. Smarter reactions. And controlled growth as a catalog expands.


How to Make Seller Central Work for You

The biggest mistake sellers make is treating Seller Central like a help desk. They log in when something goes wrong, fix the issue, and disappear again.

That approach keeps you reactive. And reactive sellers are always one step behind.

Instead, treat Seller Central like your operating system. Build simple habits around it.

  • Customize your homepage widgets so the metrics that matter most are visible immediately
  • Schedule weekly data reviews instead of checking numbers randomly
  • Monitor Account Health consistently, even when everything looks fine
  • Watch inventory trends before stock becomes aged or overstocked
  • Study conversion rates regularly, not just total revenue

None of this requires hours a day. It requires consistency.

Amazon gives you more visibility than most marketplaces ever will. Traffic data, behavioral insights, fulfillment metrics, performance benchmarks. It’s all there. But it only helps if you actually look at it and act on it.

The sellers who grow are not guessing. They’re reviewing, adjusting, refining. Small corrections compound over time.


Final Thoughts

Seller Central can feel complex at first. That’s normal.

But once you understand where everything lives and what each dashboard actually tells you, it becomes less overwhelming and more strategic.

Start with stability. Move to data. Optimize listings. Protect inventory. Listen to customers.

Do those consistently, and Seller Central stops being just a backend system. It becomes your operating advantage.


FAQ

Is Seller Central free to use?

Access to Seller Central comes with your Amazon selling plan. Individual and Professional plans both include access, but some advanced tools, like Brand Analytics and A+ Content, require a Professional plan and Brand Registry enrollment.

How often should I check Seller Central?

At minimum, you should log in several times a week. Account Health and performance alerts should be monitored consistently. Sales data, inventory levels, and conversion rates should be reviewed weekly to catch trends early.

What is the Account Health dashboard and why does it matter?

The Account Health dashboard shows whether your account meets Amazon’s performance standards. It tracks metrics like order defect rate, late shipments, and policy violations. Ignoring it can lead to listing restrictions or account suspension.

Where can I see detailed sales reports?

You can access deeper performance insights under Reports, then Business Reports. This section allows you to analyze traffic, conversion rates, sales by ASIN, session data, and category performance.

How can I improve my product listings inside Seller Central?

Use the Listing Quality dashboard under the Catalog tab to identify missing attributes and content gaps. If you’re brand registered, A+ Content allows you to add enhanced visuals and structured brand content to improve conversions.

What is the Inventory Performance Index (IPI)?

IPI is a score that measures how efficiently you manage inventory stored in Amazon fulfillment centers. A healthy score helps you maintain storage capacity, while a low score may limit how much inventory you can send to FBA.

Brand Tailored Promotions: A Smarter Way to Discount on Amazon

Running discounts on Amazon used to feel like flipping a switch and hoping for the best. You’d launch a coupon, watch your margins shrink, and pray the lift in sales made it worth it. Sometimes it did. Often, it didn’t.

Brand Tailored Promotions change that dynamic. Instead of broadcasting a discount to everyone, you can offer it only to the people who are most likely to convert. Cart abandoners. Repeat buyers. High spend customers. Even shoppers who follow your brand.

It’s not just another promo feature buried in Seller Central. Used well, it’s a way to turn discounts into strategy instead of damage control.


What Are Brand Tailored Promotions

Brand Tailored Promotions allow sellers enrolled in Amazon Brand Registry to offer exclusive discounts to specific customer segments. Instead of promoting a deal to the entire marketplace, you can target groups such as:

  • Cart abandoners
  • Repeat customers
  • High-spend customers
  • Brand followers
  • At-risk customers
  • Potential new customers
  • Complementary product buyers

This targeting is based on customer behavior. Amazon uses purchase history, browsing activity, and engagement signals to place customers into audience groups. When you create a tailored promotion, only the selected audience can see and redeem the offer.

From a strategic standpoint, this is a big deal. You are no longer discounting blindly. You are discounting with intent.


Who Can Use Brand Tailored Promotions

Not every seller has access to this feature.

To create Brand Tailored Promotions, you must:

  • Be enrolled in Amazon Brand Registry
  • Have the Brand Representative role assigned
  • Sell products in new condition
  • Meet minimum rating thresholds if products have reviews
  • Avoid restricted categories such as adult, hunting, firearms, and certain sensitive product types

There is also an audience size requirement. In most cases, the audience must contain at least 1,000 customers before you can activate a promotion. If your segment is too small, Amazon will not allow the campaign to run.

That minimum threshold prevents micro-targeting but still leaves plenty of room for strategic segmentation.


Smarter Brand Tailored Promotions with WisePPC

At WisePPC, we believe discounts should be backed by data, not assumptions. Brand Tailored Promotions can drive real growth, but without proper visibility, it is easy to overspend or misread performance.

As an Amazon Ads Verified Partner, WisePPC connects through official integrations and provides sellers with deeper insight than Seller Central alone. The platform tracks more than 30 key performance metrics, stores long-term historical data well beyond Amazon’s standard 60 to 90 day window, and enables advanced filtering across campaigns, placements, bid strategies, and match types.

When running Brand Tailored Promotions, this level of visibility makes a real difference. Sellers can clearly see how discounts affect TACOS, ACOS, profit margins, and organic sales in real time. Bulk editing tools allow thousands of updates in seconds, while performance insights surface wasted spend and underperforming segments before they turn into margin issues.

Instead of treating promotions as isolated tactics, WisePPC positions them within a structured growth system. The platform helps brands analyze, optimize, and scale their advertising and promotional strategy with greater control and confidence.


Why Traditional Amazon Discounts Often Fail

Before diving deeper, it is important to understand why Brand Tailored Promotions matter in the first place.

Traditional promotions on Amazon come with several limitations:

  1. Everyone sees the discount.
  2. Loyal buyers receive the same offer as new shoppers.
  3. Margins suffer due to unnecessary discounts.
  4. Promotions stack with other deals if you are not careful.
  5. There is little lifecycle strategy behind the offer.

Imagine giving a 20 percent coupon to customers who would have purchased anyway. That is not marketing. That is margin erosion.

Brand Tailored Promotions fix this by allowing segmentation. Instead of rewarding everyone equally, you reward behavior. That is a very different mindset.


Understanding the Audience Segments

This is where things get interesting. Each audience type serves a different business objective. If you use them correctly, you can build a full customer lifecycle strategy inside Amazon.


Cart Abandoners

These customers added your product to their cart but did not complete the purchase. They showed strong buying intent but stopped short.

A small incentive – often 10 to 20 percent – can be enough to convert them. This is usually one of the highest performing segments.


Potential New Customers

These shoppers interacted with your product in the last 90 days but have not purchased from your brand in the past year.

They are curious but not convinced. This audience works well for acquisition campaigns, especially when paired with entry-level products.


Repeat Customers

Customers who have purchased from your brand more than once in the last 12 months.

These buyers already trust you. The goal here is retention, not aggressive discounting. Often, 10 to 15 percent is sufficient.


High-Spend Customers

The top 5 percent of your customers based on purchase volume.

These buyers drive a disproportionate share of revenue. A well-timed exclusive offer strengthens loyalty without needing extreme discounts.


At-Risk Customers

Shoppers who have not purchased recently and may be drifting away.

Re-engagement campaigns targeting this group can bring back lost revenue. Discounts here tend to be slightly stronger, often 15 to 25 percent.


Complementary Product Buyers

This newer audience category allows you to target customers who purchased related products. For example, if someone bought running shoes, you could promote athletic socks.

This cross-sell capability expands your reach beyond your existing buyers.


How to Create a Brand Tailored Promotion

The setup inside Seller Central is simple. The real work is in choosing the right audience and discount. Here is the streamlined process:

  1. Go to the Advertising tab and select Brand Tailored Promotions. Make sure you have Brand Registry access and the correct permissions.
  2. Click Create Promotion and select your brand. If you manage multiple brands, double-check you are working under the right one.
  3. Choose your target audience. This is the most important step. Pick the segment that matches your goal – acquisition, retention, re-engagement, or cross-sell.
  4. Select products. You can apply the promotion to your entire catalog or limit it to specific ASINs for tighter control.
  5. Set discount, budget, and duration. Remember that the budget reflects total discount spend. Plan it based on realistic redemption expectations.
  6. Review for stacking conflicts, then submit. Check for active coupons or deals that might overlap before activating.

Technically, it only takes a few minutes. Strategically, it deserves much more thought.


Budget Planning – The Part Most Sellers Get Wrong

Amazon allows you to set a maximum budget for each promotion. The budget represents the total discount spend, not total revenue.

Here is where things become practical. Amazon suggests estimating budget using:

Average Order Value x Discount Percentage x Audience Size x Expected Redemption Rate


Example

  • Average Order Value: $30
  • Discount: 10 percent
  • Audience Size: 100,000
  • Estimated Redemption: 5 percent


Calculation

30 x 0.10 x 100,000 x 0.05 = $15,000 budget

Many sellers skip this math. They set low budgets and wonder why promotions end after a few hours. Others overshoot and burn through more than intended during high traffic events.

Take the time to calculate realistic budget projections. It prevents unpleasant surprises.


Promotion Caps and Operational Limits

Amazon limits sellers to 20 active or scheduled Brand Tailored Promotions at one time. At first, that sounds like plenty. In reality, once you start segmenting by audience and product line, those slots can disappear quickly.

This limit forces discipline. You cannot run endless small experiments. Each promotion should have a clear objective – acquisition, retention, re-engagement, or cross-sell – rather than existing just because there is room for it.

If you are targeting the same audience across multiple ASINs, consider grouping them into a single promotion instead of splitting them up. It simplifies management and protects your limited slots.

Also remember that scheduled campaigns count toward the cap. Keep track of what is planned so you are not locked out when you need flexibility.


The Stacking Risk – Protecting Your Margins

This is the hidden danger that most sellers overlook until it shows up in their numbers.

Brand Tailored Promotions can stack with certain types of discounts, including Lightning Deals, standard coupons, and Subscribe and Save discounts. They do not stack with other preferential claim code promotions. However, stacking with visible deals and coupons can still reduce margins more than expected.


How Stacking Actually Hurts

Imagine running a 20 percent tailored promotion on a product that is already discounted 15 percent during a Lightning Deal. On paper, each promotion looks reasonable. Combined, they can wipe out profit on every unit sold.

During high-traffic periods, this effect multiplies quickly. More visibility leads to more redemptions, and more redemptions mean more discounted revenue than you originally planned for.


Where Sellers Get Caught

Stacking issues usually happen when multiple teams manage pricing and promotions separately, when coupons are left running in the background, or when holiday deals overlap with retention campaigns. Sometimes budgets are set without accounting for combined discounts.

It is rarely intentional. It is often just poor coordination or a missed detail.


How to Reduce the Risk

Before launching a tailored promotion:

  • Audit active promotions
  • Pause conflicting coupons
  • Avoid overlapping deal windows
  • Monitor performance daily

Do not assume everything is clean just because you set it that way last week. Things change quickly inside Seller Central.

Discount stacking is not theoretical. It happens. And when it does, it quietly eats into profit while sales numbers look great on the surface.


Choosing the Right Discount Level

Not every audience needs a deep discount.

Based on observed performance trends:

  • Cart abandoners often respond at 10 to 20 percent.
  • Repeat customers may convert at 10 to 15 percent.
  • At-risk customers might require 15 to 25 percent.
  • High-spend customers rarely need aggressive pricing.

Higher discounts do not always mean higher profit. The goal is efficient conversion, not maximum volume at any cost.


Strategic Lifecycle Planning

Instead of treating Brand Tailored Promotions as isolated campaigns, it helps to think in terms of customer lifecycle. Different audiences require different objectives, discount levels, and timing. When mapped correctly, these promotions become part of a structured growth system rather than random discount bursts.

Here is a simple way to frame it:

Lifecycle Phase Target Audience Strategic Focus
Acquisition Potential new customers, in-market shoppers Moderate entry-level discounts to drive first purchase
Conversion Cart abandoners, product viewers Timely incentives to close high-intent buyers
Retention Repeat customers, high-spend customers Loyalty-focused offers to increase frequency and LTV
Re-engagement At-risk customers, lapsed buyers Stronger incentives to bring customers back
Cross-sell Complementary product buyers, brand followers Promote related products to increase basket size


When structured this way, Brand Tailored Promotions stop being reactive. They become a deliberate part of your revenue engine, supporting customers at every stage of their journey with your brand.


When Brand Tailored Promotions Make the Most Sense

They work best when:

  • You have enough brand data and traffic
  • You want to improve repeat purchase rates
  • You are trying to reduce wasted discount spend
  • You want better targeting than traditional coupons provide

If you are brand registered and serious about retention and profitability, this feature deserves attention.


Final Thoughts

Brand Tailored Promotions represent a shift in how Amazon sellers can approach discounting. It is no longer just about offering lower prices. It is about offering the right price to the right customer at the right time.

That distinction changes everything.

Used carelessly, it becomes another promotion tool that eats into your margins. Used strategically, it becomes a precision instrument for growth.

Start small. Test segments individually. Calculate your budgets carefully. Monitor stacking. Refine based on performance.

Discounting does not have to mean sacrificing profit. With Brand Tailored Promotions, it can actually mean protecting it.


Frequently Asked Questions

What are Brand Tailored Promotions on Amazon?

Brand Tailored Promotions are audience-based discounts available to sellers enrolled in Amazon Brand Registry. Instead of offering a deal to all shoppers, you can target specific customer segments such as repeat buyers, cart abandoners, high-spend customers, or potential new customers.

Who is eligible to use Brand Tailored Promotions?

You must be enrolled in Amazon Brand Registry and have the appropriate Brand Representative role assigned. Your products must be in new condition and meet Amazon’s rating requirements if reviews are present. Some restricted categories are not eligible.

Is there a fee to create a Brand Tailored Promotion?

No. Amazon does not charge a setup fee. However, you are responsible for funding the discount itself, which comes out of your margin.

What is the minimum audience size required?

In most cases, the selected audience must contain at least 1,000 customers. If the audience size is smaller, Amazon will not allow the promotion to go live.

How many Brand Tailored Promotions can I run at once?

Amazon allows up to 20 active or scheduled Brand Tailored Promotions at any given time. Scheduled campaigns count toward this limit.

success icon

Thank you for submitting request.

We will get back to you ASAP.