111222

FBA Shipment Tracking: How to Stay Ahead of Inventory Delays and Delivery Issues

If you’re sending inventory into Amazon’s fulfillment network, tracking those shipments isn’t optional – it’s what keeps everything else in sync. Whether you’re running a lean operation or managing dozens of SKUs, knowing where your stock is (and what’s actually been received) makes all the difference. Timelines shift, boxes go missing, and sometimes checked-in doesn’t mean sellable. The sooner you understand what’s happening behind those shipping statuses, the better you can plan, react, and protect your margins.


Where FBA Shipments Start: What They Are and Why They Matter

An FBA shipment is exactly what it sounds like – the inventory you send into Amazon’s fulfillment network so they can take care of storage, packing, and delivery for you. It’s how products get into Amazon warehouses in the first place. You prep your boxes, create a shipping plan in Seller Central, print the labels, and hand it off to a carrier. From that point on, the inventory is officially on its way to being available for Prime delivery. Sounds simple. But the process has more moving parts than it lets on.

Each shipment kicks off a chain of events: scanning, transport, check-in, receiving, and – eventually – inventory becoming sellable. And not all stages move at the same speed. One box might get processed in a day, another might sit at the dock for a week. That’s why understanding how FBA shipments actually work isn’t just helpful – it’s essential if you care about performance, timing, or staying in stock during high-traffic weeks. You don’t need to micromanage the system, but you do need to read it right.


Understanding FBA Shipment Status: What Each Stage Actually Tells You

When you’re tracking an FBA shipment, the status you see in Seller Central isn’t just a label – it’s a signal. Each one reflects a specific step in how Amazon processes your inventory behind the scenes. But not all statuses are equally clear, and some can hang there longer than expected. Here’s what each one really means, and when you should pay attention.


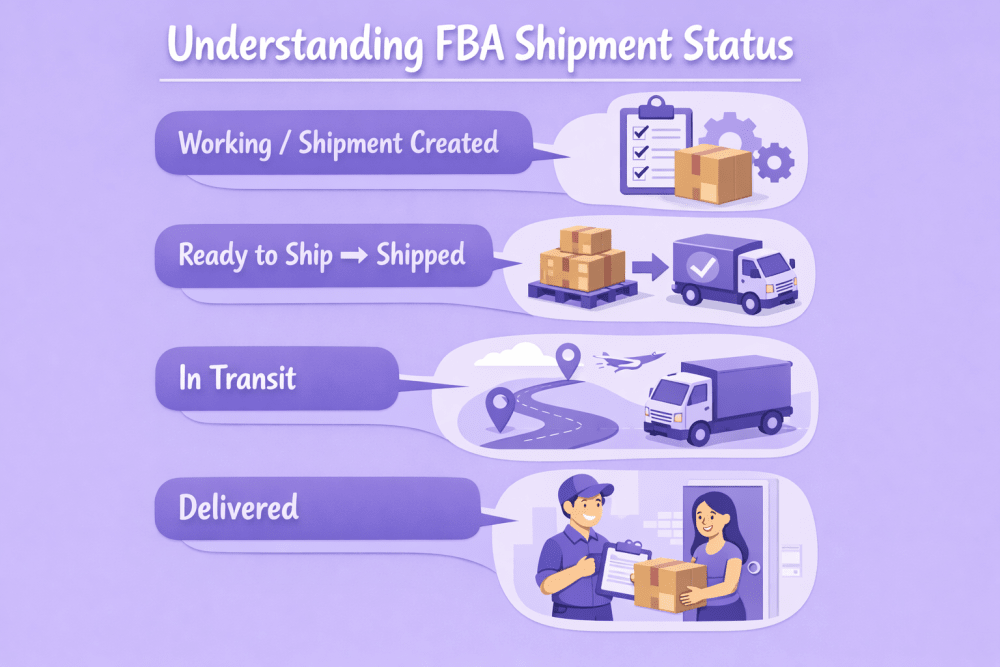
1. Working / Shipment Created

This is the starting point – you’re building or editing the shipping plan. No inventory has moved yet, but Amazon now knows what to expect. Once box contents are confirmed and labels are printed, the shipment progresses to the next stage.


2. Ready to Ship → Shipped

Ready to Ship appears when you provide the carrier’s name and tracking information or confirm the shipment through the Amazon Partnered Carrier program. It means your part is done – now it’s on the carrier. The status changes to Shipped once the carrier scans the boxes or you confirm drop-off. If that scan never happens, the shipment stays stuck. Always double-check that pickup or drop-off was properly recorded.


3. In Transit

At this stage, Amazon knows the shipment is on the move. This doesn’t mean it’s close – just that tracking data from your carrier confirms movement. It could still be crossing the country. If it stalls here too long, check with the carrier directly, not Amazon.


4. Delivered

Your shipment made it to the fulfillment center… in theory. “Delivered” means it arrived at the building – not that anyone’s touched it. Sometimes it sits in the yard for days before check-in starts, especially during peak volume weeks.


5. Checked In

This means your boxes have been scanned at the dock. It’s a signal that warehouse staff is starting to process them. Still doesn’t mean units are ready for sale – it’s more like being next in line at the DMV. Progress, but not done.


6. Receiving

Here’s where Amazon begins scanning individual items into inventory. Some SKUs go live right away. Others might get rerouted to different warehouses before becoming available. You’ll often see partial receiving at this stage – not a glitch, just how FBA works.


7. Closed

The shipment’s lifecycle is done. Either all items were received, or Amazon automatically closed the shipment after 90 days for domestic shipments or 90 days for international shipments since the shipment creation date. If the numbers don’t match what you sent, this is when you start reconciling.

Each status is a breadcrumb, not a full picture. But when you learn to read them right, you’ll catch delays early, flag receiving issues faster, and stop guessing where your inventory’s stuck. It’s not about micromanaging Amazon’s process – it’s about knowing when to dig in and when to wait.


From Inventory Delays to Budget Adjustments with WisePPC

When shipments don’t move as expected, the impact isn’t limited to logistics – it shows up in your sales, ad performance, and margins. That’s why WisePPC connects the dots between what’s happening in your FBA pipeline and what you’re seeing in your marketplace dashboards. We give sellers the visibility to catch delays early, adjust campaigns in real time, and stop spending on products that aren’t actually available to ship.

Our platform separates organic from paid sales, tracks real-time metrics like TACOS and profit, and highlights inventory-related ad waste – so you know exactly when fulfillment issues start to drag down performance. Whether you’re running Sponsored Products, managing multiple accounts, or juggling ad pacing with restock schedules, we help you stay ahead instead of reacting late.

You’ll find us on Facebook, Instagram, and LinkedIn, where we post insights, small fixes, and product updates to help sellers run tighter, smarter systems. At the end of the day, the goal isn’t to flood you with data – it’s to surface what matters and make it easier to act on it.


How to Actually Track an FBA Shipment (Without Guessing)

Tracking an FBA shipment shouldn’t feel like chasing a moving target – but sometimes it does. The good news is, Amazon gives you multiple ways to monitor where your inventory is and what’s happening to it. The trick is knowing where to look and what each view is actually telling you. Here’s how to get answers without digging through five tabs or waiting for something to go wrong first.


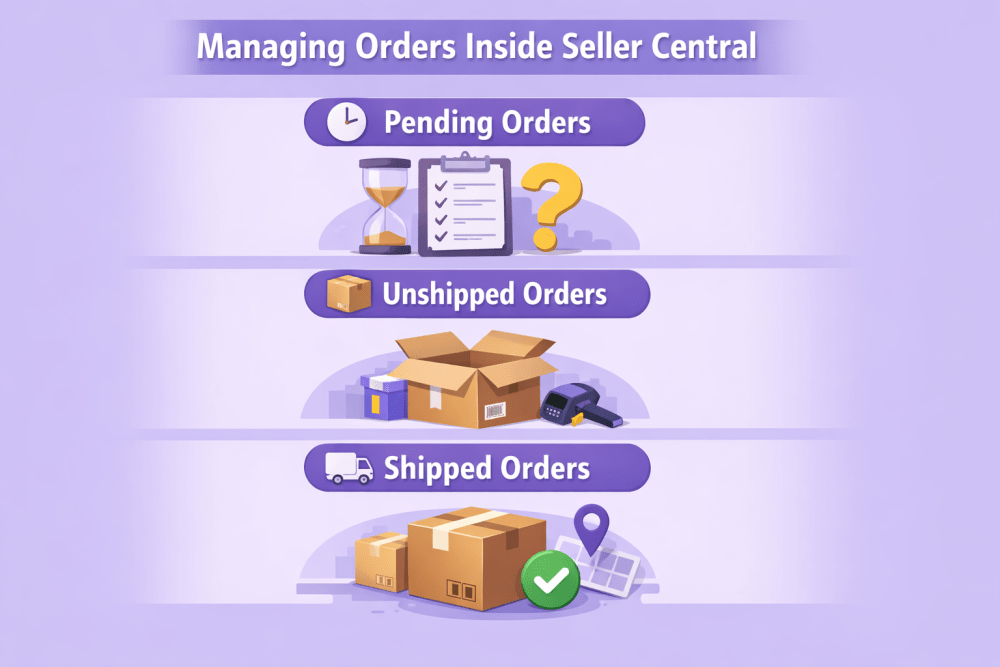
Start in Seller Central: Your Shipping Queue

This is your launchpad.

  • Go to Inventory in the top nav.
  • Click Manage FBA Shipments.
  • You’ll land in the Shipping Queue, where all your inbound shipments live.

For each one, you’ll see a status (like “In Transit” or “Receiving”) and a button labeled Track Shipment. That’s your way in.


Use “Track Shipment” to See the Full Trail

Clicking that button takes you to a Shipment Summary – which has two key tabs:

  • Shipment events: This is your event log, with timestamps for every scan and transition.
  • Contents: Shows what Amazon thinks it received – useful later if the numbers don’t match.

Watch for gaps in the timeline. If you see “Delivered” but nothing after, your shipment might still be waiting to be checked in – normal, but worth watching if it drags past a few days.


Cross-Check with the Carrier

If the shipment is still in transit, Amazon’s view can lag. That’s when you go straight to the source.
Grab the tracking number (it’s listed in the summary) and plug it into UPS, FedEx, or whichever carrier you used. You’ll get location updates, expected delivery time, and sometimes delay flags.

  • Quick tip: Amazon’s Partnered Carrier Program usually syncs well, but third-party freight can be slower or missing scans altogether.


For High-Volume Sellers: Automate the Watchtower

If you’re sending frequent shipments or managing multiple accounts, manual tracking breaks down fast. You need a system that not only shows where inventory is but also connects delays to performance drops and missed revenue. You’ll still check shipment statuses in Seller Central, but now you can also:

  • Spot stockouts before they tank your ACOS
  • See if poor delivery timing is messing with your best-performing SKUs
  • Correlate slow receiving times with missed sales targets

Inventory doesn’t move in isolation – and tracking shouldn’t either.

Staying on top of shipment movement is part of the job now. But it doesn’t have to be a guessing game. The more you check early, the less you chase problems later.


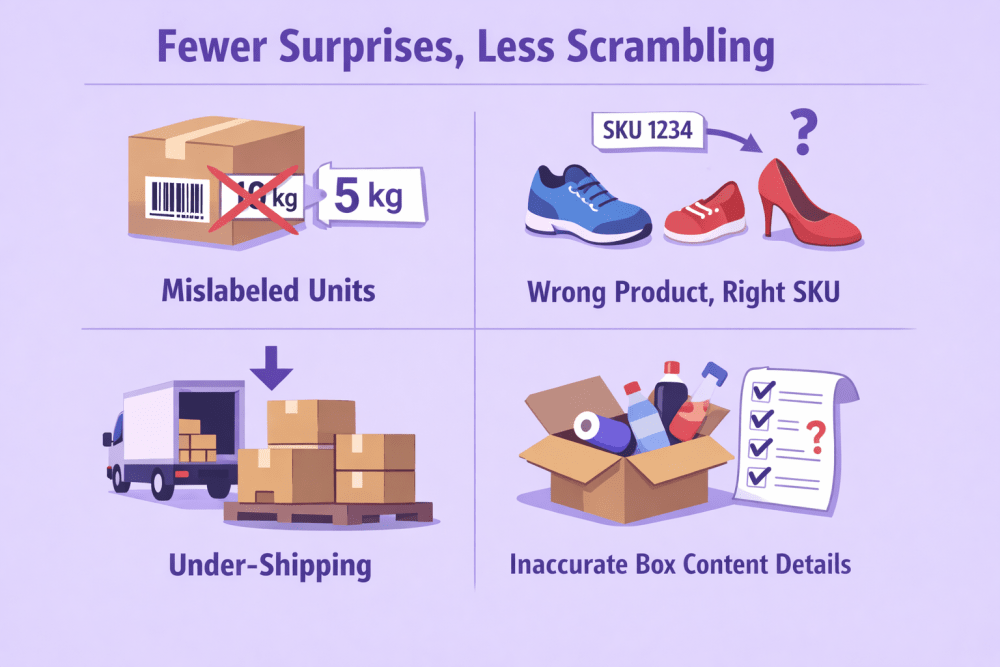
Fewer Surprises, Less Scrambling: How to Avoid FBA Inventory Headaches

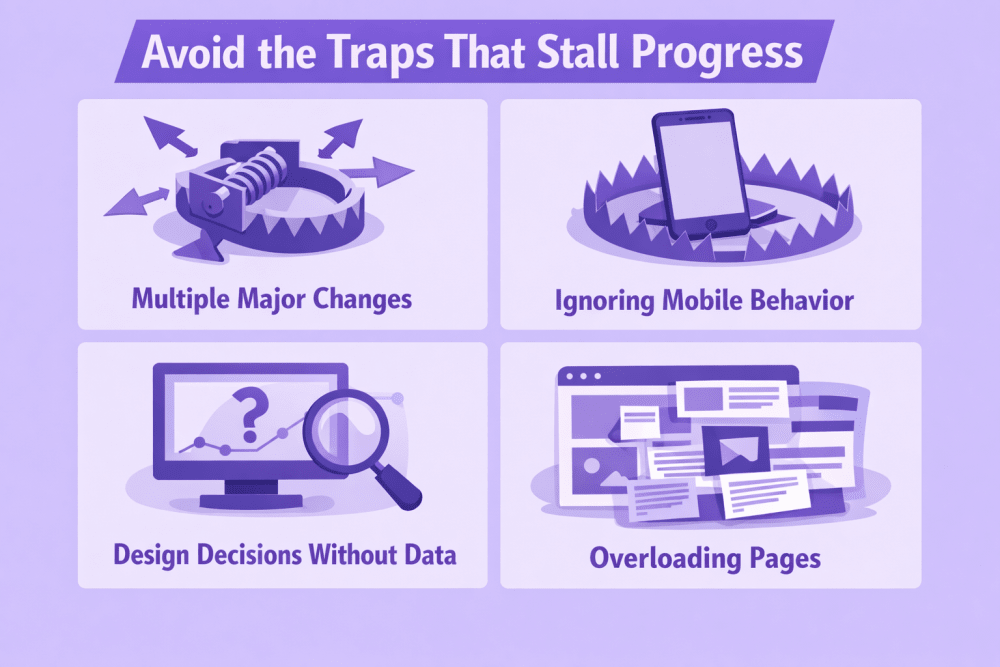
The quickest way to mess with a strong ad campaign? Inventory issues that should’ve been caught before shipping. You print the labels, send the boxes, and hope for the best – but small prep errors can spiral into delays, stockouts, and wasted spend. Most of it starts early. Here’s what to watch for:

  • Mislabeled units or missing barcodes: Amazon needs clean, scannable barcodes. If even one unit shows up with the wrong label (or none at all), the whole box might get flagged. Use Amazon-approved labeling or have Amazon do it for you.
  • Wrong product, right SKU: You entered the correct SKU in the shipping plan – but the actual item doesn’t match. Double check every variation before you seal the box. Sizes, colors, and bundles get mixed up more than you’d think.
  • Under-shipping or over-shipping: If you say you’re sending 50 units and only send 48 (or 52), the receiving process stalls. Stick to exact counts. If you’re using a distributor, make sure they’re aligned on quantity and cutoff dates.
  • Inaccurate box content details: Box-level information isn’t optional – it’s how Amazon knows what’s in each box before opening it. Skip this step, and your shipment will get slowed down at the dock.
  • Damaged packaging or unapproved materials: Avoid shrink wrap confusion, fragile items without bubble wrap, or loose units in oversized boxes. Amazon expects specific prep depending on product type. Cut corners here and you’ll pay with delays – or worse, removals.
  • Wrong fulfillment center: If you manually change the ship-to address or override Amazon’s suggested locations, expect pushback. It can lead to refusals or split shipments that delay check-in.

Fixing these things after the fact is slow, expensive, and usually comes with a support case. Catching them early is a workflow issue – and a visibility issue. If your system doesn’t track this stuff clearly, you’re just hoping for the best. That’s not a strategy.


When the Numbers Don’t Match: How to Handle FBA Shipment Discrepancies

Sometimes Amazon says they received fewer units than you sent. Or they log an item you never packed. It’s frustrating – especially when your inventory, rankings, or ad campaigns are tied to those missing products. But it’s fixable. The key is knowing where to look, what to click, and when to step in.

Start by opening the shipment in Seller Central and heading to the Contents tab. You’ll see expected vs. received units side by side. Hover over the numbers to check details. If the shipment is marked “Closed” and there’s still a mismatch, look for the Action Required dropdown – that’s where you start a reconciliation.

Amazon might ask for proof of shipment, invoices, or tracking docs. Upload what you’ve got and submit the case. After that, watch for updates under Case Submitted – and follow up if it stalls. This part isn’t fun, but if your margins depend on it, don’t wait it out. Track it like you track your campaigns.


Pro Tips to Make Your FBA Tracking Actually Work for You

If you’re treating shipment tracking like a background task, you’re already behind. The most effective sellers use it as an early warning system – a way to flag risks before they impact revenue. These aren’t hacks. They’re small habits that shift you from reactive to proactive. Here’s how to sharpen your tracking process:

  • Check the Shipping Queue daily – even if nothing’s “wrong”: Stalls usually show up in status changes. Catching a shipment stuck in “Delivered” before it turns into a support case saves time and inventory headaches.
  • Set internal deadlines earlier than Amazon’s window: Don’t rely on Amazon’s check-in timeframe. Build buffer time into your ops calendar so campaigns don’t go live before stock is actually sellable.
  • Tag shipments tied to high-performing SKUs: If an inbound box contains your top sellers, track it like a campaign. These shipments deserve more attention than your slow-moving units.
  • Pair shipment tracking with ad pacing: If stock is running late, slow down spend. Otherwise, you risk pushing traffic to products that aren’t even available – and burning budget with nothing to show for it.
  • Keep your prep routine locked in: Labeling errors and missing box content info are still the top reasons shipments get delayed. Standardize your packing process – or outsource it if needed.
  • Document everything – even when it’s boring: Save tracking numbers, shipment plans, and prep invoices. When discrepancies happen (and they will), the fastest resolution comes from being organized, not right.

Smart tracking isn’t about watching every box. It’s about setting up enough visibility so you only have to step in when it matters.


Conclusion

FBA tracking isn’t about obsessing over where every box is at all times. It’s about having enough visibility to spot delays before they become stockouts, to fix small prep issues before they become expensive support cases, and to understand how fulfillment speed affects everything else – including your ad performance.

You don’t have to be perfect. But the sellers who grow the fastest usually aren’t the ones guessing. They’re the ones watching signals early, tying operations to results, and making quiet adjustments before problems hit the surface. Shipments are part of your system. Track them like they matter – because they do.


FAQ

1. How often should I check my Shipping Queue in Seller Central?

If you’re shipping regularly, once a day is enough. It only takes a minute to spot a stalled status or a delayed check-in – and catching it early means fewer problems later.

2. Why does my shipment say “Delivered” but nothing is being received?

“Delivered” just means it reached the fulfillment center, not that anyone’s touched it yet. It can sit there for a few days (or longer during peak weeks) before it’s checked in.

3. Can I start a reconciliation if the shipment isn’t marked “Closed”?

Nope. You’ll have to wait until Amazon officially closes the shipment. That’s when the “Action Required” dropdown becomes available, and that’s your signal to start the process.

4. What if I accidentally sent the wrong number of units?

Be honest during reconciliation. If you over- or under-shipped, select the matching option and upload whatever proof you have. Trying to fake it rarely works out.

BFCM 2026 Strategy Guide: How to Prepare Your Amazon Store for Peak Traffic, Sales, and Pressure

Black Friday and Cyber Monday come with more than just higher traffic – they bring pressure, expectations, and a ticking clock. Inventory needs to be in place, campaigns polished, pages tested, and tools ready to catch what breaks before it breaks you. The upside? It’s also the moment when well-prepared sellers pull ahead – not with gimmicks, but with solid execution. Here’s how to set up, scale, and stay calm through it.


What Makes BFCM 2026 Different (and What Hasn’t Changed)

Some things stay the same – BFCM still delivers the year’s highest traffic spikes, shortest buyer attention spans, and most aggressive pricing. But 2026 is showing new signs of maturity. Shoppers are earlier. Ads are pricier. And backend mistakes get noticed faster. Here’s what’s shifted – and what sellers still need to get right, regardless of the year:

  • The season starts earlier: Promotions don’t wait for Friday anymore. Many brands launch discounts two or three weeks ahead, which means customers are primed – but also pickier.
  • Mobile is the default: The vast majority of shopping happens on phones now. If your product page stutters or your filters feel clunky on mobile, that’s game over.
  • Ad spend is up, but so is noise: CPCs are climbing, especially on high-volume keywords. The winners are the ones who track what’s actually working – and shut off what’s not.
  • AI is doing more heavy lifting: From dynamic pricing to predictive targeting, AI isn’t just a trend – it’s shaping campaigns in real time. But if your data’s a mess, the outputs won’t save you.
  • Performance still wins: Pages that load fast, sites that don’t break, inventory that doesn’t run out – none of that’s new, but it’s still what separates solid sellers from scattered ones.
  • Customer trust is fragile: Confusing discounts, broken links, or delayed shipping can burn a new buyer for good. Clean execution matters more than ever.

BFCM doesn’t give second chances. What changed in 2026 is that there’s less room to recover mid-flight. Smart prep is still the edge – just more so.


Plan Your BFCM 2026 Strategy Early

The sooner you start planning, the fewer surprises you’ll have to manage later. That applies to everything – discounts, inventory, landing pages, even support shifts. Once the sale starts, the last thing you want is to be fixing broken links or scrambling to restock a product you already advertised. The prep window is now, not mid-November.

Begin with your promo structure. Which products are you featuring? Are you offering a straight discount, bundle, or tiered deal? Set clear dates and test every rule ahead of time. A single conflicting code can wreck a margin or break the checkout flow entirely. It’s small stuff – until it’s not.

And don’t overlook the ripple effect. If your ad team builds campaigns without knowing what’s in stock, or your pages don’t reflect the live offers, it’s friction for the shopper and missed conversions for you. When planning starts early, coordination gets easier, and the whole system runs cleaner.


Smarter Campaigns, Less Waste: WisePPC for BFCM Prep

When BFCM traffic spikes, what usually breaks isn’t the offer – it’s the structure behind it. Sellers end up flying blind mid-campaign, toggling between reports, unsure what’s actually driving performance. That’s where visibility starts to matter more than ambition.

At WisePPC, we built the platform specifically to give sellers control before the pressure hits. You can see how ads impact both paid and organic sales, adjust bids without leaving your dashboard, and compare performance across key metrics without exporting a single file. We separate real signals from noise – so when it’s time to scale, you’re not guessing. Campaigns, placements, even keyword-level trends – everything’s centralized and built for speed.

We also stay connected across channels. You’ll find us on Facebook, Instagram, and LinkedIn, where we share platform tips, updates, and practical ways to squeeze more clarity out of your data. Whether you’re prepping for BFCM or reviewing what worked after, we’re here to help you run smarter, not just louder.


Prepare Your Amazon Storefront and Listings

You don’t need a full redesign for BFCM – but everything the shopper sees should be cleaned up, synced up, and built to handle pressure. The goal is simple: no confusion, no dead ends, and no extra clicks between curiosity and purchase. Here’s where to focus.


1. Check the Basics First

Make sure every product you plan to promote is fully updated: titles, images, bullet points, and pricing. If your listing was last edited six months ago, it probably needs a refresh. Fix any inconsistencies across variants – size, color, price – and double-check inventory is linked to the correct ASINs. Out-of-date listings don’t just look sloppy – they drive bounce.


2. Optimize for Mobile

Most buyers are shopping from their phones. If your A+ Content doesn’t stack well or your images take too long to load, they’re gone before the carousel even scrolls. Stick to clean layouts, clear images, and short-form copy that works on a 6-inch screen. If something feels clunky on mobile, assume it costs you sales.


3. Use Your Brand Store Wisely

Your Amazon Brand Store should feel like a calm, well-organized landing zone – not a homepage crammed with everything at once. During BFCM, shoppers don’t have time to hunt. Create a separate BFCM collection page or highlight deal categories up top. The layout doesn’t need to impress. It needs to help people find what they’re looking for, fast.


4. Sync Creative and Campaigns

If you’re running ads to a product or Brand Store page, it needs to match what the shopper expects. Use consistent language, pricing, and visuals across your creative. A banner saying “25% off” needs to be reflected immediately on the page – not buried in the fine print. Every mismatch adds friction. And BFCM traffic isn’t patient.

Get this part right, and your backend work – campaign structure, budgets, bids – actually has a chance to convert. Get it wrong, and you’ll be paying for clicks that bounce.


Technical Readiness Checklist (Based on FPWD)

A great BFCM offer won’t matter if your site crashes or your promo code doesn’t fire. These are the details that don’t show up in campaign reports – but they’re exactly what sink conversions when traffic spikes. Here’s a no-fluff checklist to pressure-test your setup before it’s too late:

  • Run a full storefront audit: Check page load speed and performance metrics. Remove old scripts and apps that don’t serve a clear purpose. Clean setups move faster, crash less, and convert better.
  • Test discount logic ahead of time: Trial your promotions like a customer would – from landing page to checkout. Watch for overlapping codes, broken timers, and anything that sounds good but doesn’t apply cleanly.
  • Review all active apps and extensions: Some third-party tools inject heavy scripts or conflict with recent platform updates. If it’s not helping you convert or fulfill, consider removing it for the season.
  • Confirm payment and certificate validity: Expired SSLs or broken payment credentials can quietly block sales. Recheck domain renewals, Apple Pay certs, Stripe/Shopify keys – the invisible stuff that has very visible consequences.
  • Don’t launch updates last minute: Any theme changes, new app installs, or DNS edits should happen well before the sale. Deploying changes on BFCM weekend is a gamble you don’t need.
  • Stress-test integrations under load: If you’re syncing with CRMs, custom APIs, or fulfillment partners, simulate high-volume flows. Missed webhook calls and rate-limit errors don’t show up until the rush hits.
  • Track real conversions, not test noise: Make sure analytics filters out bots and staging data. If you’re feeding AI systems or dashboards with junk, the recommendations won’t help – and might mislead.

This is the stuff people skip. But it’s what keeps the lights on when orders start stacking up. Clean, predictable systems beat last-minute scrambles – every single time.


Stay in Stock, Ship on Time: Smart Inventory Moves for BFCM

Running out of your best-selling item on Day 2 of BFCM isn’t just lost revenue – it’s momentum you won’t get back. Once shoppers move on, they usually don’t circle back. That’s why inventory planning isn’t just about stocking up – it’s about forecasting demand, watching lead times, and knowing what can break if things move faster than expected.

Start with your historicals. What sold last year? What trended upward last quarter? Use that data to build a reorder strategy that doesn’t lean on guesswork. If you’re using FBA, check deadlines early and build in buffer time for delays. And if you’re fulfilling yourself, make sure your packaging, labels, and team can scale under pressure – because same-day pickups won’t wait for a print queue.

Also worth doing: spot-check your listings for stock sync issues. If you’re using third-party tools or syncing across channels, make sure quantity tracking is live and stable. A product that shows “In Stock” but isn’t actually available is one of the fastest ways to kill trust during high-volume weeks. Clean inventory data keeps things moving and helps your ad spend land where it should – on products that can actually ship.


BFCM Campaign Execution: Ads, Coupons, and Urgency

Once the prep is done, it’s time to go live – and that’s where timing, clarity, and pressure all start working together. Your campaigns don’t need to be flashy. They need to work, load fast, and land the message before the scroll gets swiped away. Here’s how to approach it.


Build Ad Campaigns That Don’t Waste Spend

Start with your high-intent products and work outward. Don’t spread budget across your full catalog unless you’ve got the data to back it. Pull in performance metrics from past sales cycles – if certain targets ate spend and didn’t convert last year, cut them loose.

Track ACOS, CTR, and blended ROAS in real time. Adjust in bulk where needed, pause underperformers fast, and don’t get sentimental about low-volume SKUs during a peak week.


Use Coupons and Deals with a Clear Hook

Coupons, Lightning Deals, and Prime Exclusive Discounts all work – if shoppers can see the value right away. Keep it clean: percentage off, stackable if needed, and visible in the first two lines of the product detail page. Avoid promo copy that makes people hunt for the actual offer.

Also, test your discount logic ahead of time. A misfiring coupon on Black Friday will not be forgiven.


Don’t Fake Urgency – Use It Where It Helps

Urgency tools like countdown timers, “limited stock” labels, and flash deal overlays still work – but only when they’re honest and minimal. If everything’s urgent, nothing is. Use these tactics on your key deals or seasonal bundles.

And make sure they’re synced across your campaigns. If the ad says “Ends in 2 hours,” the landing page better match. Shoppers notice. So does the algorithm.

Execution is what turns clicks into orders. You don’t need dozens of campaigns – you need a few that are sharp, tested, and monitored in real time. Let the metrics guide what stays running and what gets turned off. Keep the pressure where it counts.


Post-BFCM Follow-Up: Don’t Waste the Momentum

BFCM might be over, but the real value often comes after the rush. You’ve got fresh traffic, new buyers, and data that’s still warm. What you do next decides whether that spike was a one-off or the start of repeatable growth. Here’s how to keep the momentum rolling:

  • Retarget the right segments: Not every buyer needs a full-funnel campaign. Split audiences by behavior – first-time customers, high spenders, coupon users – and build tailored follow-ups that actually make sense.
  • Thank customers like a human would: A simple follow-up email with clear order info, delivery expectations, and maybe a small bonus offer builds trust. If they had a good experience, they’re more likely to come back before Q4 ends.
  • Check what actually worked: Run a clean post-mortem. Which campaigns drove revenue, not just clicks? What offers converted best? Where did inventory fall short? Use this data to adjust the rest of your holiday strategy – not just next year’s.
  • Restock fast – but smart: If something sold out during BFCM, check whether it was promo-driven or truly high-demand. Reordering just because it moved quickly can backfire if the volume came from a one-time discount.
  • Keep ad pressure on top performers: Don’t kill your campaigns too early. If a product performed well and inventory’s solid, let the ads keep running into December – especially for giftable or winter-relevant items.
  • Clean up your backend: Deactivate expired promos, archive BFCM-specific creative, and check your integrations. A clean system now avoids headaches when Q1 hits and you’re already thinking about spring.

You did the hard part – now it’s about using that spike to shape smarter decisions going forward. Don’t just close the tab and move on. There’s still revenue on the table.


Conclusion

BFCM doesn’t reward chaos – it rewards preparation that feels invisible when it works. Clean listings, synced campaigns, tested flows, and decisions grounded in real data. That’s what gives sellers breathing room during the rush and clarity after it. The brands that win aren’t always the loudest – they’re the ones that know what’s working, why it’s working, and when to pivot.

If you’ve done the work – planned early, kept your systems tight, and tracked the right signals – the weekend won’t feel like a scramble. It’ll feel like execution. And that’s when growth starts to feel repeatable.


FAQ

1. How early should I start preparing for BFCM?

Honestly, as early as Q3. Good campaigns take time to plan and test. Inventory planning and promos should be locked in by early November at the latest.

2. Do I really need a Brand Store for BFCM?

You don’t need it, but if you’re brand registered, it’s one of the easiest ways to centralize your offers and give shoppers a cleaner path to browse. Just keep it focused – don’t overload it.

3. How do I know if my ads are actually driving profit?

Track TACOS and blended ROAS, not just clicks or ACOS. You need visibility into how advertising impacts total revenue, including organic sales. That broader view is what shows whether your campaigns are scaling profitably or just increasing spend.

4. What if I don’t use FBA?

You can still win BFCM, but fulfillment becomes a bigger variable. Make sure your logistics are airtight. Buyers will bounce if delivery estimates look shaky.

5. Should I pause campaigns after BFCM ends?

Not necessarily. If certain products are still converting and inventory is solid, keep them running. Just shift the messaging – urgency might drop, but intent often lingers.

How to A/B Test Your Products the Right Way

A/B testing sounds technical at first, but at its core it is simply a way to stop guessing and start learning from real customer behavior. Instead of changing something and hoping it works, you compare two versions and let the data tell you what actually improves performance. Sometimes the difference is obvious. Other times the results surprise you, and that is usually where the real insight lives.

For product teams and sellers, testing becomes less about chasing quick wins and more about building confidence in decisions. A small change to an image, title, or message can shift how people respond, but without testing it is almost impossible to know why. A structured A/B testing approach helps reduce risk, uncover patterns in customer behavior, and gradually improve results over time without disrupting what already works.


What A/B Testing Really Means in Practice

In everyday work, A/B testing is less complicated than it sounds. At its simplest, it is a controlled experiment designed to answer one question: which version works better for real users. Instead of changing something for everyone at once, you create two versions of the same element and split your audience between them. One group sees the original version, often called the control, while the other sees a modified version, known as the variant. Everything else stays the same so that the impact of the single change can be observed clearly.

What makes this approach reliable is that it removes opinion from the process. Teams often make decisions based on experience, preferences, or internal discussions, but customers do not always respond the way we expect. A product image that looks cleaner to a designer might feel less trustworthy to a buyer. A shorter description might seem easier to read but leave important questions unanswered. A/B testing replaces assumptions with observable behavior. Users vote through their actions rather than their feedback.

Another important detail is that A/B testing is not about guessing the winner in advance. It is about creating a fair comparison. Traffic is usually divided randomly so that each version is exposed to similar types of users. Over time, patterns emerge. If one version consistently leads to more clicks, purchases, or engagement, the difference is unlikely to be accidental. That is when teams can make changes with confidence instead of hope.


Why Product A/B Testing Matters More Than Ever

Products no longer compete only on features or price. They compete on clarity, trust, and how quickly users understand value. In an environment where customer attention is short and expectations change constantly, small improvements can make a noticeable difference, which is exactly why structured testing has become essential rather than optional.


Changing Digital Environments Require Continuous Validation

Digital environments do not stand still. Customer expectations shift quickly, competitors adapt, and platforms evolve. A product page that performed well last year may quietly lose effectiveness without anyone noticing immediately. Small declines compound over time, and performance rarely drops all at once. More often, it fades gradually as user expectations change. A/B testing helps detect and correct these slow shifts before they become larger problems.


A/B Testing Prevents Stagnation and Encourages Progress

A/B testing acts as a safeguard against stagnation. Instead of waiting for performance drops, teams actively explore improvements through controlled experiments. This proactive approach creates momentum because optimization becomes part of regular work rather than an occasional redesign effort. Even minor gains matter. When small improvements are applied consistently across product images, messaging, layout, or pricing presentation, the cumulative effect can be significant over time.


Data Reduces Friction in Team Decision Making

There is also a psychological benefit inside teams that often goes unnoticed. Testing reduces friction in decision making. Discussions move away from personal taste and toward measurable outcomes. When data replaces debate, progress tends to accelerate because decisions no longer depend on hierarchy or opinion. Teams spend less time arguing about direction and more time refining what actually works for users.


What You Should Test First

When people first discover A/B testing, there is often a temptation to test everything at once. Colors, fonts, layouts, messaging, imagery. The result is usually noise rather than insight. Prioritization matters more than experimentation volume.

A good starting point is to look at moments where customers make decisions. These are points where uncertainty or hesitation can stop progress. The closer an element is to that decision moment, the higher its testing value.


High Impact Elements to Consider

  • Main product images or hero visuals
  • Product titles and value propositions
  • Pricing presentation or discounts
  • Call to action wording or placement
  • Key benefit descriptions
  • Social proof such as reviews or testimonials

These elements shape first impressions and influence trust. Visual polish matters, but clarity matters more. Customers need to understand what the product is, why it matters, and what to do next. Testing helps refine that path.


WisePPC: Advanced Analytics to Guide Your Product A/B Testing Strategy

At WisePPC, we see A/B testing as a natural extension of analytics. Testing only works when you clearly understand what is happening before and after a change. That is why our platform focuses on giving sellers full visibility into both advertising and sales performance in one place. When you run experiments on product listings, pricing, or campaign structure, you need to see how those changes affect real outcomes, not just surface metrics. By combining historical data, real time performance tracking, and detailed segmentation, we help identify whether a variation genuinely improves results or simply shifts numbers temporarily.

In practice, this means we allow teams to compare performance across campaigns, placements, and time periods without losing context. Long term historical data helps avoid common testing mistakes, such as judging results too early or missing seasonal patterns. Granular analytics and filtering make it easier to isolate what changed and why, while bulk actions allow quick adjustments once a winning version is identified. Instead of guessing which version performs better, we focus on helping sellers connect testing decisions with measurable business impact, whether that is improved ROAS, reduced wasted ad spend, or clearer understanding of what actually drives conversions.


How to Run an A/B Test Without Guesswork

A/B testing works best when it follows a clear sequence. Many teams jump straight into creating variations because that feels like progress. In reality, most failed tests happen before the experiment even starts. The difference between useful results and confusing data usually comes down to preparation, clarity, and patience.

This section walks through the full process in a practical way. Each step builds on the previous one, so skipping ahead often creates more problems later.


Step 1 – Define What Success Actually Means

Before changing anything, it is important to understand why the test exists in the first place. A/B testing without a clear objective turns into activity without direction. You might end up with data, but no real answer.

A strong testing goal connects directly to user behavior. Instead of vague intentions like improving performance, the goal should describe a specific outcome you want to influence. For example, more completed purchases, higher engagement with product details, or fewer users dropping off before checkout. 

What a Clear Goal Usually Answers

  • What user action are we trying to improve
  • Where in the journey the problem occurs
  • How success will be measured

When goals are clear, analysis becomes simpler later. You already know which metric matters most and why you are measuring it.

Examples of Focused Testing Goals

  • Increase product purchase rate by improving product clarity
  • Improve click through rate on the primary call to action
  • Reduce cart abandonment during checkout
  • Increase engagement with key product information

The clearer the goal, the easier it becomes to design a meaningful test.


Step 2 – Turn Observations Into a Testable Hypothesis

Once the goal is defined, the next step is explaining why a change might work in the first place. This is where many tests either become meaningful or turn into random experimentation. A hypothesis gives the test direction. It connects what you are seeing in the data with a specific change you believe could improve the outcome.

A hypothesis is not a guess or a creative idea. It is a structured assumption built on observation. Something in the current experience is not working as expected, and the hypothesis explains what might be causing that friction. For example, if users consistently leave a product page within a few seconds, the problem may not be the price or the design. It could simply be that visitors do not immediately understand why the product matters to them. In that case, the hypothesis might be that improving the clarity of the headline or opening message will help users stay longer and engage more deeply.

The most useful hypotheses usually come from patterns rather than opinions. Customer reviews often reveal confusion or missing information. Support questions highlight areas where expectations do not match reality. Analytics can show where users hesitate or abandon the process altogether. Even comparing high performing products with weaker ones can reveal differences in messaging or presentation that are worth testing. These signals help turn testing into problem solving instead of experimentation for its own sake. Keeping the hypothesis focused is important. Each test should aim to answer one meaningful question. When the scope stays narrow, the result becomes easier to interpret, and the insight gained can be applied confidently to future improvements.

Step 3 – Create Variants That Isolate the Change

This is the stage where many A/B tests quietly lose their value. When several improvements feel obvious, the natural instinct is to update everything at once. A new image, rewritten copy, adjusted layout, maybe even pricing changes. The problem is that once multiple elements change together, the results stop being clear. If performance improves, you cannot confidently explain why it happened.

A well structured A/B test keeps things intentionally simple. The purpose is not to redesign the entire experience but to isolate one meaningful difference between two versions. When only one variable changes, cause and effect become visible. The outcome becomes useful knowledge rather than a lucky result.

Control Version – the Current Product Page or Listing

The control version is the existing version that users already see. It serves as the baseline for comparison because its performance is already known. Nothing is changed here. Keeping the control untouched ensures that any difference in performance comes from the new variation rather than external factors.

Variant Version – Identical Except for One Intentional Change

The variant version introduces a single, deliberate adjustment based on the hypothesis. This could be a different product image, revised headline wording, or a new placement for social proof. Everything else remains the same so the impact of that one change can be measured accurately. Maintaining this consistency protects the integrity of the test and makes the result easier to interpret.

When variants are created this way, the insight gained becomes reusable. A successful change can often be applied across other products or pages because you understand what influenced user behavior, not just that performance increased.


Step 4 – Let the Test Run Long Enough to Be Trustworthy

One of the hardest parts of A/B testing is waiting. Early data often looks convincing, especially when one version starts outperforming the other quickly. Unfortunately, early trends are often temporary.

User behavior changes depending on timing, traffic sources, and even day of the week. A version that performs well during a short window may not perform the same way over time.

Reasons tests need time:

  • Weekday and weekend behavior differs
  • New and returning visitors behave differently
  • Campaign traffic fluctuates
  • Random variation can create short term spikes

Ending a test too early introduces risk. A decision made on incomplete data can lock in a weaker version and undo previous improvements. Patience protects against this.


Step 5 – Look Beyond a Single Metric

It is natural to focus on the primary metric tied to the goal. However, real performance is rarely one dimensional. Improvements in one area can create unexpected tradeoffs elsewhere.

For example, a more aggressive message might increase clicks while reducing purchase quality. Engagement rises, but long term value drops. Looking at supporting metrics helps reveal these situations before changes are rolled out broadly.

Metrics Worth Reviewing Alongside the Main Goal

  • Conversion rate
  • Revenue per visitor
  • Add to cart behavior
  • Time spent on page
  • Bounce or exit rates
  • Customer quality indicators

A balanced analysis considers both engagement signals and business outcomes. The best performing version is not always the one with the highest clicks. It is the one that supports sustainable results.


Common A/B Testing Mistakes to Avoid

Most A/B testing problems do not come from bad intentions or lack of effort. They usually appear when teams move too quickly or try to force conclusions before the data is ready. Testing feels simple on the surface, but small mistakes in setup or interpretation can lead to decisions that quietly hurt performance instead of improving it. Understanding where things typically go wrong helps keep experiments useful and reliable.


Testing Too Many Changes at Once

This is probably the most common issue, especially when teams are eager to improve results quickly. Several elements look weak, so everything gets updated at the same time. The page looks better, performance changes, and everyone assumes the test worked. The problem is that no one knows which change actually made the difference.

When multiple variables move together, the result becomes impossible to learn from. You may accidentally keep changes that hurt performance while removing the ones that helped. Over time, this creates inconsistent results and makes future testing harder.

A/B testing works best when each experiment answers one clear question. One change, one comparison, one conclusion.


Ending Tests Too Early

Early data can be convincing. A variant shows improvement after a few days and the temptation to declare a winner becomes strong. The issue is that early results are often unstable. Traffic patterns change throughout the week, campaigns shift, and user behavior varies depending on timing.

Stopping a test too soon increases the chance of choosing a false winner. What looks like improvement may simply be short term fluctuation. Allowing enough time for behavior to normalize helps ensure the result reflects real performance rather than coincidence.

Patience here is not wasted time. It protects you from rolling out changes that later need to be reversed.

Optimizing for the Wrong Metric

Not every improvement is actually an improvement. Sometimes a test increases activity without improving outcomes that matter to the business. For example, a more aggressive message might increase clicks while attracting less serious buyers, leading to lower overall revenue or retention.

This usually happens when teams focus on easy metrics instead of meaningful ones. Metrics should always connect back to the real goal of the product or campaign.

Common examples include:

  • Increasing click through rate while purchase rate declines
  • Improving add to cart numbers without improving completed orders
  • Reducing form friction but lowering lead quality
  • Increasing engagement time without increasing conversions

Looking at supporting metrics alongside the primary goal helps prevent these situations.


Assuming One Result Fits Every Audience

Another frequent mistake is assuming that one winning version works equally well for everyone. In reality, different audience segments often behave differently. New visitors may need more explanation, while returning customers prefer speed and familiarity. Mobile users may respond differently than desktop users.

Ignoring these differences can hide valuable insights. Sometimes a losing variant overall performs exceptionally well for a specific segment. Recognizing these patterns can lead to more targeted improvements instead of one universal change.


Conclusion

A/B testing is often described as a tactic, but in practice it becomes a way of thinking about improvement. Instead of making changes based on instinct or internal debate, you give real users a voice in the decision. Sometimes the results confirm what you expected. Other times they challenge assumptions you did not even realize you were making. Both outcomes move the product forward.

What matters most is consistency. One test will not transform performance overnight, and that is perfectly normal. The real value appears over time as small insights accumulate. You begin to understand how customers interpret your messaging, what builds confidence, and where friction appears in the buying process. Decisions become calmer, changes become safer, and progress becomes more predictable.

If there is one thing worth remembering, it is that testing is not about chasing perfection. Products evolve, audiences change, and new ideas always appear. A/B testing simply gives you a reliable way to adapt without guessing. Start with a clear question, test it honestly, and let the results guide the next step.


FAQ

How long should an A/B test run before choosing a winner?

There is no universal timeline because it depends on traffic volume and the number of conversions generated. In general, a test should run long enough to capture normal user behavior across different days and traffic patterns. Ending a test too early often leads to misleading conclusions, so it is better to wait until results stabilize rather than reacting to early trends.

Can small changes really make a difference in A/B testing?

Yes, and this is often where surprising improvements come from. A different image, clearer headline, or better placement of key information can change how quickly users understand a product. These changes may look minor internally but can significantly affect how customers make decisions.

What should I test first if I am new to A/B testing?

It usually makes sense to start with elements that directly influence buying decisions. Product images, value propositions, and calls to action tend to have a stronger impact than purely visual adjustments. Testing areas closest to conversion helps produce clearer results early on.

Is it possible for an A/B test to fail?

Absolutely, and that does not mean the test was wasted. A result that shows no improvement still provides information. It tells you that a particular assumption was incorrect, which prevents larger mistakes later. Over time, these learnings help refine future experiments.

Do I need special tools to run A/B tests effectively?

Tools help with tracking and analysis, especially as testing becomes more frequent, but the core idea does not depend on complex software. What matters most is having clear goals, isolating changes properly, and analyzing results carefully. Technology supports the process, but discipline makes it work.

How Amazon FBM Shipping Works: A Practical Guide for Sellers

Fulfilled by Merchant, usually called FBM, sounds simple at first. You sell the product, you ship the product. In reality, there is a bit more going on behind the scenes. FBM gives sellers control over how orders move from warehouse to customer, but that control also means taking responsibility for timing, costs, and consistency.

For many sellers, FBM is less about doing everything manually and more about building a process that works reliably day after day. When shipping runs smoothly, customers rarely notice it. When it does not, it quickly affects reviews, metrics, and profitability. Understanding how FBM shipping actually works helps sellers avoid common friction points and make smarter decisions about inventory, carriers, and delivery promises from the start.


What Amazon FBM Shipping Really Means

Amazon FBM shipping, or Fulfilled by Merchant shipping, is a fulfillment method where the seller manages the entire shipping process after a sale is made on Amazon. The product is listed and sold through Amazon’s marketplace, but inventory is stored outside Amazon’s warehouses. Once an order is placed, the seller is responsible for picking, packing, shipping, providing tracking information, and handling returns or delivery-related questions. Amazon facilitates the transaction and customer access, but the physical movement of the product remains under the seller’s control.

In practice, this means shipping becomes part of daily operations rather than a service handled in the background. Delivery speed, packaging quality, and accurate shipping promises directly affect seller performance metrics and customer satisfaction. FBM shipping requires sellers to align their internal processes with Amazon’s expectations, ensuring orders are shipped on time, tracking is provided, and delivery dates shown to customers match real transit times. When managed well, it allows sellers to maintain flexibility and control while still operating within Amazon’s ecosystem.

Control Comes With Trade-Offs

The reason many sellers choose FBM is control. They decide how products are packed, how fast orders move, and which carriers are used. This is especially valuable for businesses that already have logistics experience or products that need special handling.

At the same time, control means exposure to operational mistakes. A missed pickup or inaccurate delivery estimate does not stay hidden. Amazon tracks performance closely, and small issues can accumulate quickly.

Where FBM Fits Best

FBM tends to make the most sense in situations where flexibility matters more than automation. For example:

  • Products that are oversized or expensive to store long term
  • Items that sell slowly but consistently
  • Products that need customization before shipping
  • Brands that want direct control over packaging or inserts

The important distinction is that FBM is not simply a cheaper path. It is a fulfillment model built around ownership of logistics.


The FBM Shipping Workflow From Order to Delivery

From the customer’s perspective, ordering from an FBM seller looks identical to ordering from FBA. Behind the scenes, however, the process is entirely different. Every order passes through several stages, and delays at any one of them affect delivery performance.


Step One: Order Appears in Seller Central

After payment is confirmed, the order moves into the seller’s queue. This is where timing begins to matter. Amazon measures how quickly sellers confirm shipments, so even early-stage processing affects performance metrics.

At this moment, sellers usually check three things:

  • Whether inventory is actually available
  • Whether the shipping address requires special handling
  • Whether the promised delivery date is realistic based on current workload

This stage often becomes automated later, but in smaller operations it is still manual.


Step Two: Preparing the Shipment

Picking and packing sounds routine, but it is where most operational inefficiencies hide. Packaging that is too large increases shipping costs. Packaging that is too light increases damage rates. Both problems eventually affect profitability.

Experienced FBM sellers often standardize packaging sizes early. Instead of choosing boxes order by order, they create predefined packaging options that match common product dimensions. This reduces decision time and keeps shipping costs predictable.


Step Three: Carrier Selection and Dispatch

Once packed, the shipment moves into the carrier network. FBM allows sellers to choose carriers freely, which is both useful and risky. Cheaper options sometimes come with inconsistent delivery times, and Amazon’s performance metrics do not consider price when evaluating late deliveries.

A reliable carrier with slightly higher cost often produces better long-term results because it reduces customer complaints and delivery claims.


Step Four: After the Package Leaves

Shipping does not end at dispatch. FBM sellers remain responsible for communication if a delivery is delayed or lost. Customers contact the seller, not Amazon, which means fulfillment and customer support are closely connected.

This is one reason FBM operations often evolve to include tracking monitoring or automated delivery alerts.


How WisePPC Supports Smarter FBM Shipping Decisions

At WisePPC, we look at FBM shipping from a slightly different angle. Shipping performance is rarely just a logistics problem. In many cases, it is connected to advertising efficiency, pricing decisions, and inventory movement. When campaigns scale faster than operations, fulfillment pressure increases. Orders grow in regions where stock is limited, shipping costs rise, and delivery promises become harder to maintain. That is why we focus on giving sellers clear visibility into what actually drives sales and demand before shipping problems appear.

Our platform brings advertising, sales performance, and marketplace data into one place so sellers can see how decisions upstream affect fulfillment downstream. With long-term historical data, granular analytics, and real-time performance tracking, we help identify patterns that influence FBM shipping efficiency. For example, understanding which campaigns drive sales in specific regions helps sellers anticipate shipping demand, adjust inventory placement, and avoid reactive fulfillment decisions. Instead of treating shipping as a separate operational task, we help sellers connect performance data with operational outcomes, making FBM shipping more predictable and easier to scale.


Amazon Tools That Help Simplify FBM Shipping

Managing Fulfilled by Merchant shipping involves more than packing orders and handing them to a carrier. Sellers need to balance delivery speed, shipping costs, operational efficiency, and performance metrics at the same time. As order volume grows, doing everything manually becomes difficult to maintain. Amazon provides several tools and services designed to reduce complexity and make FBM workflows more predictable without removing the seller’s control over fulfillment.

Amazon Buy Shipping, Veeqo, and Amazon Shipping are often used together because each one solves a different part of the process. One focuses on label purchasing and delivery reliability, another helps organize multi-channel fulfillment, and the third expands delivery capability through Amazon’s own carrier network.


Amazon Buy Shipping

Amazon Buy Shipping is a label purchasing system built directly into Seller Central. Instead of arranging shipping outside Amazon, sellers can compare carrier options, purchase labels, and automatically attach tracking information to orders within the same workflow. The main advantage is alignment between shipping methods and Amazon’s delivery expectations, which helps reduce disputes related to late deliveries.

What Buy Shipping Helps With

Buy Shipping is designed to support both cost control and account health by combining carrier access with Amazon’s performance framework.

Key benefits include:

  • Access to pre-negotiated carrier rates that are often lower than retail pricing
  • Ability to connect existing carrier accounts and use negotiated rates
  • Automatic tracking updates sent to customers
  • Bulk label printing for multiple orders at once
  • Integration with major carriers and weekend delivery options

Flexible Delivery and Performance Protection

When sellers purchase labels through Buy Shipping, Amazon recommends shipping methods with strong on-time delivery performance. Orders marked with protection indicators are covered against specific delivery claims, which reduces risk when carriers experience delays. Sellers still have flexibility to choose other methods, but those shipments may not include the same protections.


Veeqo

Veeqo is a shipping and inventory management platform that integrates directly with Amazon Buy Shipping. Its primary role is organization. Sellers managing orders across multiple marketplaces or sales channels often struggle with fragmented workflows, and Veeqo brings those operations into a single interface. Instead of switching between platforms, sellers can manage fulfillment centrally while still benefiting from Amazon’s shipping rates and protections.

How Veeqo Supports FBM Operations

Veeqo focuses on reducing manual work and improving visibility across orders and inventory by bringing fulfillment activities into a single workflow. Instead of managing orders separately across different marketplaces, sellers can view and process them from one dashboard, which helps keep fulfillment organized as volume increases. Inventory levels update in real time across connected platforms, reducing the risk of overselling and helping maintain accurate stock availability.

Workflow Improvements in Practice

Automation plays a large role here. Sellers can create rules that automatically select shipping methods based on destination, product type, or cost thresholds. Inventory updates sync across platforms in real time, reducing overselling and preventing last-minute fulfillment issues. Over time, this reduces manual decision-making and keeps fulfillment consistent as order volume increases.


Amazon Shipping

Amazon Shipping is Amazon’s own carrier service designed to support FBM sellers who want more flexible delivery options while keeping fulfillment under their control. Inventory stays with the seller, but pickup and delivery are handled through Amazon’s logistics network. This allows sellers to offer delivery across more days of the week and meet customer expectations for faster shipping without switching to FBA.

The service supports automated label creation, real-time tracking, and both standard and faster delivery speeds. Sellers can access Amazon Shipping directly through Seller Central, through Veeqo, or through integrated systems, making it easier to include Amazon’s delivery network as part of an existing FBM workflow.

For sellers, the practical advantage is consistency. Using Amazon’s delivery infrastructure can help reduce variability between different carriers, especially during busy periods or seasonal spikes. It also simplifies communication with customers since tracking and delivery updates remain closely connected to Amazon’s system, which helps maintain clear delivery expectations without changing how fulfillment is managed internally.


How to Optimize Your Amazon FBM Shipping Workflow

Improving FBM shipping rarely happens all at once. Most sellers start with a simple setup and gradually refine it as order volume increases and patterns become clearer. The goal is not to add more tools immediately, but to build a workflow that stays reliable under pressure. Optimization usually happens in stages, beginning with a solid foundation, followed by smarter automation, and then ongoing adjustments based on real performance.


Step 1: Build the Foundation First

Before adding tools or automation, the basic setup needs to reflect how your business actually ships orders. This is where many issues start, especially when delivery promises are set too aggressively.

Start by making sure the essentials are configured correctly:

  • Set accurate shipping templates and delivery regions based on real transit times
  • Define handling times that match your daily packing capacity
  • Enable shipping settings automation to generate realistic delivery estimates
  • Use Buy Shipping to simplify label creation and access carrier rates within Seller Central

A stable foundation reduces late shipments and makes later optimization much easier.


Step 2: Introduce Advanced Tools Gradually

Once the basic workflow runs smoothly, additional tools can help remove manual steps and improve efficiency. At this stage, the focus shifts from setup to scalability. Sellers often introduce order management tools that centralize fulfillment across channels, add carrier integrations that expand delivery options, or use multi-location inventory settings to calculate delivery dates from the closest available stock. These additions help reduce errors and allow the shipping process to grow without increasing daily workload.


Step 3: Monitor and Adjust Continuously

Optimization in FBM shipping is ongoing. Even a well-configured system needs regular adjustments as order patterns change.

Key areas to review regularly include:

  • Shipping performance metrics such as on-time delivery and late shipment rates
  • Shipping templates and delivery regions as demand shifts
  • Inventory levels across locations to maintain accurate delivery estimates

When monitoring becomes part of routine operations, small adjustments prevent larger problems and help keep fulfillment both efficient and reliable over time.


When FBM Shipping Makes Sense and What Often Goes Wrong

FBM works best when the fulfillment model matches the nature of the product and the way a business operates. At the same time, many shipping issues appear not because FBM is complicated, but because small operational gaps build up over time. Understanding where FBM fits naturally and where mistakes usually happen helps sellers avoid unnecessary friction.

When FBM Shipping Makes the Most Sense

FBM is often strongest where flexibility is required. Sellers with unusual products or specialized fulfillment needs tend to benefit the most.

Some common situations include:

  • Large or fragile items that incur high FBA fees
  • Products with unpredictable sales volume
  • Handmade or customized products
  • Businesses already running independent logistics

FBM also serves as a useful backup strategy. Many sellers maintain FBM listings alongside FBA inventory to avoid interruptions during stock shortages or peak seasons.


Common Mistakes That Disrupt FBM Shipping

Most FBM shipping problems do not appear suddenly. They usually develop from small inconsistencies that seem harmless at first but eventually affect delivery performance and customer experience.

Unrealistic Handling Times

Setting handling times that are too optimistic is one of the most common issues. Sellers often try to appear faster than competitors, but when order volume increases or unexpected delays occur, shipments go out late. This directly impacts performance metrics and creates avoidable customer complaints.

Inconsistent Packaging Decisions

Changing packaging methods from order to order can increase costs and damage rates. Larger boxes raise shipping expenses, while insufficient protection leads to returns or negative feedback. Standardizing packaging helps maintain predictable costs and reduces fulfillment errors.

Delayed Inventory Updates

Inventory that is not updated in real time creates overselling risks. When an item sells but is no longer available, shipping delays or cancellations follow. Over time, this affects seller reliability and can reduce visibility in search results.

Choosing Carriers Based Only on Price

Lower shipping rates are attractive, but unreliable delivery performance often costs more in the long run. Late deliveries can lead to refunds, negative feedback, or loss of Buy Box eligibility. Reliable delivery tends to produce better results than occasional savings on shipping fees.

FBM rewards consistency more than quick fixes. Small operational improvements applied regularly usually have a greater impact than large changes made occasionally.


Conclusion

Amazon FBM shipping works well when it is treated as a process rather than a task that happens at the end of a sale. The mechanics themselves are not complicated. What makes the difference is how consistently everything runs behind the scenes. Accurate delivery promises, realistic handling times, and reliable shipping choices create a rhythm that customers rarely notice, but they feel the result when orders arrive exactly as expected.

For many sellers, FBM becomes easier over time. The first stage usually involves trial and error, learning how long packing really takes or which carriers perform best for certain regions. After that, small adjustments start to add up. Shipping becomes more predictable, costs become clearer, and fewer problems need urgent fixes. That is usually the point where FBM stops feeling like extra work and starts functioning as part of a stable system.

The biggest advantage of FBM is control, and that control comes with responsibility. Sellers who accept that balance tend to get the most out of it. When fulfillment is organized around reliability instead of speed alone, FBM can support steady growth without forcing businesses into a one size fits all logistics model.


FAQ

What is the main difference between Amazon FBM and FBA shipping?

With FBM, the seller stores inventory and ships orders directly to customers, while Amazon handles storage and delivery in FBA. The marketplace experience looks similar to customers, but the operational responsibility sits with the seller in FBM.

Do FBM sellers need to provide tracking information for every order?

Yes, Amazon expects tracking information for shipped orders. Providing valid tracking helps maintain performance metrics and allows customers to follow their delivery progress, which reduces support requests and disputes.

Can FBM sellers offer fast delivery options?

They can, but it depends on their logistics setup. Faster delivery requires accurate handling times, reliable carriers, and consistent performance. Some sellers also qualify for programs that allow faster delivery promises when performance standards are met.

Is FBM cheaper than FBA?

Not always. FBM can be more cost effective for certain products, especially large or slow moving items, but shipping, labor, and packaging costs need to be considered. The better question is usually which model fits the product and operations better.

Can sellers use both FBM and FBA at the same time?

Yes, many businesses use both methods. Some products are fulfilled through Amazon warehouses while others are shipped directly by the seller. This approach helps maintain flexibility and reduces risk during inventory shortages or peak seasons.

Amazon Express Payout – How to Get Your Money Faster

A lot of Amazon sellers run into the same problem: sales are coming in, but the money takes days to actually reach the bank. That delay makes it harder to buy more inventory, keep ads running, or just know how much cash is really available. Amazon created Express Payout to fix exactly that for some sellers.

With Express Payout, eligible sellers who use Amazon Pay can get their money in about 24 hours instead of waiting up to 5 days for the normal ACH transfer. It even works on weekends. Right now this is only for sellers based in the US.

Let’s break it down clearly.


What Express Payout Actually Is

Normally Amazon sends payouts through the ACH system – that’s the standard bank transfer most people know. It’s safe, but slow. After Amazon starts the payout, the money usually takes up to five days to show up in your account.

Express Payout uses a different setup. Amazon Pay connected directly to many banks, credit unions, and the Visa network. Because of that connection, the money can land in your account (or on a Visa debit card) in roughly 24 hours – even on Saturday or Sunday.

It’s completely optional. You choose whether you want the fast version or stick with the normal slow one.


Who Can Actually Use It

Not every seller qualifies. There are a few clear rules:

  • You must be signed up for Amazon Pay
  • Your bank account has to be with a bank or credit union that’s part of Amazon’s direct network
  • Your business address must be in the continental United States (not in US territories like Puerto Rico or Guam)
  • The payout amount must be $1 million or less at the time of payout initiation. Payouts exceeding $1 million are automatically processed through the standard ACH method

If you meet those four points, you can turn Express Payout on. New sellers who are just starting with Amazon Pay can choose it right away. Sellers who already use Amazon Pay can switch to it whenever they want.


When It Makes Sense to Use It

Express Payout is not useful for every type of seller.

It usually helps more if:

  • Your products sell quickly and you turn inventory over fast
  • You spend heavily on ads and need steady cash to keep campaigns running
  • You restock often and have short time between orders
  • You manage many different products at the same time

On the other hand, if your products move slowly, you only have a few items, or your sales are very steady and predictable, the normal 4-5 day wait probably doesn’t hurt you much.


How to Turn It On: 5 Very Simple Steps

You don’t need to fill out long forms or wait for approval. Everything happens inside Seller Central, and the whole process takes just a few minutes if you’re already set up with Amazon Pay. Below, I’ll walk you through each step in detail so you can get it done without any hassle.


Step 1: Log Into Seller Central

Start by opening your web browser and going to sellercentral.amazon.com. Enter your usual login credentials – the same email and password you use for your Amazon seller account. If you’re new to Amazon Pay entirely, you’ll need to sign up for it first through the Amazon Pay registration page, but for most sellers already using it, this is just a standard login. Once logged in, you’ll see your main dashboard with sales reports, orders, and other account info.


Step 2: Navigate to Deposit Methods

From the dashboard, find the gear icon in the top-right corner – that’s the Settings menu. Click it to open the dropdown options. Look for and select “Account Info” (sometimes listed directly as “Deposit Methods” if visible). This takes you to the section where Amazon manages all your payment and deposit preferences, including where your seller earnings get sent. If you can’t spot it right away, use the search bar at the top of Seller Central – just type “Deposit Methods” and it should jump you straight there.


Step 3: Find Your Current Payout Setting

On the Deposit Methods page, you’ll see your linked bank accounts or other payment options listed. Scroll to the area that shows your current payout method – it will typically say “Standard Payout” or something similar, indicating the default ACH transfer that takes 3-5 days. This is where your default setting is displayed. It’s a good idea to note down or screenshot your current bank details here in case you ever need to revert or troubleshoot later.


Step 4: Switch to Express Payout

In the same section, look for the option labeled “Express Payout” – it often appears as a selectable preference or toggle next to “Standard Payout.” If your account meets the eligibility rules (US-based Amazon Pay merchant, in-network bank, continental US address, and payouts of $1 million or less), this will be available and clickable. Select or switch to “Express Payout.” You might see a brief confirmation prompt or explanation about the 24-hour processing and weekend availability. Amazon will check your linked bank account eligibility automatically; if it’s not in the network, it’ll prompt you to add or verify a supported one.


Step 5: Save and Confirm the Changes

Once you’ve selected Express Payout, scroll to the bottom of the page and click “Save,” “Update,” or the equivalent button to apply the change. The update processes instantly – you’ll usually get an on-screen confirmation message like “Your payout method has been updated to Express Payout” or similar. No further waiting is required. From that point, your next eligible payouts will use the faster 24-hour method.

The change is fully reversible: you can go back to Standard Payout anytime by repeating these steps and switching it off again – no penalties or delays.


Extra Option: Using a Visa Debit Card

If you’d rather receive funds on a debit card instead of a bank account, look in the same Deposit Methods section for the push-to-card or Visa debit card option (sometimes listed separately as “Express Payout (Visa Debit Card)”). You can add a Visa debit card issued by a US financial institution – enter the card number, expiration date, and CVV like any online payment, then select it as your payout destination. Once added and approved during the process, eligible payouts can route directly there, often making funds available even faster for spending. Note that this follows the same overall eligibility rules as the bank transfer version, and you may need to keep an active bank account linked as a fallback for any ineligible payouts. You can switch between bank and card or deactivate anytime through the same page.


Does It Cost Anything?

Right now Express Payout is free for sellers who qualify. No extra fees at all.

Amazon said they might add a small fee (around 50 cents per payout) sometime in the future. If they do, they promise to tell sellers ahead of time. Even then you can turn it off whenever you want and go back to free standard payouts.

  • You must be signed up for Amazon Pay
  • Your bank account has to be with a bank or credit union that’s part of Amazon’s direct network
  • Your business address must be in the continental United States (not in US territories like Puerto Rico or Guam)
  • The payout amount must be $1 million or less at the time of payout initiation. Payouts exceeding $1 million are automatically processed through the standard ACH method

If you meet those four points, you can turn Express Payout on. New sellers who are just starting with Amazon Pay can choose it right away. Sellers who already use Amazon Pay can switch to it whenever they want.


WisePPC: Turning Express Payouts into Continuous PPC Growth

At WisePPC we work with Amazon sellers every single day, and one thing stands out constantly: even when sales look strong in Seller Central, that classic 4–5 day ACH wait can turn good momentum into unnecessary stress. Once someone flips on Express Payout and the money starts landing in roughly 24 hours, we see it as an opening to squeeze more performance out of their advertising.

What we do is simple – we take the new, quicker cash rhythm and feed it directly into the PPC strategy we’re already running for them. We tweak daily budget caps so they no longer have to drop spend while waiting for the old slow transfer. We refresh reorder alerts and safety stock calculations to line up better with when funds actually become available. And most importantly, we help prevent those annoying moments where a campaign that’s finally hitting its stride gets paused or throttled because cash was temporarily short.

The result in many accounts is pretty straightforward: budgets run more evenly through the week, key search terms keep getting impressions without random interruptions, and overall ad efficiency tends to improve a bit because the money is sitting there ready to be used instead of being promised in a few days. It’s not about us magically speeding up payouts (we have zero control over Amazon’s payment system) – it’s about helping sellers react faster to the money that’s already arriving quicker.

If you’re running campaigns with us or thinking about it, just message your account manager. We’ll pull up your current numbers – SKUs, spend patterns, restock cycle – and walk through exactly how the 24-hour payouts could let you adjust pacing, bids or alerts in a way that fits your setup. Quite often it’s only a couple of small, precise changes that start showing up positively after the next few payout rounds.


Why Getting Money in 24 Hours Actually Matters

When money from sales sits in processing for 4–5 days, it creates real cash flow problems for many Amazon sellers. Here are the main ways this delay hits operations:

  • Inventory reordering becomes stressful: especially for fast-selling products. Waiting that long often leads to stockouts or forces sellers to place smaller orders than needed just to preserve cash.
  • Advertising budgets suffer: if you’re running heavy PPC campaigns to protect rankings or drive sales, you need consistent incoming funds. A long delay can force you to pause ads, cut spend, or pull from credit, which directly hurts performance and momentum.
  • Planning gets harder: sellers who manage many different products or restock frequently feel the pain most. Delayed funds make it difficult to predict cash availability and increase reliance on borrowing or credit cards.
  • Overall flexibility decreases: faster access to cash (in about 24 hours, including weekends) makes daily operations smoother and lets you reinvest sales proceeds quickly.

But Express Payout is not a cure-all. If your forecasting is inaccurate, you’re consistently overspending, or your cash management has bigger issues, getting money faster won’t solve those root problems. It delivers real value mostly when you already have decent control over inventory, reorder timing, and advertising spend.


Things to Keep in Mind

These are some practical details that often catch sellers off guard when they first start using Express Payout. Knowing them ahead of time helps avoid surprises and set expectations correctly.


Start Counting the 24 Hours Correctly

Keep in mind that the 24-hour clock starts ticking the exact moment Amazon presses “send” on the payout. Don’t be surprised if the money lands in your account even faster than 24 hours – most supported banks post these transfers very quickly. Just remember that the final speed still depends a bit on your own bank’s internal processing.


Don’t Expect the Fast Option on Big Payouts

If a single payout is larger than the allowed limit, Amazon will automatically send it through the standard ACH channel – even if you have Express Payout turned on. There is currently no way to override this rule, so plan larger withdrawals expecting the usual 4–5 day wait.


Check Whether Your Bank Is Actually Supported

Not all US banks and credit unions are part of Amazon’s direct network. If you turn on Express Payout and nothing changes, the most common reason is that your current bank isn’t connected. In that case the fastest fix is to add and verify a different bank account that is in the supported list.


Feel Free to Switch Back Anytime

There is zero penalty or lock-in period. If you try Express Payout and later decide it doesn’t bring enough benefit for your particular business, simply go back to the Deposit Methods section in Seller Central and change it to standard ACH payouts – the switch takes effect immediately for future disbursements.


To Sum Up

Express Payout lets qualifying US sellers using Amazon Pay get their money about 24 hours after payout instead of waiting several days. It’s easy to turn on and off in Seller Central, currently free, and works on weekends.

It can make a real difference if you sell fast-moving products, run big ad campaigns, or need to restock frequently. But it’s just a tool – it works best when you already manage inventory and cash flow sensibly.

If you don’t qualify or your business doesn’t have tight cash timing, the standard payout method is still perfectly fine.


FAQ

What is Amazon Express Payout?

It’s an optional way for some sellers to get payouts in about 24 hours instead of the usual 4-5 days through ACH.

Who can use Express Payout?

US sellers who use Amazon Pay, have a supported bank, have a continental US business address, and keep payouts under a certain size limit.

How do I turn Express Payout on?

Log into Seller Central, go to Deposit Methods, switch from Standard Payout to Express Payout, and save.

Is Express Payout free?

Yes, right now it’s free. Amazon might add a small fee later (around 50 cents per payout) but they will warn sellers first.

Can I get the money on a debit card?

Yes, you can choose to send it to a Visa debit card instead of a bank account.

What if my payout is too big?

Payouts over the limit automatically use the normal ACH process, even if Express Payout is turned on.

Can I switch back to normal payouts later?

Yes, you can change it back to Standard Payout anytime in the same Deposit Methods section.

What Is the FBA Inventory Tool and Why It Matters

If you sell on Amazon using FBA, inventory can either make your life easy or quietly drain your profits.

Too much stock and you’re paying storage fees for months. Too little and you lose the Buy Box, ranking, and sales. Somewhere in between is the sweet spot. That’s exactly where the FBA Inventory tool comes in.

It’s not flashy. It doesn’t promise magic. But if you use it properly, it becomes one of the most important dashboards in your Seller Central account.

Let’s break down what it actually does, and why serious sellers pay attention to it.


The FBA Inventory Tool Explained in Plain Terms

The FBA Inventory tool is a dashboard inside Seller Central designed to help you monitor and manage the inventory stored in Amazon fulfillment centers.

It gives you visibility into:

  • How much stock you currently have
  • How fast your products are selling
  • Which items are overstocked
  • Which products are close to running out
  • Which units are stranded or inactive
  • How inventory health impacts your IPI score

In short, it helps you keep your stock in balance.

Amazon does not want its warehouses used as long term storage facilities. The system is built around flow. Products should move in, sell, and move out. The FBA Inventory tool helps you align with that model.

If you ignore it, the system will still work. You will just pay more for it.


Why Inventory Balance Matters on Amazon

Why inventory balance matters so much on Amazon becomes clear when you look at how the platform evaluates sellers. Amazon tracks your inventory health through the Inventory Performance Index, or IPI. This score ranges from 0 to 1000 and shows how effectively you manage your FBA stock. If the score drops, you can face storage limits, reduced capacity during peak periods, higher storage fees, and slower growth overall. A strong score, on the other hand, gives you more operational freedom and fewer restrictions.

Your IPI is influenced by how efficiently your inventory moves. Amazon looks at your sell-through rate, how much excess stock you hold, how long units sit in storage, and whether you have stranded listings. All of these factors reflect how well you control your stock levels. The FBA Inventory tool is the place where you track these metrics and make the adjustments that keep your account healthy.


How WisePPC Connects Inventory and Advertising

WisePPC is built around a simple idea – advertising and inventory should work together, not compete for attention. Scaling campaigns while stock is low creates unnecessary risk. Letting products sit in storage while ads underperform wastes opportunity. That is why our system connects ad performance, sales data, and inventory levels in one unified environment. Instead of looking at FBA metrics as separate reports, our platform analyzes them alongside traffic, conversion rates, and ad spend to support smarter decisions around restocking and budget allocation.

Within our service, campaign automation, stock monitoring, and demand forecasting operate inside the same workflow. If inventory levels start to decline, our platform highlights it early so advertising can be adjusted before visibility drops. In cases where excess stock builds up, it enables strategic campaign optimization instead of reactive discounting. The objective is clear – reduce wasted ad spend, protect inventory balance, and provide a transparent view of performance across Amazon, Shopify, and other marketplaces. By aligning advertising data with inventory insights in one system, our platform supports more stable and predictable growth.


Core Inventory Metrics You Need to Understand

To use the FBA Inventory tool effectively, you need to understand the key metrics Amazon tracks.

1. Sell-Through Rate

Sell-through rate is calculated by dividing units sold over the past 90 days by the average number of sellable units during the same period.

A high rate means inventory is moving efficiently. A low rate usually indicates overstocking.

As a benchmark, a sell-through rate above 2.0 is generally considered good/strong, 1.0 to 2.0 is average/acceptable, and below 1.0 is poor and signals a problem. The tool shows this across SKUs so you can spot slow movers early.


2. Excess Inventory

Inventory is considered excess when you hold more than 90 days of supply or when units have been stored for over 90 days.

Excess stock increases storage costs, raises the risk of long-term fees, lowers IPI, and ties up cash. The FBA Inventory tool flags these SKUs so you can lower price, increase demand, remove, or liquidate them.


3. Aged Inventory

Aged inventory refers to units stored in FBA for extended periods. Amazon tracks this using a first-in, first-out method.

The longer stock sits, the more it costs. The tool allows you to filter by age to identify products nearing fee thresholds.


4. Stranded Inventory

Stranded inventory includes units that cannot be sold because they are not linked to an active listing.

Common causes include listing errors, inactive offers, pricing issues, or missing information. Storage fees still apply. The FBA Inventory tool highlights these units so you can fix the listing or remove the stock.


What You Can Actually Do Inside the Tool

It is one thing to see numbers. It is another to act on them.

Here is how the tool helps you take control.


Monitor Inventory Age and Risk

The FBA Inventory tool allows you to filter stock by age range, so you can quickly identify units older than 90 days, products approaching long-term storage fees, and slow-moving SKUs. This visibility gives you time to act before additional costs apply.


Identify Overstocked SKUs

The excess inventory view shows you products that are unlikely to sell through within a reasonable time.

You can then choose to:

  • Lower the price
  • Increase advertising bids
  • Run promotions
  • Create removal orders
  • Liquidate units
  • Use Amazon Outlet if eligible

The key is acting early instead of waiting until fees accumulate.


Track In-Stock Performance

Running out of stock hurts more than most sellers expect.

When you go out of stock:

  • You lose the Buy Box
  • Your organic ranking drops
  • Your advertising performance suffers
  • Your competitors gain ground

The FBA Inventory tool shows how consistently your ASINs have remained in stock over the past 30 days. This is weighted by sales velocity, so high volume SKUs matter more.

Keeping top sellers in stock is critical to maintaining sales momentum.


Improve Your 90-Day Sell-Through Rate

If your sell-through rate is low, the FBA Inventory tool highlights the issue and suggests where to take action. That usually means reducing excess units, running promotions to increase demand, improving your listings to boost conversion, or adjusting pricing to stay competitive. The tool does not make changes for you, but it clearly shows where your attention is needed.


How the FBA Inventory Tool Impacts IPI and Restock Limits

Your Inventory Performance Index reflects how you manage FBA stock, and the FBA Inventory tool shows the metrics that influence it. IPI is based on excess inventory, sell-through rate, stranded inventory, and in-stock rate for popular products. When the score drops, one of these areas requires correction. Improving IPI means reducing overstock, resolving stranded listings, and maintaining stable stock levels through consistent management.

Inbound and Reserved Inventory – What Sellers Often Overlook

Many sellers focus only on what is currently sellable. But Amazon tracks more than that.

Inventory Visibility Matters:

  • Fulfillable – ready to ship
  • Inbound – on the way to FBA
  • Reserved – allocated to orders or transfers
  • Unfulfillable – damaged or unsellable

Inbound and reserved units still count toward your storage capacity, even though they are not currently sellable. If these quantities are high, Amazon may restrict how much additional inventory you are allowed to send. In simple terms, the amount you can still ship is calculated by taking your restock limit and subtracting your current FBA inventory, open shipments, and reserved inventory. The FBA Inventory tool displays these numbers clearly, allowing you to plan shipments in advance and avoid unexpected restrictions.


How to Avoid the Two Biggest Inventory Mistakes

After working with sellers, I see two recurring patterns.


Mistake 1 – Chronic Overstocking

This usually happens when sellers:

  • Overestimate demand
  • Ignore sales velocity trends
  • Rely on supplier minimums instead of data

The result is excess inventory, rising fees, and stuck capital.

Better approach:

  • Maintain roughly 45 to 60 days of supply
  • Use weighted averages of recent sales to forecast demand
  • Adjust forecasts for peak and off-peak seasons


Mistake 2 – Stockouts

Stockouts can be even more damaging.

When you run out:

  • Sales drop to zero
  • Ranking falls
  • Re-launching takes time and ad spend

Sometimes slowing sales intentionally can help prevent stockouts. For example:

  • Temporarily increase price
  • Pause aggressive ads
  • Limit promotional activity

This buys time while inventory is in transit.

The FBA Inventory tool helps you spot risk before it becomes a crisis.


Smarter Inventory Strategy with the FBA Tool

The FBA Inventory tool provides the data. Your strategy determines how well you use it. Below is how to turn those insights into clear, practical decisions.


Restock Recommendations – Useful but Not Complete

Amazon’s Restock Inventory tool gives reorder suggestions based on historical sales, seasonality, and the lead time you enter. It works well for quick estimates, especially if you manage a small catalog.

However, it does not fully account for inventory at your 3PL, supplier stock levels, complex logistics chains, or adjusted sales velocity based on recent changes. As operations grow, many sellers supplement Amazon’s data with their own tracking systems or third-party tools. The FBA Inventory tool should be your foundation, but not your only source of decision-making.


A Practical Workflow

Inventory management does not need to be complicated. What matters is consistency.

On a weekly basis, review stranded inventory and resolve listing issues immediately. Check excess inventory and flag SKUs with more than 90 days of supply. Sort products by lowest days of inventory to prevent stockouts. Compare inbound shipments against projected demand and review aging stock before long-term storage fees apply.

Once per month, evaluate slow-moving products for removal or liquidation. Reassess forecasts using recent 30- and 60-day sales data. Review your IPI trend and identify weak points that require attention.

Simple routines prevent larger problems.


Using AWD as a Buffer

Amazon Warehousing and Distribution offers bulk storage that can automatically replenish FBA inventory. It can reduce FBA storage costs, help avoid capacity limits, and improve the balance between storage expense and stock availability.

For fast-growing sellers, AWD can act as a buffer between suppliers and FBA. It is not necessary for every business, but it can support broader inventory planning when restock limits or high storage fees become a constraint.


Planning for Peak and Off-Peak Periods

Inventory strategy should change throughout the year. During peak months, recent sales data should carry more weight, safety stock should increase, and potential shipping delays should be anticipated. In slower periods, it often makes sense to reduce FBA storage levels, keep more inventory at your own warehouse or 3PL, and focus on improving sell-through.

The FBA Inventory tool provides the data, but interpreting it correctly depends on understanding your business cycle.


Inventory as a Strategic Lever

Inventory management is not just operational tracking. It is a balance between cash flow, sales velocity, and storage cost. The FBA Inventory tool provides the visibility needed to make informed decisions across all three.

When used consistently, it helps maintain a healthy IPI, reduce unnecessary fees, protect rankings, keep top products in stock, and free up capital for growth. When ignored, it quietly reduces profitability and flexibility.


Conclusion

The FBA Inventory tool gives you a clear view of how your stock is performing inside Amazon’s system. It shows where you are overstocked, where you risk running out, and how your inventory decisions affect your IPI and storage limits. It does not replace strategy, but it gives you the information you need to make better decisions. If you review it consistently and act early, you avoid most of the common inventory problems sellers face.


FAQ

1. What is the main purpose of the FBA Inventory tool?

It helps you monitor stock levels, sell-through rate, excess inventory, aged units, and stranded listings so you can manage FBA inventory more efficiently.

2. Does the FBA Inventory tool affect my IPI score?

Yes. The metrics shown in the tool, such as excess inventory and sell-through rate, directly influence your Inventory Performance Index.

3. How often should I use the FBA Inventory tool?

Checking it weekly is usually enough to catch issues early. During peak seasons or when stock is tight, more frequent reviews can help prevent disruptions.

4. Can the tool predict how much I should reorder?

 It provides recommendations through Amazon’s restock system, but those suggestions are based on historical data and may not reflect external inventory or complex logistics.

5. Is the FBA Inventory tool available to all sellers?

 It is available to sellers using FBA, and full IPI scoring requires a Professional selling plan with active inventory in Amazon fulfillment centers.

Conversion Rate Optimization in 2026: What Actually Works

Getting traffic isn’t the hard part anymore. Between paid ads, SEO, social, and AI-driven content, most brands can attract visitors. The real question is what happens next.

In 2026, conversion rate optimization isn’t about tweaking button colors or copying your competitor’s landing page layout. It’s about removing friction, building trust faster, and aligning your marketing, product, and sales into one smooth experience. The brands that win aren’t necessarily louder. They’re clearer. Smarter. More intentional.

Let’s break down what CRO actually looks like this year and what’s worth your time.


What Conversion Rate Optimization Really Means

Conversion rate optimization, or CRO, is simply the process of increasing the percentage of visitors who take a specific action on your site. That action might be a purchase, a form submission, a demo request, a free trial signup, or a resource download. The calculation itself is straightforward – you divide the number of conversions by the total number of visitors and multiply by one hundred.

The concept sounds simple. The execution is not. CRO is not about random changes or surface-level edits. It is about making your website work better so more people actually do what you want them to do.


Why CRO Often Outperforms Traffic Growth

Let’s look at the numbers.

Imagine you have 10,000 monthly visitors, a 2 percent conversion rate, and a 100 dollar average order value. That gives you 20,000 dollars in revenue. Now increase the conversion rate to 3 percent. The traffic stays the same. The offer stays the same. Revenue jumps to 30,000 dollars.

One percentage point creates a 50 percent lift.

That is why serious growth-focused teams prioritize optimization before scaling acquisition. Improving conversion rates increases return on ad spend, reduces customer acquisition cost, improves marketing efficiency, and makes scaling far less risky.

Driving more traffic without fixing weak conversion points is like pouring water into a leaking bucket.


Build Clarity Before You Run Tests

It is tempting to jump straight into A-B testing. But testing without direction usually creates noise, not insight.

Before making changes, get clear on what you are optimizing. Define your primary conversion goal. Identify the smaller actions that signal intent. Look at where users are dropping off. Review what your current data actually shows.

This only works if your analytics are reliable. That means accurate event tracking, clear conversion definitions, consistent naming conventions, and alignment between marketing and sales. If tracking is messy, conclusions will be too.

Optimization starts with visibility.


Map the Funnel and Find the Friction

Conversion issues are rarely random. They tend to appear at specific stages of the funnel.

In ecommerce, that might be the move from product view to add to cart, from cart to checkout, or from checkout to purchase. In lead generation, it could be from landing page to form start, from form start to completion, or from lead to qualified opportunity.

Look closely at drop-off between each stage. That is usually where the real opportunity sits.

Use tools to understand behavior, not just numbers. Heatmaps show where attention goes. Scroll tracking reveals engagement depth. Session recordings expose confusion. Form analytics highlight hesitation.

Data shows you where the problem exists. Behavior helps you understand why.


Measuring What Matters

Conversion rate is only part of the picture. On its own, it does not tell you whether growth is healthy or profitable.

You should also track average order value, customer lifetime value, cost per conversion, bounce rate, engagement metrics, and lead quality. These indicators show whether your conversions bring real business value or just inflate numbers.

A higher conversion rate matters only if it supports sustainable revenue and long-term growth.


How Wise PPC Supports Conversion Optimization

We built Wise PPC on a simple belief – conversions are the outcome of connected systems working together. A click does not turn into revenue because of one isolated change. It is shaped by advertising performance, inventory availability, pricing decisions, and marketplace dynamics. Our platform brings those elements into one environment, allowing brands to see the full operational picture instead of juggling separate tools.

Through our service, teams can automate ad campaigns, track real time sales data, monitor stock levels, and forecast demand from a single dashboard. That level of visibility changes how optimization decisions are made. Instead of reacting to performance drops without context, Wise PPC provides the clarity needed to adjust budgets, prevent stockouts, and scale campaigns with confidence across Amazon, Shopify, and other marketplaces.


Friction Is the Silent Conversion Killer

If there is one principle that consistently drives results, it is friction reduction.

People do not abandon because they are uninterested. They abandon because something feels unclear, slow, or risky.

Here are the highest impact friction areas to review.


Simplify Forms

Long forms drain momentum.

High-Converting Forms:

  • Ask only essential questions
  • Use autofill when possible
  • Provide clear labels
  • Show instant error messages
  • Avoid unnecessary dropdowns

Every additional field reduces completion probability.


Streamline Checkout

Checkout friction directly impacts revenue.

Where to Focus:

  • Guest checkout options
  • Clear progress indicators
  • Transparent shipping costs
  • Multiple payment methods
  • Visible security badges

Uncertainty during checkout creates doubt. Doubt kills conversions.


Improve Speed and Mobile Experience

Mobile still underperforms in many industries because the experience is often clunky. Buttons are too small, text requires zooming, pages load slowly, and popups block the screen. These details push users away.

Page speed is not just a technical metric. If a site feels slow or awkward on mobile, people lose confidence and leave.


The Details That Actually Move Decisions

Conversions rarely depend on one big moment. More often, they are shaped by a series of small signals – trust, relevance, and tiny interactions that either build confidence or create doubt.


Build Confidence With Real Proof

People compare options fast. They look for evidence before they commit. A clever headline might catch attention, but proof is what closes the gap.

What Builds Trust:

  • Customer reviews with real names
  • Testimonials that show specific results
  • Case studies
  • Clear guarantees
  • Transparent return policies
  • Recognizable certifications

Where you place these matters. Add them near pricing sections and calls to action, because that is where hesitation usually happens. When someone is unsure, a single credible proof point can be enough to push the decision forward.


Make Personalization Feel Natural

Personalization works when it makes things clearer. It fails when it feels like surveillance.

In Action:

  • Matching landing page messaging to the ad that brought the user there
  • Showing relevant product recommendations
  • Displaying local currency and shipping details
  • Segmenting emails based on real behavior

The goal is not to impress with technology. It is to reduce effort. When relevance feels logical, users move forward without thinking about it.


Optimize the Small Moments

Conversions rarely depend on one big action. They are often shaped by a series of smaller interactions that either build confidence or create hesitation. Watching a short demo, opening an FAQ section, comparing pricing options, or scrolling through product images all influence how comfortable someone feels about moving forward.

Strengthening these touchpoints does not require dramatic changes. Clear explainer videos, structured comparisons, visible differentiators, and direct answers to common questions can remove uncertainty at the right moment. Individually, these improvements may seem minor. Together, they reduce friction and make the decision feel easier.


Turning Optimization Into a Connected Growth System

Conversion rate optimization does not live in isolation. It works best when tools, content, and teams are aligned around one goal – turning attention into revenue.


Use AI to Support Strategy, Not Replace It

AI is now part of most optimization workflows. It can summarize survey responses, surface patterns in feedback, suggest headline variations, generate test ideas, and assist with segmentation. That makes research faster and experimentation more efficient.

But AI is not a strategy. It cannot replace judgment or deep understanding of your audience. Use it to speed up analysis and idea generation, then apply human insight to refine messaging. If your copy starts to sound generic, tighten it. Specific language and real examples build credibility in ways automated text cannot.


Make Content Move People Forward

Content should not exist just to bring traffic. It should guide users toward action.

Strong content anticipates objections, matches search intent, and leads naturally to the next step. If a blog post covers cart abandonment, the logical continuation might be a downloadable checklist or a consultation offer. Contextual calls to action work better because they feel relevant, not forced.

The goal is simple. Help readers move from information to decision without friction.


Align Marketing and Sales Around Revenue

For many businesses, especially in B2B, a form submission is only the beginning. Real optimization continues through lead qualification, sales conversations, and closed deals.

Improving conversion performance means improving lead quality, shortening sales cycles, aligning messaging across channels, and tracking how experiments affect revenue. If sales teams hear the same objections repeatedly, address them earlier in the funnel. If certain types of leads convert at higher rates, study their behavior and replicate what works.

Optimization is not limited to landing pages. It spans the entire customer journey.


Build a Disciplined Optimization System

Random testing does not create consistent growth. Structure does.


Prioritize What Actually Matters

Testing everything at once creates noise. A smarter approach is to evaluate ideas before you launch them. Score each experiment based on expected impact, implementation effort, and your level of confidence.

High impact and high confidence changes should come first. Simplifying a complicated checkout flow will usually deliver more value than changing a button color. Adding trust signals near pricing tends to outperform minor visual tweaks.

Focus on decisions that influence buying behavior, not cosmetic edits.

Avoid the Traps That Stall Progress

Even experienced teams fall into predictable mistakes. The most common ones include:

  • Running multiple major changes at the same time
  • Ignoring mobile behavior
  • Making design decisions without data
  • Overloading pages with information
  • Copying competitors without understanding context
  • Stopping after one successful test

Optimization is not a one time win. It is a habit.


Turn Optimization Into a Habit

The strongest teams follow a simple rhythm: analyze data, identify friction, form a clear hypothesis, run a focused test, measure the impact, document insights, and apply what works elsewhere.

One strong result often reveals a broader pattern. If simplifying one form increases conversions, similar simplifications may improve other parts of the journey. When this cycle repeats consistently, improvements compound.


Where Optimization Is Headed

User behavior keeps getting sharper. People research quickly, compare options side by side, and expect a seamless experience on every device. Many visitors now arrive already informed, which means your site has less time to convince and more responsibility to confirm their decision.

That puts more pressure on bottom-of-funnel pages. Pricing must be clear. Value should be obvious. Trust elements need to be visible at the moment of decision. Inconsistent messaging between ads, landing pages, and checkout creates doubt instantly.

The core principles stay the same: clarity, speed, transparency, and structured testing. Tools will change. Human expectations will not.


Final Thoughts

Conversion rate optimization is about making your existing traffic work harder. Not by tricks, but by removing friction, strengthening trust, and guiding users toward clear decisions.

When you understand where people drop off and why, improvements become practical, not theoretical. Small, focused changes often outperform big redesigns. Teams that treat CRO as an ongoing system, not a one time effort, see steady gains over time.

Growth becomes more predictable when the experience is clear, fast, and aligned with user intent.


FAQ

1. What is conversion rate optimization?

Conversion rate optimization is the process of increasing the percentage of visitors who take a specific action on your website, such as making a purchase or submitting a form.

2. Why is CRO important if I already have traffic?

Traffic alone does not guarantee revenue. If visitors are not converting, you are losing potential value. CRO improves performance without increasing acquisition costs.

3. Where should I start with CRO?

Start with your data. Identify where users drop off in the funnel, then focus on the stage with the highest friction.

4. How often should I run tests?

Testing should be continuous but structured. Run focused experiments, measure results properly, and apply what you learn before moving to the next change.

5. Does CRO require advanced tools?

Advanced tools help, but the foundation is clear tracking and disciplined analysis. Even basic analytics can reveal major opportunities if used correctly.

How to Manage Seller-Fulfilled Orders on Amazon

Handling your own Amazon orders sounds simple at first. List a product, get a sale, ship it out. In reality, seller-fulfilled orders come with moving parts that can quietly affect your margins, metrics, and customer trust.

If you’re using Fulfilled by Merchant, you’re not just shipping boxes. You’re managing delivery promises, tracking numbers, cancellations, returns, and buyer messages. Done right, it builds a strong reputation. Done poorly, it can cost you sales and even your account health.

Let’s walk through how to manage FBM orders in a way that keeps things efficient and under control.


Connecting Order Management With Smarter Advertising

WisePPC is a performance advertising platform built around pay-per-click campaigns for Amazon sellers. In the context of managing seller-fulfilled (FBM) orders, advertising performance cannot be separated from operational capacity. Order volume is directly influenced by campaign activity, and without visibility into that connection, fulfillment planning quickly becomes reactive.

We built the platform to align advertising data with sales trends and inventory levels in one system. Instead of optimizing campaigns in isolation, WisePPC helps sellers understand how ad-driven demand impacts stock availability and shipping workload,  which is especially important for FBM businesses that control their own fulfillment.

The platform automates campaign management, tracks stock dynamics, and supports demand forecasting to reduce the risk of overspending on ads when inventory or capacity is limited. The objective is simple: protect margins, maintain operational stability, and scale growth without creating fulfillment bottlenecks.


Understanding What Seller-Fulfilled Orders Really Involve

Before diving into settings and workflows, it is worth being clear about what FBM actually means in practice. When you use Fulfilled by Merchant, you take full responsibility for the operational side of each order. You store the inventory, ship the products, confirm dispatch in Seller Central, communicate with buyers, and handle returns. Amazon processes the payment, but the rest is on you.

That difference changes how you run your business. With FBM, performance depends on how well your internal processes work. You have more control, but also less room for error. The goal is simple – keep your fulfillment accurate, timely, and fully aligned with Amazon’s requirements.


Setting Up Delivery Time the Right Way

One of the most common problems with FBM sellers is inaccurate delivery promises. This usually starts with handling time and shipping settings.

Amazon calculates total delivery time using several components:

  • Handling time
  • Transit time
  • Weekends and holidays
  • A built-in buffer for potential delays

You directly control handling time, transit time settings, and your working days. If these are off, everything else becomes harder.


Handling Time – Be Honest With Yourself

Handling time is the period between when the order is placed and when you hand it over to the carrier.

Many sellers try to look competitive by setting handling time too short. It feels harmless at first. But if you promise same-day handling and consistently ship the next day, your late shipment rate will reflect that.

A better approach:

  • Review your actual processing speed over the past 30 days
  • Add a realistic buffer for busy periods
  • Adjust by SKU if needed

If you ship some products from a different location or they require special packaging, set separate handling times for those SKUs. Do not assume everything moves at the same speed.


Transit Time – Align With Your Carrier, Not Your Hopes

Transit time is how long the carrier takes after you ship.

You can manually configure transit times in your shipping templates, or use automation features inside Seller Central. Either way, your transit settings should match the service level you actually use.

If you are using ground shipping that takes 4 to 5 business days, do not configure it as 2 to 3 days just to appear faster. Customers notice. Amazon notices.


Weekends and Holidays – Plan Ahead

If you do not operate on weekends, reflect that in your settings. The same applies to public holidays. Nothing damages trust like promising a Sunday delivery when you do not process orders on Saturday.

Take a few minutes to configure your non-working days correctly. It prevents a lot of stress later.


Creating a Reliable Shipping Workflow

Once your delivery settings are accurate, the next layer is your internal workflow. This is where most FBM operations either run smoothly or become chaotic.

Here is a simple structure that works well:

  1. Order review
  2. Inventory verification
  3. Pick and pack
  4. Label purchase
  5. Shipment confirmation
  6. Tracking validation

It sounds obvious, but documenting this flow and making sure every order passes through it consistently is powerful.


Use Amazon Buy Shipping When Possible

If you handle your own fulfillment, Amazon Buy Shipping makes the process cleaner and safer. When you purchase labels directly through Amazon, tracking is added automatically and the shipment is confirmed at the same time. You do not have to enter tracking numbers manually, which reduces errors and protects your valid tracking rate. In some cases, you also receive extra protection in delivery-related claims, and the shipping rates are often competitive.

If you work with an external carrier or shipping software, accuracy becomes your responsibility. The carrier name must match Amazon’s system, the tracking number has to be correct, and the shipment must be confirmed within the required timeframe. Missing that confirmation can cost you the entire order. After seven days, Amazon may cancel it and you will not receive payment, even if the package is already on its way.

It sounds simple, but this is where many sellers lose money. Build a routine or automate confirmations so nothing slips through.


Managing Orders Inside Seller Central

The Manage Orders page in Seller Central is where you track every FBM order. It shows the current status and tells you what needs attention. Orders move from Pending to Unshipped, then to Shipped, or to Cancelled if the transaction does not go through. Each status requires a specific action, so checking this page regularly is part of staying in control.


Pending Orders – Wait, Do Not Act

Pending means payment has not yet been verified. You cannot ship the order. You also should not contact the buyer.

It can be tempting to prepare the order early. That is fine internally, but do not confirm shipment or reach out to the buyer until the status changes to Unshipped.


Unshipped Orders – This Is Your Window

When an order is marked Unshipped, it is ready for fulfillment. At this point:

  • Check stock
  • Pack the item
  • Purchase a shipping label
  • Confirm shipment

Speed matters, but accuracy matters more. Sending the wrong SKU is more damaging than shipping a few hours later within your promised handling time.


Shipped Orders – Monitor and Support

Once marked as Shipped, the buyer can track the order. That does not mean your job is done.

Monitor tracking for:

  • Stalled shipments
  • Delivery exceptions
  • Failed delivery attempts

If you see an issue before the buyer contacts you, you are already ahead. Proactive communication can prevent negative feedback.


Managing Risk, Communication, and Growth in FBM

Once fulfillment is running smoothly, the focus shifts to controlling risk and protecting performance. How you handle cancellations, returns, communication, and scaling decisions determines whether FBM stays stable and profitable over time.


Cancellations and Returns

Cancellations should be processed immediately if the order has not shipped. Quick approval protects the customer experience and keeps your workflow clean. Buyer-initiated cancellations usually do not damage your metrics, but cancellations caused by stock issues do. That is why inventory accuracy is critical, especially if you sell across multiple channels or combine online and offline stock. Overselling during promotions is one of the most common reasons sellers hurt their cancellation rate.

Returns require a defined internal process. Approve the request, provide clear instructions, inspect the item upon arrival, and issue the refund without delay. Document the condition of returned products and restock only when appropriate. Slow or unclear handling increases the risk of claims. Refund-related fees in certain categories should also be considered in your cost calculations.


Buyer Communication

Use Amazon’s messaging system strictly for order-related matters. Address shipping issues, product questions, or delivery delays directly and without emotion. Responses should be timely and solution-oriented. If tracking shows a delay, acknowledge it and explain what action you are taking. Clear communication reduces escalation and builds credibility.


Account Health Control

Performance metrics determine how stable your account remains. Late shipment rate, cancellation rate, valid tracking rate, and on-time delivery rate reflect operational quality. If any indicator declines, identify the cause immediately. Unrealistic handling times, unreliable carriers, and tracking errors are common sources of problems. Corrections may involve adjusting shipping settings or improving internal processes.


Choosing When FBM Makes Sense

FBM is often more suitable for oversized, heavy, or slower-moving products where FBA fees reduce profitability. It also fits sellers who need full control over packaging or already operate their own logistics infrastructure. Fast-moving, lightweight products may perform better under FBA. Many sellers combine both models to balance cost control and efficiency.


Automation and Scalability

Automated handling time and shipping settings tools help align delivery promises with actual performance. These settings should be reviewed regularly to reflect operational changes. As order volume increases, assess whether your team, carriers, and storage capacity can handle growth. Order handling capacity limits inside Seller Central can prevent overload by adjusting handling time when volume exceeds your threshold. Sustainable scaling in FBM depends on operational stability, not speed.


Final Thoughts

FBM works when your operations are tight. Accurate handling times, on-time shipment confirmation, clean inventory tracking, and professional communication are what keep your account stable. There is no buffer with seller-fulfilled orders. The margin for error is small, but the control is real. If your process is consistent, FBM can be reliable and profitable.


FAQ

1. What happens if I do not confirm shipment on time?

If shipment is not confirmed within seven days, Amazon can cancel the order and you will not get paid, even if the package was sent. Confirmation must be part of your routine.

2. Can I edit the shipping address after an order is placed?

No. If the address is wrong, the buyer needs to cancel and place a new order. Shipping to a different address can create compliance issues.

3. Is FBM better than FBA?

It depends on the product. FBM often makes sense for heavy or low-volume items. FBA can be more efficient for fast-moving, lightweight products. Many sellers use both.

4. How fast should I reply to buyer messages?

Within 24 hours. Keep it clear and focused on solving the issue.

5. Do I have to use Amazon Buy Shipping?

No, but if you use your own carrier, tracking must be valid and the shipment confirmed on time. Mistakes here directly affect your metrics.

Send to Amazon Simplifies Shipments for FBA Sellers

If you sell with Fulfillment by Amazon, you already know that shipping inventory isn’t the glamorous part of the job. It’s necessary. It’s detailed. And if you get it wrong, it costs time and money.

That’s where Send to Amazon comes in. It’s not flashy, but it’s practical. It tightens up the shipment creation process inside Amazon Seller Central and makes getting products into fulfillment centers far less complicated.

Let’s break down why it actually matters.


Why Shipment Creation Matters in FBA

FBA performance depends on three practical factors:

  • Inventory availability
  • Cost control
  • Operational accuracy

Shipment creation affects all of them. Inefficient processes increase labor costs. Inaccurate data slows check-in. Poor shipping mode decisions raise freight expenses. Labeling mistakes create inbound defects.

Each shipment influences stock levels, cash flow, and listing stability. That is why shipment workflows should be treated as operational systems, not routine admin work.

Inside Amazon Seller Central, Send to Amazon is a structured shipment creation workflow for Fulfillment by Amazon sellers. It centralizes inventory selection, supports reusable case pack templates, integrates shipping mode selection, and simplifies label generation.

The key operational improvement is flexibility. Sellers can pack inventory first and confirm shipment details afterward. This reduces repacking, manual re-entry, and allocation errors. Instead of adapting warehouse processes to system limitations, the workflow aligns with how inventory is actually prepared.

Further cost, planning, and strategic implications are covered in the following sections.


Turn Inventory Into Sales With Wise PPC

Efficient shipments are only one side of the equation. Getting products into Amazon fulfillment centers through FBA keeps inventory available. But availability alone does not generate sales. Traffic does.

That is where WisePPC comes in.

Our platform is built around pay-per-click advertising. You can promote any product with us and pay only when a shopper clicks. We provide the tools to launch, manage, and optimize campaigns in a structured way. Inside one dashboard, you track performance, monitor spend, adjust bids, and see which products actually convert.

We position our platform as the operational layer for advertising, just as Send to Amazon structures inbound logistics. When inventory flows in efficiently, our platform helps it move out. WisePPC focuses on transparency, automation, and data clarity so you are not guessing which campaigns work. You see the numbers, you control the budget, and you scale what delivers results.


Step-by-Step – How the Workflow Functions

The Send to Amazon process follows a clear structure. The exact steps vary slightly depending on whether you ship boxes or pallets, but the framework remains consistent.

Step 1 – Choose Inventory to Send

You select:

  • Ship-from address
  • Marketplace destination
  • FBA-converted SKUs
  • Packing type

This is also where case pack templates come into play.

Instead of recreating details every time, you can save:

  • Box dimensions
  • Weight
  • Units per case
  • Prep requirements
  • Labeling specifications

For sellers with stable product configurations, this saves hours each month.


Step 1B – Pack Individual Units When Needed

If you ship mixed-SKU boxes or variable quantities, the system guides you through packing individual units. It shows which SKUs can be grouped together and lets you update quantities as you pack. This removes guesswork, eliminates the need to recount later, and prevents reopening boxes after confirmation.


Step 2 – Confirm Shipping Details

Here you set:

  • Estimated ship date
  • Shipping mode – small parcel or pallet
  • Carrier selection

The system displays estimated shipping costs. If you use an Amazon partnered carrier, you receive:

  • Discounted rates
  • Integrated tracking
  • In-workflow label purchasing

For sellers shipping weekly, these savings compound.


Step 3 – Print Box Labels

Once shipping is confirmed, the system generates the required box labels automatically. You can enter tracking information directly within the workflow, and all shipment documentation becomes available for download. If you are shipping via small parcel delivery, this is typically the final step before the carrier pickup.


Step 4 and 5 – Pallet Shipments

For pallet shipments, you confirm the number of pallets and provide carrier details within the workflow. The system then generates pallet labels, and you schedule the delivery window according to Amazon’s requirements. This process is particularly relevant for high-volume sellers using less-than-truckload freight, where coordination and accuracy directly affect check-in speed and overall inbound efficiency.


Operational Flexibility and Efficiency in Send to Amazon

Send to Amazon improves shipment creation in three key areas – packing order, data accuracy, and shipping mode decisions. These directly affect labor time, check-in speed, and inbound costs.


Packing Before Confirming

Inventory is rarely ready all at once. Production happens in batches. Wholesale orders arrive in parts. The older workflow required sellers to choose fulfillment destinations first and pack around that decision. If allocations changed, boxes had to be reopened.

Send to Amazon allows sellers to pack first and confirm later. You can add units as they become available, update quantities in real time, close boxes when full, and finalize shipment details afterward. This reflects how warehouses actually operate and reduces unnecessary handling.


Case Pack Templates

For single-SKU case packs, entering the same box data repeatedly slows everything down. Units per box, dimensions, weight, prep type, labeling details – all of it had to be retyped.

Case pack templates store that information. This reduces manual entry and lowers the risk of errors. Accurate box content data helps Amazon receive inventory faster and make units sellable sooner. Faster check-in improves cash flow. Fewer mistakes prevent delays.


Shipping Mode Selection

Send to Amazon supports small parcel delivery, pallet shipments, and multi-mode shipping. The choice affects cost per unit, inbound speed, and operational risk.

Small parcel works better for lighter shipments and flexible restocks. Pallets make sense for larger replenishments and stable high-volume SKUs. Built-in carrier comparisons help sellers evaluate costs inside the workflow instead of guessing.


How This Supports Broader FBA Strategy

Shipment creation is not isolated. It connects directly to FBA economics.

FBA includes fulfillment fees based on size and weight, storage fees, long-term storage fees, inbound placement fees, and removal fees.

If your replenishment process is inefficient, you risk overstocking, storage surcharges, restock limits, and capacity issues.

A smoother shipment system allows better inventory planning. You can restock more frequently in smaller, controlled waves. That reduces storage pressure. With Amazon tightening restock limits and capacity rules in recent years, this level of precision matters more than ever.


Inventory Control, Error Reduction, and Operational Impact

Send to Amazon does not forecast demand or calculate reorder points. Its value lies in execution. When connected to forecasting tools, restock alerts, inventory tracking, and API systems, it becomes the operational bridge between planning and action. Forecasting determines when to replenish. Send to Amazon structures how inventory is physically prepared and shipped. Clean execution supports stable inventory cycles.


Reducing Human Error in Fulfillment Prep

Inbound errors create delays and added costs. Incorrect box dimensions, inaccurate weight entries, missing labels, mixed-SKU miscounts, or confirming shipments before packing is finalized all increase risk.

The workflow reduces exposure by structuring each stage, validating inputs in real time, reinforcing accurate box content data, and centralizing label generation. It does not remove human involvement, but it narrows the margin for mistakes. At scale, fewer errors mean stronger cost control.

Operational Impact Across Seller Types

The operational advantages vary depending on the selling model.

Private Label Brands Benefit From:

  • Reusable case pack templates
  • Structured replenishment cycles
  • More efficient pallet planning

Wholesale Sellers Gain:

  • Faster SKU selection
  • Flexible mixed-SKU packing
  • Direct carrier cost comparisons

Manufacturers Benefit From:

  • Packing alongside production
  • Reduced need to reopen shipments
  • Closing boxes when units are physically ready

The applications differ, but the outcome is consistent – tighter inbound control and clearer operational flow.


Business Impact Beyond Shipment Creation

Send to Amazon influences more than just inbound logistics. It affects Prime performance, cost structure, fulfillment strategy, and overall operational focus. When shipment workflows are clean, the business runs more predictably.


Prime Performance and Revenue Stability

FBA automatically enables Prime eligibility, but maintaining Prime performance depends on inventory availability, reliable inbound flow, and avoiding stockouts.

Shipment delays can result in lost Buy Box share, slower sales velocity, and ranking drops. Inbound consistency directly supports listing stability. Faster and more accurate shipments help maintain steady stock levels, which in turn protect revenue flow and improve cash predictability. Shipment workflow quality may seem operational, but it connects directly to sales performance.


Cost Control and Margin Protection

Send to Amazon supports cost control in practical ways. Sellers gain leverage through partnered carrier discounts, reduced labor hours, and fewer inbound errors that lead to repack fees.

Labor costs are often overlooked. If a team spends hours correcting shipment mistakes or reopening boxes, that time becomes margin loss. Efficiency is not only about speed. It is about protecting profit by reducing avoidable friction.


Supporting Hybrid Fulfillment Strategies

Many experienced sellers operate hybrid models, using FBA for fast-moving SKUs, FBM for slower products, and strategic inventory splitting to balance risk.

Send to Amazon strengthens the FBA side of that strategy. With tighter restock limits and storage controls, sellers need flexibility. Clean inbound processes make it easier to send smaller replenishment waves, respond faster to demand changes, and stay within capacity rules. Operational flexibility makes strategic adjustments possible.


Practical Execution Tips

The tool works best when used with discipline. A few practical habits improve results:

  • Create case pack templates for stable SKUs
  • Weigh and measure boxes accurately instead of estimating
  • Confirm shipping only after packing is fully completed
  • Compare small parcel and pallet rates before deciding
  • Monitor check-in times and adjust shipment size accordingly
  • Keep ship-from addresses accurate to prevent routing issues

Small details prevent larger problems.


Staying Responsible

Send to Amazon simplifies workflow, but it does not replace oversight. Sellers still need to follow FBA prep requirements, apply correct labeling standards, monitor inbound placement fees, track storage limits, and calculate profitability after fees. The system structures the process, but accountability remains with the seller.


Why Simplification Matters

Amazon’s fulfillment network is complex. That complexity creates opportunity, but it can also create operational pressure. When shipment creation becomes structured instead of chaotic, the impact goes beyond logistics.

Sellers experience less operational stress, faster inventory availability, cleaner cost tracking, and more predictable cash cycles. With fewer fires to put out, attention shifts to higher-value work such as product research, pricing decisions, advertising optimization, and brand development.

Operational friction consumes mental bandwidth. Removing it creates space for growth.


Final thoughts

Send to Amazon is not flashy, and it does not change how FBA works at its core. What it does is make the shipment process smoother and more logical. You pack first, confirm later, reuse templates, compare shipping options in one place, and move on. Less friction, fewer mistakes, less wasted time.

For sellers who ship regularly, that consistency matters. Faster check-ins mean products go live sooner. Fewer errors mean fewer delays and fewer surprise costs. Over time, those small improvements add up. Shipment creation stops feeling like a bottleneck and starts feeling like a routine part of the operation.


FAQ

1. Is Send to Amazon mandatory for FBA sellers?

It is not technically mandatory, but it is now the standard shipment workflow inside Seller Central. Most sellers use it because it is simpler and more structured than older processes.

2. Does it lower FBA fees?

It does not change Amazon’s fee structure, but it can reduce indirect costs. Cleaner shipments mean fewer inbound issues, less repacking, and potentially lower labor and shipping expenses.

3. Can I ship mixed SKUs using Send to Amazon?

Yes. You can pack mixed-SKU boxes and update quantities as you go, which reduces the need to recount or reopen boxes later.

4. Does Send to Amazon replace inventory forecasting tools?

No. It handles execution, not forecasting. Planning tools tell you when to restock. Send to Amazon helps you send it correctly.

5. Is it useful for small sellers?

Yes. Even with lower volumes, having a clear shipment process reduces mistakes and keeps operations organized.

What Is a Trademark and Why Your Brand Needs One

You don’t really think about trademarks when you’re sketching logo ideas on a notepad or arguing over business names with your co-founder. At that stage, it’s all creative energy and big plans. But sooner or later, if things start working, someone will notice your brand. That’s when protection stops being optional.

A trademark isn’t just a legal formality. It’s how you claim your space in the market. It tells competitors, customers, and the law that this name, this logo, this identity belongs to you. And if you’re serious about building something that lasts, that matters more than most people realize.


What Is a Trademark in Simple Terms?

A trademark is a legal tool that protects the identity of your business in the marketplace. It can take different forms, including a word or business name, a logo or symbol, a slogan, a combination of text and design, or even a distinctive product shape. In some cases, trademarks may also cover non traditional elements such as a specific color, sound, or even a smell, if they are strongly associated with a brand.

The main purpose of a trademark is to distinguish your goods or services from others in the same category. It does not protect the product itself or the idea behind it. Instead, it protects the sign that tells customers who stands behind that product.

Once registered, a trademark grants you exclusive rights to use that sign within particular classes of goods or services. In practice, this means that other businesses cannot legally use a confusingly similar name, logo, or symbol in the same field.

Trademark vs Brand vs Logo

These terms get mixed up all the time, even in business circles.

Here is the distinction:

  • A brand is the overall perception people have of your business. It includes reputation, customer experience, values, and emotional associations. It exists in the minds of your audience.
  • A logo is a visual element that represents your business. It is a design asset that appears on packaging, websites, and marketing materials.
  • A trademark is the legal protection granted to a name, logo, or other distinctive sign. It exists in official registers and gives you enforceable rights.

You can build a recognizable brand without registering a trademark. Many businesses start that way. Without registration, your brand remains legally vulnerable.

That is why experienced founders treat trademark registration as part of long term brand strategy, not as paperwork to deal with later.


Scale Your Brand with Smarter PPC Advertising

Launching a product is only the first step. To grow, it needs visibility, traffic, and controlled ad spend. That is where WisePPC comes in.

We built WisePPC as a performance advertising platform focused on pay per click campaigns. It provides the tools to launch, manage, and scale ads across marketplaces from one dashboard. Campaign automation, bid optimization, conversion tracking, and clear reporting work together so you can see exactly how each click impacts revenue.

The platform supports advertising on Amazon, Shopify, and other sales channels. Instead of managing ads manually, you get structured analytics and performance insights that help allocate budget more effectively.

Trademark protection secures your brand legally. WisePPC focuses on growth. It is built to turn traffic into measurable sales and help products gain traction across marketplaces.


Trademark Protection and Business Risk

In a small, low competition market, brand confusion may not seem like a real threat. But most businesses operate in crowded spaces, especially online, where customers compare brands instantly. Without protection, your name and visual identity can be copied, imitated, or even registered by someone else.

If you do not have a registered trademark, risks increase. A competitor may secure a similar name, a seller could list products under your brand on a marketplace, or a confusingly similar website may appear. Enforcing unregistered rights is possible, but it is harder, slower, and more expensive. A registered trademark puts you in a stronger position and allows you to stop problems before they grow.


Do You Need a Trademark to Start?

In most countries, you can begin trading without a registered trademark. Once you use a brand in commerce, you may gain limited rights. However, these rights are limited and often insufficient for businesses planning to scale.

Waiting can create additional risk. If another business registers a similar mark before you, they may require you to rebrand. That can mean redesigning packaging, changing your domain, updating marketing materials, and rebuilding recognition. The cost of rebranding often exceeds the cost of early registration.

For businesses planning to scale, enter marketplaces, or expand internationally, securing trademark protection early reduces uncertainty and protects long term investment.


Scope and Limitations of Protection

A trademark protects your market identity, not your innovation. It does not cover your business idea, product concept, manufacturing process, or overall business model. Those may fall under patents or trade secrets.

Protection applies to the distinctive sign you register. This may include your business or product name, logo, tagline, a specific color combination associated with your brand, or in rare cases certain non traditional elements such as sounds. The exact scope depends on what you include in your application and the classes of goods or services selected.

Understanding both the risks and the limits of trademark protection helps you make informed decisions about how to secure your brand.


Trademarks as Strategic Business Assets

A trademark is not only about defense. It is a business tool that works both ways. It protects your brand from misuse and at the same time creates measurable value.

On the one hand, registration secures your position in the market. It gives you legal control over your name and identity, reduces the risk of unfair competition, and strengthens your position in disputes and negotiations. You decide who can use your brand and under what conditions.

On the other hand, a trademark increases the economic value of your company. It can:

  • Raise overall business valuation
  • Appear as intellectual property on your balance sheet
  • Increase credibility when attracting investors
  • Become the foundation for franchising
  • Be licensed to other businesses in exchange for royalties

Franchising depends entirely on trademark ownership, since partners pay for the right to operate under your brand. Licensing works in a similar way, allowing other companies to use your mark on specific products while you retain ownership and receive compensation.

If you plan to sell your business in the future, brand recognition will likely be one of the main assets a buyer evaluates. Without a registered trademark, that asset is legally weaker.

In practical terms, a trademark gives you two things at once: protection and leverage. It safeguards what you have built and allows you to expand it on structured, legally secure terms.


How Trademark Registration Works in Practice

The exact procedure depends on the country, but the general steps are similar.

  1. Conduct a trademark search. You check whether a similar name or logo is already registered in your class of goods or services.
  2. Choose the appropriate class. Trademarks are registered in specific classes. There are 45 internationally recognized classes covering goods and services. If you sell clothing today but plan to launch cosmetics later, you may need to apply in multiple classes.
  3. File an application. You submit details about the mark, the owner, and the goods or services covered.
  4. Examination by the authority. The national intellectual property office reviews your application for conflicts and compliance.
  5. Publication and opposition period. Third parties may object if they believe your mark conflicts with theirs.
  6. Registration. If approved, you receive a certificate and registration number.

Trademark registration usually lasts 10 years from the filing date. After that, it can be renewed indefinitely, provided you pay the renewal fees, continue using the mark, and comply with local regulations.

Although the process may seem simple, trademark searches and class selection can be complex, which is why many businesses work with a trademark attorney or specialist.

Because protection can be maintained for decades through renewal, trademarks are considered long term business assets rather than temporary legal tools.


International Protection

Trademark rights are territorial. One registration does not automatically protect you worldwide. If you want protection in multiple countries, you must register in each of them.

There are international systems that simplify filing in several jurisdictions at once, but fees apply for every territory selected. A common strategy is to register first in your home country, then expand to key export markets, and later add protection in countries where you manufacture or distribute.

For businesses selling online, international exposure increases risk. Even if you operate from one country, customers and competitors may come from many others. Planning protection accordingly is essential.


Can Two Companies Share the Same Name?

In some situations, yes. Because trademarks are registered by class, two companies can use the same or similar names if they operate in completely different industries and there is no likelihood of customer confusion. For example, a clothing brand and a plumbing service might coexist legally under similar names.

However, the digital environment complicates this. Online visibility can blur industry boundaries, and overlapping audiences may create confusion even when products differ. This is why thorough searches and professional advice are important before committing to a name and investing in branding.


Choosing and Securing the Right Trademark

Selecting a trademark is not just a creative task. It is a legal and strategic decision. A strong name can support growth. A weak one can create delays, rejections, or even forced rebranding.


What to Check Before You Commit

Before investing in branding, it is important to carry out a few basic checks. Start by searching national trademark databases to see whether a similar name is already registered. Then verify domain availability and review social media handles to ensure consistency across platforms. It is also worth checking search engine results to understand how widely the name is already used.

A name that sounds strong during a brainstorming session can quickly become a legal problem if someone else already holds the rights to it.


Types of Trademark Registration

When filing a trademark application, you can choose to protect different versions of your brand. This may include a word mark in plain text, a stylized version of that word with a specific font or design, or a combined mark that includes both text and graphic elements.

Each version can be registered separately. Some businesses decide to secure protection for several variations to create broader and stronger legal coverage.

Common Mistakes to Avoid

Not every name can be registered. The most frequent problems include:

  • Using descriptive terms that directly explain the product, such as Best Shoes Store
  • Choosing generic names that anyone in the industry could use
  • Slightly modifying well known brands
  • Relying on broad geographic terms
  • Selecting a name already widely used in your market

Distinctiveness is key. Invented words or unexpected combinations are usually easier to register and defend because they are less likely to conflict with existing marks.


When You Need a Different Type of Protection

If your product has a unique shape or appearance, trademark law may not be enough. In such cases, industrial design registration may be more appropriate. For example, a distinctive bottle shape could qualify for design protection if it meets legal requirements.

Understanding which legal tool applies to each element of your brand helps you build a clear and effective intellectual property strategy.


Trademarks in E Commerce and Marketplaces

Online selling has changed the risk landscape.

On platforms like Amazon, brand protection is closely tied to trademark registration. Enrollment in programs such as Brand Registry typically requires a registered or at least pending trademark.

With registration, sellers can access tools that help:

  • Report listing violations
  • Remove counterfeit products
  • Gain greater control over product detail pages
  • Use enhanced content features

In digital marketplaces, your brand name is often the main differentiator. If others can use it freely, confusion spreads quickly.

Even outside large platforms, search engines and online advertising amplify the impact of brand misuse. A similar name can siphon traffic, affect SEO, and damage customer trust.

In short, trademarks are even more important in the online world than in traditional retail.


Conclusion

A trademark protects the name and identity behind your business. It gives you legal rights, reduces risk, and adds real value to your brand. It is not just a formality. If you are building something you want to grow and keep, protecting it makes sense.


FAQ

1. What is the difference between a trademark and a company name?

Registering a company name allows you to operate legally. A trademark gives you exclusive rights to use that name for specific goods or services.

2. Do I need a trademark if I sell online?

Yes, especially online. Marketplaces and search engines increase visibility, which also increases the risk of copycats. A trademark makes enforcement easier.

3. How long does a trademark last?

Most trademarks last ten years and can be renewed indefinitely if you pay renewal fees and keep using the mark.

4. Can I apply for a trademark myself?

You can, but the process involves proper searching and class selection. Many businesses work with specialists to avoid mistakes.

5. What if someone uses my trademark without permission?

If it is registered, you can demand they stop and take legal action if necessary. Registration gives you a much stronger position.

success icon

Thank you for submitting request.

We will get back to you ASAP.