111222

Managing B2B Pricing and Bulk Discounts on Amazon: A Complete Guide

Selling to businesses is different from selling to consumers. Orders are larger. Returns are lower. Expectations are clearer.

If you’re already selling in the Amazon store, tapping into Amazon Business isn’t just an add-on – it’s a shift in how you think about pricing.

Business buyers typically purchase more units per order and come back with fewer returns. That alone makes B2B pricing worth serious attention. But the real opportunity comes from structuring your prices correctly.

Let’s break down how to do that in a way that actually works.


What Makes B2B Pricing Different?

Amazon gives sellers two main ways to attract business customers:

  • Business-only pricing
  • Quantity discounts

Used together, they can increase average order value without hurting your margins.


Business Prices

A business price is a special per-unit price that’s visible only to verified Amazon Business customers. Regular shoppers never see it.

For example, you might list a product at $25 for consumer buyers, but offer it at $22 for business customers. That difference may seem small at first glance. But when someone orders 30, 50, or 100 units, the savings become meaningful.

Business buyers are usually less impulsive and more numbers-driven. They compare cost per unit, think in terms of procurement budgets, and often reorder consistently. A competitive business price signals that you understand that mindset.

It’s a simple adjustment, but it changes how your product is positioned in the B2B space.


Quantity Discounts

Quantity discounts reward bulk purchasing. You can structure them in two formats:

  • Percentage discount: Offer a percentage off once a minimum quantity is reached.
  • Fixed unit price: Set a new lower per-unit price when buyers purchase a specific volume.

Here’s a simplified example:

Units Purchased Discount Final Price (based on $20 business price)
5+ 5% $19.00
10+ 10% $18.00
25+ 15% $17.00
50+ 20% $16.00


Each tier should make financial sense – for you and for the buyer.


Static Pricing vs Automated Pricing

When it comes to managing B2B pricing, you have two main approaches. Both work. The right choice depends on how large and complex your catalog is.


Static Pricing

With static pricing, you manually set your business prices and quantity discount tiers. You decide the exact numbers for each SKU and adjust them when needed.

This approach gives you full control. You can fine-tune margins, test different discount levels, and react deliberately to cost changes or competitor moves. For sellers with a smaller catalog, or for high-value products that need close oversight, manual control often makes sense.

The tradeoff is time. The more SKUs you manage, the harder it becomes to keep everything aligned and competitive.


Automated Pricing

Automated pricing works differently. Instead of setting prices one by one, you create rules. Those rules adjust your business prices automatically based on conditions you define.

For example, you can set business prices to stay a fixed percentage below your standard price. Or you can build rules that react to changes in your main pricing strategy. When your base price updates, your business price adjusts with it.

If you manage dozens or hundreds of SKUs, automation quickly becomes less of a convenience and more of a necessity. It reduces manual errors, saves time, and keeps pricing consistent across your catalog.

That said, automation still needs oversight. Rules should be reviewed regularly to make sure they’re working the way you intended.

In most cases, the smartest setup is a mix: automation for scale, manual control for your top-performing or high-margin products.


How to Set Business Prices Manually

You can adjust prices one SKU at a time directly inside Seller Central.


To Set a Business Price

  1. Go to Inventory → Manage All Inventory
  2. Locate the SKU
  3. Select the Business Price field
  4. Enter your price
  5. Save

You can return at any time to update it.


Adding Quantity Discounts to a Single Product

Once a business price is set, you can build tiers underneath it.

Inside the Business Price panel:

  • Choose percentage or fixed price
  • Enter minimum quantity
  • Add additional tiers (up to five)
  • Save changes

Each new tier must offer a better per-unit price than the previous one. If not, Amazon removes it automatically.


Bulk Upload for Larger Catalogs

If you’re managing dozens or hundreds of products, editing individually isn’t realistic.

Amazon allows bulk pricing updates using the Business Price/Quantity file:

  1. Download the template
  2. Enter SKUs and business pricing details
  3. Save as a tab-delimited file
  4. Upload via the Catalog section in Seller Central

Changes appear quickly in your dashboard and usually reflect to business buyers within minutes.


Using Automated Pricing Rules

Manual updates work well at first. But as your catalog grows, they become harder to manage. That’s where automated pricing comes in.

Amazon’s Automate Pricing tool allows you to set business prices as a percentage or fixed amount below your standard price. You can apply rules across your entire catalog or attach them to specific SKUs. Some rules are designed to help you compete for the Business Featured Offer position, while others focus on maintaining structured business pricing and quantity discounts at scale.

There are catalog-wide percentage rules that automatically apply discounts across all SKUs, SKU-level rules that combine business pricing with quantity tiers, and competitive rules that adjust pricing to improve Featured Offer eligibility. When you update a rule, every SKU connected to it adjusts automatically. That consistency is what makes automation powerful.


How Automation Interacts With Promotions

It’s important to understand how pricing layers work:

  • Coupons on your standard price do not automatically affect business pricing.
  • Deal pricing may temporarily influence percentage-based business discounts.
  • If your standard price drops below your minimum threshold, the rule pauses.

Pricing logic matters. Review rule performance regularly.


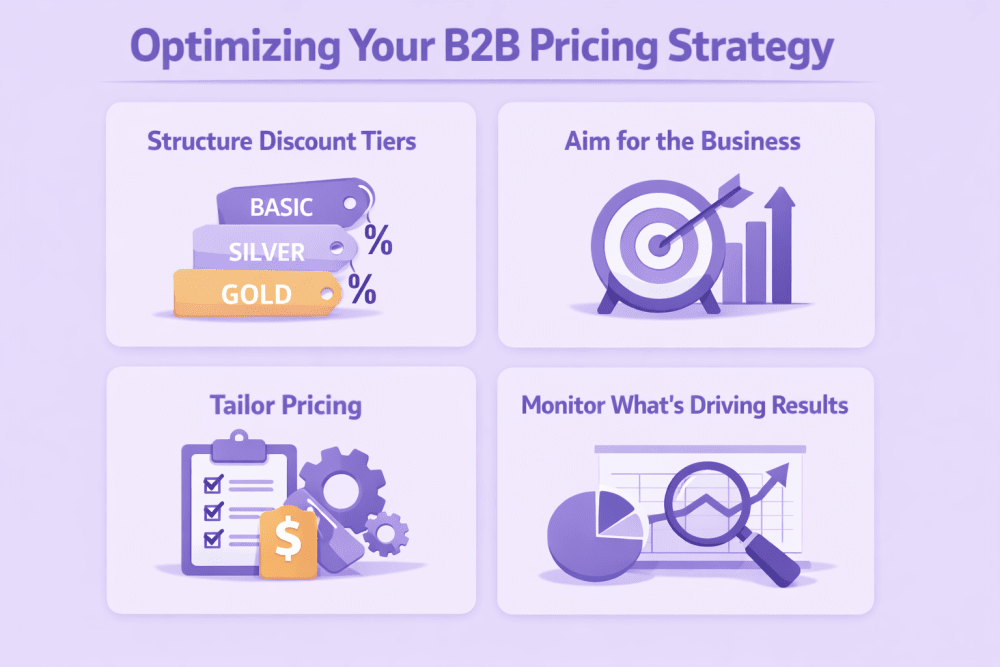
Optimizing Your B2B Pricing Strategy for Better Results

Setting business prices is only the first step. The real impact comes from how you structure, position, and monitor those prices over time.


1. Structure Discount Tiers with Purpose

More tiers don’t automatically mean more sales. In most cases, three to five tiers are enough to guide buyers toward larger orders without overwhelming them.

Discount jumps should feel meaningful. If the difference between tiers is too small, there’s little incentive to increase the order size. At the same time, minimum quantities should reflect actual buying behavior. If your typical business order averages 12 units, setting your first tier at 50 won’t move the needle.

Study your historical order data. Look at real purchasing patterns and build your tiers around them. Keep it practical. Keep it realistic.


2. Aim for the Business Savings Blue Badge

Well-structured discounts can also unlock additional visibility. When your pricing meets Amazon’s thresholds, your product may qualify for the Business Savings Blue Badge.

This badge appears in search results and business storefront placements, helping your offer stand out to professional buyers.

Generally, eligibility requires at least 5% off the standard price for a single-unit business price, or at least a 3% discount on your first quantity tier. Products also need a minimum 4-star rating.

It’s not guaranteed, but when your listing qualifies, visibility and click-through rates often improve.


3. Tailor Pricing to Business Segments

Not all business buyers behave the same way. Amazon Business groups customers by industry, and those industries purchase differently.

Some buy in predictable cycles. Some are highly price-sensitive. Others routinely purchase in large quantities. Understanding these patterns helps you move beyond one-size-fits-all pricing.

Review your reports in B2B Central. Identify which industries are already purchasing from you and consider adjusting pricing tiers or business discounts to better match their buying habits.


4. Monitor What’s Actually Driving Results

Pricing without measurement is guesswork.

Inside B2B Central, review business sales volume, average order value, repeat purchase rates, and how often each discount tier is used. Compare conversion rates between business and consumer buyers.

Look for patterns. Are most buyers stopping at the first tier? Are higher tiers rarely used? Are deeper discounts cutting into margins without increasing volume?

Small adjustments based on real data can make a noticeable difference over time. The key is staying attentive and responsive rather than setting pricing once and forgetting about it.


Smarter B2B Growth Starts with WisePPC

We built WisePPC for sellers who need clarity across advertising, pricing, and overall marketplace performance. As an Amazon Ads Verified Partner, the platform connects through official integrations and provides deeper visibility than Seller Central alone. It tracks more than 30 key metrics, stores long-term historical data well beyond Amazon’s standard 60–90 day window, and clearly separates ad-driven revenue from organic sales.

Instead of switching between multiple reports, WisePPC centralizes everything in one dashboard. Sellers can filter campaigns instantly, apply bulk bid and budget changes across thousands of targets, and compare up to six KPIs on a single chart. Placement-level performance analysis and gradient-based metric highlighting make it easier to detect wasted spend or underperforming keywords at a glance.

Designed to scale with growing catalogs, WisePPC supports advanced segmentation by campaign type, bid strategy, cost type, and match type. With AI-based bid adjustments, automated optimization features, and upcoming inventory forecasting tools, the platform helps sellers align pricing, advertising, and profitability in one structured system.

For sellers serious about improving B2B performance, WisePPC delivers the data control needed to make smarter decisions with confidence.


When Should You Revisit Your B2B Pricing?

B2B pricing is not something you set once and forget. Markets shift. Costs move. Competitors adjust. And business buyers change their purchasing patterns depending on the season.

The smartest sellers treat pricing as a living strategy. That doesn’t mean constant changes. It means knowing when to step in and make thoughtful adjustments.

Below are some of the most common situations that should prompt a pricing review:

Situation What to Do
Cost increases Recalculate your margins and adjust business prices or discount tiers to protect profitability.
Competitor price drops Review your positioning. You may need to adjust your business price or restructure tiers to remain competitive without over-discounting.
Slow business sales Test a stronger first-tier discount or lower minimum quantity to stimulate larger orders.
Excess inventory Increase bulk incentives temporarily to accelerate turnover and free up storage space.
Seasonal buying cycle Introduce time-based stronger tiers during peak procurement periods or fiscal year-end buying windows.


Not every trigger requires a dramatic change. Sometimes a small adjustment to the first tier or a slight repositioning of your base business price is enough.

The key is staying proactive. Waiting too long to react can cost visibility, conversions, or margin. Reviewing your B2B pricing at regular intervals keeps you competitive and aligned with how business customers actually buy.


Plan Around Business Buying Seasons

Business purchasing doesn’t happen randomly. Many organizations follow budget cycles and procurement schedules, which means demand often spikes during predictable windows.

Large orders frequently cluster around:

  • Fiscal year-end, when departments use remaining budget
  • Pre–Prime Day preparation, as sellers stock up for traffic surges
  • Before Black Friday and Cyber Monday, when inventory planning becomes critical
  • End-of-quarter inventory resets and budget reallocations

During these periods, buyers are often more open to placing bulk orders. They’re thinking ahead, securing stock, or closing out budgets before deadlines.

If you anticipate these demand spikes, consider temporarily strengthening your quantity tiers. That could mean slightly deeper first-tier discounts, adjusted minimum quantities, or limited-time bulk incentives. The goal isn’t permanent discounting. It’s strategic timing.

Aligning your pricing with real buying cycles can increase order size without changing your long-term structure. Timing, in many cases, matters just as much as how your tiers are built.


Balance Automation With Oversight

Automation saves time. It reduces manual updates and keeps your catalog aligned. But it doesn’t replace strategy.

The smartest approach is to use automation for broader catalog rules while maintaining closer control over your top-performing or highest-margin SKUs. High-volume products often deserve more attention, especially if small price adjustments can significantly affect revenue.

It’s also important to schedule regular pricing reviews. Even well-built rules need occasional evaluation to make sure they’re still aligned with your costs, competition, and overall goals.

That balance between efficiency and oversight is what keeps your pricing competitive without giving up control.


Final Thoughts: Building a Sustainable B2B Pricing Strategy

Selling to business customers isn’t about simply lowering prices. It’s about creating logical incentives that make bulk purchasing an easy decision. It’s about structuring quantity tiers in a way that feels fair and compelling, while still protecting your margins.

It also requires paying attention. Monitoring performance, reviewing which tiers actually get used, adjusting when costs shift, and aligning your pricing with real buying cycles across industries. None of it is complicated on its own, but it does require intention.

When done right, B2B pricing can increase average order size and create more stable revenue without pushing you into unnecessary discounting.

Start simple. Test carefully. Make adjustments based on what the numbers tell you. That’s how B2B pricing turns into steady, long-term growth.


Frequently Asked Questions

What is the difference between a business price and a quantity discount?

A business price is a lower per-unit price that only verified Amazon Business customers can see. It applies even if they purchase just one unit. A quantity discount, on the other hand, rewards buyers for purchasing in bulk. The price decreases further once they reach specific quantity thresholds. You can use both together to create stronger incentives for larger orders.

Do business prices affect my standard consumer pricing?

No. Business prices are separate from your standard price. Regular shoppers continue to see your normal listing price, while business buyers see the discounted business price. This allows you to target professional buyers without changing your consumer-facing strategy.

How many quantity tiers should I create?

In most cases, three to five tiers are enough. Too many tiers can create confusion, while too few may limit flexibility. The key is to build tiers around real purchasing behavior. Review your historical order data and set minimum quantities that reflect how business customers already buy.

Can I automate business pricing?

Yes. Amazon’s Automate Pricing tool allows you to create rules that adjust business prices automatically. You can set business prices as a percentage below your standard price or apply structured rules across multiple SKUs. Automation saves time, but it’s still important to review performance regularly.

What happens if I run a promotion on my standard price?

Coupons applied to your standard price do not automatically change your business price. However, deal pricing may temporarily influence percentage-based business discounts during the promotion window. Always review how different pricing layers interact to avoid unintended margin impact.

Prime Day 2026: How to Get Your Store Ready Before the Rush

Prime Day is not just another sales spike. For many sellers, it’s one of the most important traffic surges of the year. In 2025, Amazon reported record-breaking participation from independent sellers, with hundreds of millions of items sold during the event. Expectations for 2026 are even higher.

If you’re planning to sell during Prime Day 2026, preparation matters. The sellers who see the biggest lift are usually the ones who plan weeks in advance, not days.

Below is a practical guide to help you prepare, whether you’re a Professional seller or you manage a registered brand.


Preparing Your Amazon Store for Prime Day 2026

Prime Day is not just a spike in traffic. It’s a stress test for your entire operation. Listings, inventory, ads, creative, pricing. Everything gets pressure at once.

If you prepare early, the surge works in your favor. If you don’t, it exposes weak spots fast. Below is a practical, no-fluff breakdown of what to focus on before and during Prime Day 2026.


1. Start With Offers That Actually Stand Out

When traffic increases, so does competition. Shoppers scroll fast. Your listing needs a reason to pause them.

Use Coupons the Right Way

Coupons are still one of the easiest visibility boosters. That small badge in search results can lift click-through rate, especially during major events.

If you plan to run coupons:

  • Schedule them exactly around Prime Day dates
  • Make the discount noticeable, not symbolic
  • Target Prime members where possible

Small discounts rarely move the needle during high-volume events. Be intentional.

Add Limited-Time Promotions

Beyond coupons, consider Best Deals or Lightning Deals. Time pressure works well during short event windows.

Just double-check your margins. A discount that looks strong but erodes profit too much won’t help long term.

Prime-exclusive price discounts are another option. These allow you to control duration and unit limits, but not every SKU qualifies, so check eligibility early.


2. Review Inventory Before You Increase Traffic

It sounds basic. It’s also where many sellers slip.

Prime Day traffic can drain stock faster than expected. Running out mid-event doesn’t just stop sales. It can affect ranking and future visibility.

Before the event:

  • Check FBA inventory levels
  • Review inbound shipment timelines
  • Account for processing delays

If you rely on Fulfillment by Amazon, build in buffer time. Warehouses move quickly during peak season, but they also receive massive volume.


3. Adjust Advertising Budgets Ahead of Time

Prime Day clicks are more frequent and often more expensive.

If your daily budget runs out at noon, your ads shut off. That means lost exposure during peak hours.

Use Schedule-Based Budget Rules

Set budget increases in advance:

  • Raise budgets by percentage during event dates
  • Apply automatic increases for a defined window
  • Scale back once the event ends

Don’t wait until Prime Day morning to adjust budgets. By then, performance data may already be skewed.


4. Fine-Tune Bids for Higher Competition

Cost-per-click almost always climbs during major shopping events. More sellers compete for the same placements, which means hesitation can cost you visibility.

Start by reviewing your strongest performers. Look at the keywords and ASIN targets that consistently convert, not just the ones that drive traffic. If something already proves it can turn clicks into orders, it’s usually worth protecting that position during Prime Day. A moderate bid increase on high-converting terms can help you stay competitive when auction pressure rises.

Dynamic bidding can also work in your favor. With strategies that adjust in real time based on conversion likelihood, your budget is more likely to flow toward impressions that matter. It won’t guarantee top placement, but it helps prioritize smarter clicks instead of random exposure.

It’s important not to overcorrect. The goal is not to win every auction or dominate every placement. It’s to stay visible where performance is strongest and margins still make sense. Watch performance daily during the event. If CPC spikes without a lift in conversion, scale back. If a campaign holds steady and drives profit, lean in.

Once Prime Day wraps, revisit everything. Lower inflated bids, review placement data, and compare pre- and post-event efficiency. The auction will cool down. Your structure should adjust with it.


5. Optimize Your Storefront for Event Traffic

If your brand is enrolled in Amazon Brand Registry, you have more control.

Create a Prime Day Storefront Version

Use the scheduling feature inside Stores to launch a temporary Prime Day layout. This allows you to:

  • Highlight active deals and promotions
  • Feature specific product collections
  • Automatically revert after the event

Submit updates at least a week early to leave room for moderation.

You can also add a Featured Deals widget so promotional items appear dynamically while the promotion runs.


6. Use External Traffic Strategically

Prime Day exposure doesn’t have to stay inside Amazon. In fact, relying only on on-platform traffic can limit your reach, especially if competitors are increasing ad spend at the same time.

Driving traffic through social media, email campaigns, influencer partnerships, or paid search can strengthen overall sell-through during the event window. If you already have an audience, Prime Day is a good moment to activate it. A short, focused campaign tied directly to your Prime Day offers can bring in shoppers who were not actively browsing Amazon that day.

If you use Amazon Attribution tags, you may qualify for the Brand Referral Bonus. This program provides credits on qualifying sales generated from external traffic. It does not apply to Amazon Ads campaigns themselves, but it can help offset referral fees tied to off-platform marketing efforts.

Alignment is important. Promote the same products, the same discounts, and the same timing across channels. Mixed messaging creates confusion. Clear, consistent communication makes it easier for shoppers to act quickly, especially during a short event like Prime Day.


7. Leave Time for Creative Approvals

Content moderation takes time. During peak seasons, it can take longer.

If you’re updating:

  • Storefronts
  • A+ Content
  • Sponsored Brand creatives

Submit at least one week early. If something gets rejected, you’ll have time to revise and resubmit.

A+ Content remains one of the strongest tools for brand-registered sellers. Clear visuals and structured comparison sections help shoppers decide faster, especially during high-traffic events.


8. Run A/B Tests Before the Event

Prime Day is not the moment to experiment from scratch. When traffic surges, every percentage point in conversion matters. That’s not the time to guess which image works better or whether a new title might perform well.

If you’re enrolled in Brand Registry, use Manage Your Experiments well before the event. Give your tests enough time to collect meaningful data. A few days of traffic is rarely enough to draw conclusions, especially if your sales volume fluctuates.

Use Manage Your Experiments in Advance

Focus on the elements that influence conversion the most:

  • Main images
  • Titles
  • Bullet points
  • A+ layouts

Even small changes can shift performance. A clearer main image, a tighter value proposition in the title, or more structured comparison charts in A+ Content can improve shopper confidence.

Once you identify a winner, publish it before Prime Day traffic peaks. When volume increases, you want your strongest version live. High traffic amplifies whatever is on the page, good or bad. Better to make those decisions calmly ahead of time than under pressure during the event.


9. Watch Your Metrics in Real Time

Once Prime Day starts, things move quickly.

What to Monitor Closely

  • Conversion rate
  • ACOS and TACOS
  • Session volume
  • Inventory levels

If something underperforms, adjust. If something overperforms, consider reallocating budget.

Sellers who actively monitor during the event usually outperform those who set campaigns and walk away.


10. Think Beyond the Two-Day Window

Prime Day often creates momentum that extends well beyond the event itself. The spike in traffic is temporary, but the impact can carry forward for weeks if you pay attention.

New customers may come back. Product rankings can shift. Advertising data collected during the surge can reveal patterns you wouldn’t see during a normal week. What converted under pressure? Which keywords scaled efficiently? Where did margins tighten?

After Prime Day, take time to review your top-performing SKUs, dig into keyword performance, and compare results from before, during, and after the event. Look at both paid and organic lift. Sometimes the real value shows up in improved ranking and repeat purchases, not just those two headline days.

Treat Prime Day as both a revenue opportunity and a data opportunity. The sales matter. The insights matter just as much.


Take Control of Prime Day With WisePPC

Prime Day moves fast. Budgets disappear quicker than usual, and small decisions can have big impact. That’s exactly why we built WisePPC.

As an Amazon Ads Verified Partner, WisePPC works through official integrations and provides deeper visibility than standard reports alone. The platform tracks 30+ advanced metrics, stores long-term historical data well beyond Amazon’s default window, and clearly separates what drives revenue, ads or organic.

During high-pressure events, clarity wins. Inside WisePPC, sellers can compare up to six KPIs on one chart, apply bulk bid or budget changes in seconds, and instantly filter campaigns to spot wasted spend. Placement data, keyword trends, bid strategies, everything is structured so decisions can be made quickly without digging through multiple dashboards.

Instead of spreadsheets and guesswork, WisePPC delivers one clean system built for real-time decisions. Prime Day doesn’t have to feel chaotic. With the right data in front of you, it becomes a controlled push, not a scramble.


Final Thoughts

Prime Day 2026 will likely bring even more competition and even more opportunity. The difference usually comes down to preparation.

Strong offers. Sufficient inventory. Structured ad budgets. Optimized listings. And enough time to get everything approved.

Whether you’re just starting with a Professional selling plan or building a registered brand with advanced tools, the fundamentals stay the same: plan early, monitor closely, and make data-backed decisions.

That approach works on Prime Day. And it works the rest of the year, too.


FAQ

When should I start preparing for Prime Day 2026?

Ideally, several weeks in advance. Inventory planning and creative approvals can take longer than expected, especially during peak seasons. Advertising adjustments and A/B tests should also be finalized before traffic spikes. The earlier you prepare, the fewer last-minute decisions you’ll have to make.

Do I need to run discounts to succeed on Prime Day?

Not necessarily, but competitive pricing helps. Prime Day shoppers expect visible value. Coupons, Lightning Deals, or Prime-exclusive discounts can improve click-through and conversion rates. Just make sure your margins still work after fees and ad spend.

How much should I increase my ad budget?

There’s no universal number. It depends on your category, conversion rate, and historical Prime Day performance. A common approach is to increase budgets for top-performing campaigns and monitor closely during the event. The goal is to avoid running out of budget during peak hours.

Should I raise bids across all campaigns?

No. Focus on campaigns and keywords that already convert well. Protect visibility where performance is strongest. Raising bids across low-performing campaigns can increase costs without improving results.

Is external traffic worth it during Prime Day?

It can be, especially if you already have an audience. Social media, email marketing, and paid search can help amplify visibility. If you use Amazon Attribution tags, you may qualify for the Brand Referral Bonus on eligible sales generated from external traffic.

Amazon Seller Forums: Where Sellers Actually Talk About What Works

Selling on Amazon comes with questions. Some are simple. Others can affect your listings, ads, or even your account health. When you need clarity, it helps to hear from people who’ve already been through it.

Amazon Seller Forums bring together experienced sellers and Amazon community managers in one place. It’s where practical answers, real examples, and current updates come together so you can make smarter decisions and move forward with confidence.


What Are Amazon Seller Forums?

Amazon Seller Forums are an official community space inside the Amazon ecosystem where sellers and Amazon community managers interact.

It’s not just sellers talking to sellers. Amazon moderators and community managers actively monitor conversations, provide clarifications, and sometimes step in with policy guidance. That structure keeps discussions productive and generally accurate.

Topics Are Organized Into Categories

  • Account Setup
  • Listings and Catalog
  • Orders and Fulfillment
  • Inventory Management
  • Product Safety and Compliance
  • Branding and Growth
  • Buyer Experience
  • Account Health
  • News and Announcements
  • Community Connections

You’ll find everything from quick “why was my listing suppressed?” questions to deep strategy threads about scaling Sponsored Products or managing seasonality.

For many new sellers, it becomes the first place they go when something feels unclear.


Forums vs. Help Content vs. Seller Support

Amazon gives you several ways to get help. The mistake many sellers make is using the wrong one for the problem they’re facing. When you understand what each resource is designed for, you stop bouncing between tabs and start finding answers faster.

Here’s how they differ in practice.


Amazon Seller Forums

The forums are where theory meets reality. Help pages might explain a policy, but sellers in the forums often explain how that policy actually affects day-to-day operations.

You’ll see threads where someone breaks down how they recovered from a listing suppression, adjusted bids after ranking drops, or dealt with a sudden spike in returns. That perspective is hard to get from official documentation alone.

Think of it as shared field experience. Not always perfect, but often practical.

Forums are not ideal for urgent account emergencies. Responses depend on community activity. But for learning, context, and strategy, they’re often the most useful place to start.

Best For

  • Learning from other sellers’ real experiences
  • Strategy discussions around ads, listings, and scaling
  • Clarifying policies through community context
  • Non-urgent operational questions
  • Hearing how others handled similar situations
  • Understanding how new updates are playing out in real time


Seller Central Help Content

Help content is the official source of truth. When you need to know exactly what Amazon’s policy says, how to submit documentation, or how to create a variation listing properly, this is where you go.

It’s structured, consistent, and written from Amazon’s perspective. If you’re learning the basics or confirming compliance details, Help content is usually the fastest way to get accurate instructions.

What it doesn’t provide is discussion. You won’t see debate, interpretation, or shared workarounds. It tells you what the system expects. It does not tell you how other sellers are adapting.

When you need the “official version,” this is the place.

Best For

  • Step-by-step instructions
  • Official documentation
  • Definitions and processes
  • Structured training materials
  • Seller University videos
  • Clear explanations of rules and requirements


Selling Partner Support

If something directly impacts your ability to sell or receive funds, this is not a forum situation. It’s a Support ticket situation.

Selling Partner Support is Amazon’s formal help desk. They can access your account details, review case history, and escalate issues when needed. Forums cannot do that.

It’s also the right choice when you need documented communication. For example, submitting an appeal, resolving a compliance block, or addressing a performance notification.

If it’s urgent or account-specific, go straight to Support.

Best For

  • Account suspensions or deactivations
  • Payment or disbursement issues
  • Technical errors affecting your account
  • FBA shipment discrepancies
  • Time-sensitive problems tied specifically to your account


How to Choose the Right Path

A simple way to decide:

  • If you’re learning, exploring, or comparing experiences, use the forums.
  • If you’re looking for official instructions, use Help content.
  • If your account is at risk or money is involved, contact Support.

The key thing to remember is that forums are not a replacement for Support. They are a complement. One gives you community perspective. The other gives you official resolution.

Used together, they can save you a lot of trial and error.


Why Forums Often Lead to Faster Clarity

Official documentation tells you what should happen. Sellers in the forums tell you what actually happened.

That gap is where clarity usually lives.

A Help page might outline the return policy, but a seller in the forums might explain how they handled repeated return abuse in a way that protected their metrics. Someone else might describe how they adjusted ad spend after a sudden ranking drop and what signals they watched before scaling back up. Another thread might break down how a new policy update affected listings during the first few weeks, including small details that weren’t obvious at first glance.

That kind of real-world context shortens the learning curve. Instead of experimenting blindly, you’re seeing what others tested and what the outcome was.

And when several experienced sellers point toward a similar solution, it adds a layer of confidence. You’re not guessing in isolation. You’re learning from patterns.


Hidden Value: Events and “Ask Amazon” Sessions

Throughout the year, the forums host:

  • “Ask Amazon” live Q&A sessions
  • Topic-focused engagement events
  • Direct update threads on policy changes
  • Announcements tied to new features

These threads often contain clarifications you won’t find summarized anywhere else.

If you stay active, you’ll catch updates early, sometimes before they ripple across blogs and YouTube channels.


How to Access Amazon Seller Forums

Most public threads can be viewed without posting.

To participate:

  1. Log in to Seller Central.
  2. Go to Help in the upper-right corner.
  3. Select Get help and resources.
  4. Under Support tools, choose Forums.

You can also access discussions from the Amazon Seller mobile app on iOS and Android, which makes it easy to check threads while away from your desk.

To post or comment, you’ll need an active selling account.


How to Get Real Value (Not Just Scroll)

Like any community, what you get out depends on how you use it. It’s easy to skim threads, nod at a few comments, and move on. But if you approach the forums with a bit of intention, they become much more useful.


1. Search Before Posting

There are millions of archived discussions. In many cases, your exact issue has already been asked and answered, sometimes multiple times.

Searching first does two things. It saves you time, and it gives you immediate access to a range of perspectives instead of waiting for new replies. You might even find follow-up posts that explain what worked long term, not just the first fix.

Often, the fastest answer is already sitting in a thread from six months ago.


2. Be Specific

Vague posts get vague answers.

Instead of writing “My listing is down.”

Try something like: “ASIN suppressed due to compliance issue, error code X, category Y. Documentation submitted yesterday. No response yet.”

Details matter. Include what you’ve already tried, what the notification said, and what outcome you’re hoping for. The clearer your post, the easier it is for experienced sellers to give useful input instead of guessing. Specific questions attract specific answers.


3. Stay Professional

Frustration happens. Suspensions happen. Unexpected fees happen. But emotional posts rarely lead to productive discussions.

Avoid sharing personal information, financial details, or anything tied directly to sensitive account data. Keep the tone clear and respectful. Sellers are more likely to help when the conversation stays focused on the issue, not the emotion behind it.

Professional communication tends to get professional responses.


4. Contribute When You Can

You don’t need to be a seven-figure seller to add value. If you solved a listing issue, tested a pricing adjustment, or navigated a tricky compliance situation, someone else may benefit from hearing how you approached it.

Sharing your experience strengthens the community and builds credibility over time. It also helps you think more clearly about your own processes. Sometimes explaining what worked for you reveals patterns you hadn’t noticed before.

The forums work best when sellers both ask and answer.


5. Watch Patterns

One isolated complaint might not mean much. But if multiple sellers start reporting the same issue, such as a sudden drop in impressions, unexpected fee adjustments, or unusual reporting delays, that’s a signal.

Forums can act like an early warning system. When you see recurring themes, it may indicate a broader system change or policy update. That awareness gives you time to adjust before it impacts your performance too deeply.

Pay attention not just to answers, but to trends.

Used thoughtfully, the forums become more than a place to scroll. They become a tool for staying sharp in a marketplace that doesn’t stay still for long.


When Forums Help Most

Forums are especially useful when:

  • You’re navigating your first few months selling. The early stage is full of small uncertainties. Listing errors, unexpected fees, confusing notifications. Reading how others handled similar issues can shorten the learning curve and help you avoid beginner mistakes.
  • Policies feel confusing or unclear. Sometimes the Help page explains the rule, but not how it plays out in real life. In the forums, sellers often share how a policy update affected their listings, ads, or account health in practice.
  • You want perspective before making a strategic decision. Maybe you’re considering switching fulfillment methods, raising prices, or restructuring campaigns. Seeing how other sellers approached similar decisions gives you context you can’t get from a dashboard alone.
  • You’re testing new ad structures. Sponsored Products changes. Bid strategies shift. Placement behavior evolves. Forums often contain real examples of what’s working right now, not just what worked last year.
  • You’re managing account health signals. Performance notifications can feel stressful. In the forums, you’ll find discussions from sellers who’ve already gone through appeals or performance reviews and can explain what mattered most.

Even experienced sellers say they still learn something new regularly. That’s the nature of Amazon. It shifts, updates, and evolves. Staying connected to other operators helps you stay steady when things move.


From Insights to Action: Why We Built WisePPC

Seller forums are great for perspective. You see what others tested, what worked, what failed. But insight alone doesn’t optimize campaigns. Execution does. That’s where we come in.

We built WisePPC to turn scattered data into clear decisions. As an Amazon Ads Verified Partner, the platform  connects through official integrations and give you visibility far beyond standard reports. You can track 30+ key metrics, compare up to six KPIs on one chart, and access years of historical data, not just 60–90 days.

Bulk edits, advanced filtering, placement-level performance, inline bid changes, long-term trend tracking. Everything is designed to help you spot wasted spend fast and act on it without friction.

Forums help you learn. WisePPC helps you move.


Final Thoughts

Selling on Amazon isn’t static. Policies shift. Competition evolves. New features roll out.

Having access to a space where sellers share practical experience, backed by Amazon oversight, can reduce uncertainty.

You won’t find magic shortcuts in the forums.

But you will find patterns, warnings, smart workarounds, and clarity that only comes from people who are in the trenches.

And sometimes, that’s exactly what you need.


Frequently Asked Questions

What are Amazon Seller Forums?

Amazon Seller Forums are an official community space where sellers discuss issues related to selling on Amazon. Discussions are organized by topic and monitored by Amazon community managers to keep conversations accurate and productive. Sellers can ask questions, share experiences, and learn from others operating in different marketplaces.

Do I need a selling account to use the forums?

Most public discussions can be read without posting. However, to start a new thread, comment, or participate fully, you need an active Seller Central account.

Are answers in the forums official Amazon guidance?

Not always. Many responses come from other sellers sharing personal experience. However, Amazon community managers do participate in discussions and may provide clarifications. For official policies and account-specific decisions, Seller Central Help content or Selling Partner Support is the final authority.

When should I contact Selling Partner Support instead of posting in the forums?

If your issue involves account suspension, payment delays, disbursement problems, technical errors tied to your account, or anything urgent, contact Selling Partner Support directly. Forums are better suited for discussion and perspective, not time-sensitive account actions.

Can I trust advice shared by other sellers?

Seller insights can be extremely helpful, especially when multiple experienced sellers point to similar solutions. That said, every business is different. It’s wise to compare advice with official documentation before making major decisions.

How to Start and Scale a Successful Amazon Canada Store in 2026

Selling on Amazon.ca might look like a quick copy-paste from your US setup, but it’s not. You’re dealing with a different currency, bilingual rules, new tax responsibilities, and a whole set of logistics that don’t match 1:1 with what you’re used to.

But once you understand the flow – how to register, where to send your inventory, and what actually moves the needle – it’s a lot more straightforward. The Canadian market isn’t huge, but it’s solid. Loyal customers. High spending power. Less competition. Just enough friction to keep it interesting.


Selling on Amazon.ca Isn’t Copy-Paste

Expanding into Amazon Canada feels familiar until it isn’t. The interface looks the same. The listing flow works the same. But behind the scenes, things shift – quietly at first, then all at once. Suddenly you’re pricing in CAD, shipping across borders, and trying to figure out why your best US ad campaign isn’t converting north of the border.

There’s also the bilingual requirement, the GST/HST rules Amazon won’t handle for you, and the fact that “fast shipping” means something different when your fulfillment center is in Ohio and your customer’s in Quebec. It’s not complicated, but it’s not autopilot either.

The sellers who do well here are the ones who treat Canada like its own market. They track the data separately. They adjust the message. They plan around the quirks instead of ignoring them. That’s what makes the difference – not the product, not the price, but how tightly the operations fit the landscape.


10 Steps to Start Selling on Amazon Canada

The mechanics of launching on Amazon.ca aren’t hard – but they’re not automatic either. You’ll need to handle some extra layers (taxes, compliance, fulfillment quirks), and it helps if you build things deliberately from the start instead of patching holes later. Here’s a practical breakdown of what to do – and what to avoid tripping over.


1. Register Your Account (the Right Way)

You can open a Canada-only account, or you can go with a North America Unified Account, which lets you manage the U.S., Canada, and Mexico from one place. If you’re already selling in the U.S., the unified account is the better move – it keeps everything under one login and lets you use cross-listing tools like BIL (Build International Listings). You’ll need:

  • A valid government ID
  • Business info and contact details
  • A credit card
  • A bank account (Canadian or international) for receiving payouts
  • Tax registration info (more on that soon)

Even if you’re just testing the waters in Canada, it’s worth treating it like a proper business move from the start. It’ll save you time later.


2. Managing Regional Growth Without the Guesswork

Expanding to Amazon Canada is more than just switching storefronts. New currency, new fulfillment rules, and a different customer base mean sellers need sharper visibility into what’s actually driving performance. That’s where a centralized, real-time system makes all the difference.

WisePPC is built to give marketplace sellers that clarity. We track advertising and sales data across regions in one clean dashboard, so you can see how campaigns perform in the U.S. versus Canada without switching tools. From keyword-level insights to bulk campaign edits and long-term historical data, everything is designed to replace guesswork with structured decisions.

We also stay connected beyond the platform. You’ll find us on Facebook, Instagram, and LinkedIn – sharing insights, product updates, and practical use cases from real sellers. Whether you’re testing Canada with NARF or scaling through domestic FBA, WisePPC helps you see what’s working and adjust with confidence.


3. Understand Canada’s Tax Rules (Before You Ship Anything)

This part throws off more sellers than it should. Amazon does collect GST/HST in most cases as a Marketplace Facilitator. But if your global sales exceed CAD $30,000 over four consecutive calendar quarters, you’re legally required to register for a GST/HST number and may need to handle your own filings, depending on how Amazon reports and remits tax on your behalf.

  • Register for a GST/HST account with the Canada Revenue Agency
  • Collect the correct sales tax (varies by province)
  • File and remit those taxes quarterly or annually

It doesn’t matter if you’re based in the U.S. or Europe – if you’re storing goods in Canadian FBA warehouses or selling enough volume, you’re on the hook.


4. Don’t Just Copy Your U.S. Product Line – Check Compliance

Here’s the part most sellers skip: not everything that’s fine on Amazon.com is legal or approved on Amazon.ca. Some categories need special labeling, documentation, or French-language packaging – especially for Quebec. Before listing a product:

  • Check if your category requires bilingual labeling
  • Verify if it’s subject to Health Canada regulations
  • Avoid assumptions – a product eligible in the U.S. can still get flagged in Canada

If you’re selling cosmetics, food, supplements, electronics, or baby items, double-check the local rules. Seriously.


5. Localize Your Listings Like You Mean It

When it comes to listings, the biggest mistake sellers make is thinking translation equals localization. It doesn’t. Sure, Amazon gives you tools like Build International Listings (BIL) to quickly copy over your product pages, and that helps – especially since many reviews and backend data can carry over. But if you’re serious about conversions, especially in Quebec, you’re going to need to go deeper.

That means rewriting your bullet points and titles with Canadian shoppers in mind, using the right spelling conventions, terminology, and even tone. French translations should be done properly – not by AI, and definitely not by plugins – because regional customers will spot a bad translation in seconds. People often overlook small details like metric units or phrases that don’t quite land in Canadian English. But these are the things that help your listing feel local instead of imported.


6. Price in CAD and Know What’s Behind the Numbers

It’s easy to forget you’re not pricing in USD anymore. But once you do, a bunch of small variables start to matter. Factor in:

  • Fulfillment cost differences (NARF vs. FBA Canada)
  • Exchange rate fluctuations (especially if you’re paid in USD)
  • Import duties or brokerage fees if you’re the Importer of Record
  • Ad performance differences – Canadian CPCs are usually lower, but volume’s smaller too

You can let BIL sync your prices automatically based on rules, or go manual if your margins need tight control.


7. Pick a Fulfillment Strategy That Fits How You Want to Scale

Choosing how you’ll fulfill orders in Canada is one of the most important operational decisions you’ll make. It affects delivery speed, conversion rate, tax obligations, and even how customers perceive your brand. You’ve got options here, and each one comes with trade-offs.


North America Remote Fulfillment (NARF)

Ships from your U.S. FBA inventory, so you don’t need to register for Canadian taxes or handle customs upfront. It’s a quick way to test demand, but comes with slower delivery compared to domestic FBA, Prime badge is available for eligible items, and cross-border fulfillment fees are higher.


Domestic FBA Canada

You send inventory directly to Amazon’s Canadian warehouses. Your products become Prime-eligible, fulfillment costs drop, and conversion usually improves. But it requires CRA registration and upfront coordination with customs.


Fulfilled by Merchant (FBM)

You ship orders yourself from your own warehouse. It gives you full control, but also means slower delivery and no Prime badge. Best for sellers with existing infrastructure or products that don’t fit well into FBA.

There’s no single “right” choice – just depends on where you’re at and how much you’re willing to manage.


8. Set Up Currency Conversion and Get Paid (Cleanly)

Getting paid sounds simple, but with Amazon.ca, you’re juggling CAD, international transfers, and fees you might not see until they hit your statement. By default, Amazon can convert your Canadian revenue and deposit it in your home currency using their built-in Amazon Currency Converter. It works – but you’re paying for the convenience through the exchange rate spread.

A better long-term option is opening a Canadian business bank account. It gives you cleaner control over cash flow, simplifies CRA tax filings, and avoids surprises tied to fluctuating exchange rates. That said, if you’re just testing the market or don’t want to go through extra paperwork up front, Amazon’s default payout method is perfectly serviceable. Just know what you’re giving up for the ease of setup.


9. Advertise – But Adjust the Strategy

You can run Sponsored Products, Sponsored Brands, and even Display Ads on Amazon.ca. But your U.S. campaigns won’t always translate cleanly. A few quick tips:

  • Don’t just duplicate campaigns – rebuild them with localized keywords
  • Use Canadian spellings where relevant (yes, it affects search)
  • Check your targeting – some categories behave differently in Canada
  • Don’t forget to localize coupon copy or offer text in French, too

Start with a small budget, then scale what’s working. Canada tends to reward patience and clean execution over aggressive tactics.


10. Track What’s Working and Where to Go Next

Once everything’s live – listings, ads, inventory – the day-to-day challenge becomes understanding what’s working and what isn’t. On the surface, Amazon’s Sell Globally dashboard gives you basic visibility into order flow and store-level metrics. But that won’t tell you why a product suddenly dropped off in Alberta, or whether a pricing change in the U.S. is tanking your CAD margins.

Canadian expansion works best when it’s tracked separately. Monitor returns. Keep an eye on regional performance. Look out for small signals – like reviews coming in French or questions about shipping speed – that might hint at bigger underlying issues. A lot of sellers treat Amazon.ca like a “lite” version of their U.S. business, but the ones that actually scale are usually the ones treating it like a standalone store. Same brand, different playbook.


What Actually Matters to Canadian Shoppers

Selling to Canadian customers isn’t just a matter of flipping on a new marketplace. There’s a different rhythm here. Expectations around delivery, pricing, language, and even customer service come with their own tone and shoppers are pretty quick to notice when something feels off.

Prime delivery still matters. But “fast” in Canada often means dependable rather than instant. A 2-4 day window with accurate tracking usually earns more trust than overpromising next-day and missing the mark. Pricing works the same way. People expect to pay in CAD, see tax-inclusive totals, and not get hit with surprise duties. Small gaps in this flow can lead to big drop-offs.

Bilingual listings also matter more than sellers think. If you’re listing in Quebec and your French copy reads like machine translation, people will spot it immediately. Natural, regionally fluent language goes a long way – just like using metric units and spelling that matches Canadian norms. These aren’t minor tweaks. They’re signals that you’re building for this market, not just copying things over.


What Trips Sellers Up When Expanding to Amazon.ca

Canada feels familiar, which is exactly why it catches sellers off guard. It’s the same Seller Central, similar product categories, even the same ad formats. But under the surface, a few small missteps can quietly turn into bigger issues. Here’s where things tend to go wrong:

  • Delaying CRA registration: Sellers often wait too long to register for GST/HST, assuming they’re under the CAD $30K threshold. But storing inventory in Canadian FBA centers can trigger tax obligations sooner than expected, and skipping this step creates compliance problems that are harder to fix later.
  • Skipping proper localization: Copying U.S. listings and simply changing the currency isn’t enough. Quebec buyers expect real French, not machine translations, and even English-speaking provinces notice details like spelling or missing metric units.
  • Ignoring currency math: U.S. pricing rarely converts cleanly into Canadian margins. Exchange rates, fulfillment differences, and built-in FX fees can quietly eat into profit if you don’t calculate the full landed cost.
  • Running ads without regional tracking: Campaign performance in Canada behaves differently from the U.S., especially with lower traffic volume. Without isolating Amazon.ca data, sellers often misread results and overspend.
  • Treating Canada like a side project: That mindset shows up in slower shipping, generic listings, and minimal support. Canadian customers respond better when they feel the store was built for them, not copied over as an afterthought.


Conclusion

Amazon.ca isn’t just a copy of your U.S. setup. It runs on the same backend, but the front-facing details – taxes, fulfillment, expectations – demand their own approach. Sellers who succeed here take the time to localize, to track things separately, and to make adjustments that fit the market. You don’t need to get everything right on day one. But you do need to treat it like more than just a test. That mindset – combined with clean execution – is what gives Canadian expansion real legs.


FAQ

1. Do I need a Canadian business to sell on Amazon Canada?

No, but you do need to register for a GST/HST account with the Canada Revenue Agency if you cross the CAD $30,000 sales threshold – or if you’re storing inventory in Canadian FBA centers. You can operate as a non-resident importer, but taxes and compliance still apply.

2. Can I just ship orders from my US warehouse using NARF?

Yes, and it works for testing the waters. But it comes with slower delivery times, no Prime badge, and usually lower conversion rates. For serious volume or brand trust, domestic FBA Canada tends to win out.

3. Do I need to list in both English and French?

Not always. For most Amazon.ca listings, English is enough – though French is recommended, especially for Quebec. But packaging and labels for regulated products (like food or cosmetics) must be bilingual by law, and Amazon enforces this for some categories.

4. Will Amazon handle Canadian sales tax for me?

Usually, yes. Amazon.ca acts as a Marketplace Facilitator and collects GST/HST on most orders. If you’re not registered or use a non-resident tax ID, Amazon remits it for you. But if you have a standard GST/HST number, you may still need to file and remit taxes yourself.

5. Are ad strategies different for Amazon.ca?

They are. Smaller traffic, different keyword behavior, and regional language quirks all shift how campaigns perform. Duplicating US ads rarely works cleanly. You’re better off building campaigns from scratch using localized search data.

Subscribe & Save on Amazon: How It Works and What Sellers Need to Know

Repeat sales are great – until they aren’t predictable. Subscribe & Save was meant to fix that. It gives customers a reason to come back regularly, and sellers a clearer idea of what’s ahead. But it’s not a plug-and-play solution. It needs upkeep, clear data, and an eye on how shoppers actually behave. If you’re selling on Amazon in 2026, understanding the mechanics behind Subscribe & Save can help you avoid common pitfalls and get more value from each subscription.


How Amazon’s Subscription Model Actually Works

Subscribe & Save lets customers schedule recurring deliveries of everyday items – without placing the same order over and over. It’s usually used for things people run out of: vitamins, cleaning supplies, protein powder, diapers, toothpaste. They pick the item, set the delivery frequency (anywhere from monthly to every six months), and get a small discount just for subscribing.

For sellers, this setup unlocks more than just a slight bump in revenue. It creates rhythm. When a customer subscribes, that purchase becomes predictable. You don’t have to win the sale again. You just need to keep the product in stock, deliver on time, and avoid price swings that could drive them to cancel.

That said, it’s not magic. Customers can skip shipments, tweak dates, or cancel whenever they want. The system’s flexible – and that’s the catch. From a seller’s side, Subscribe & Save only works well when there’s visibility into how often people actually reorder, how many churn after one delivery, and whether the discount you’re offering is paying off long-term.


The Upside and the Catch: What Subscribe & Save Really Brings

Subscribe & Save can be a solid growth lever – if you manage it with clarity. It’s designed to build loyalty, bring structure to reorders, and make revenue a little more predictable. But it’s not a set-and-forget feature. Sellers who treat it like one often run into problems: unreliable forecasting, surprise cancellations, margin erosion. Here’s how it actually plays out on both ends.

What You Stand to Gain

If the setup is right, the benefits go beyond just more orders.


1. Predictable revenue flow

Subscriptions reduce sales volatility. You’re not constantly re-winning the same customer – you’re becoming part of their routine. That means steadier revenue and fewer dry weeks.


2. Cleaner inventory planning

Recurring orders make forecasting easier. With more consistent demand signals, you can restock with purpose – not guesswork and avoid both stockouts and dead inventory.


3. Stronger customer retention

When someone opts into a subscription, they’re less likely to explore alternatives. It’s passive loyalty, but loyalty nonetheless especially if delivery stays reliable and pricing remains stable.


4. Better margins over time

Even with seller-funded discounts, subscriber LTV often outweighs one-time purchases. If you keep churn low, the long-term revenue more than makes up for the upfront cut.


Where Things Go Sideways

The flexibility that makes Subscribe & Save attractive to customers also creates loopholes.


1. One-and-done discount hunters

Some buyers subscribe, grab the first delivery at 10-15% off, then cancel immediately. It looks like growth – until it isn’t.


2. Choppy subscriber behavior

Shoppers skip deliveries, pause, or change frequencies. That kills consistency and messes with your forecasts.


3. Discount drag

If your margins are tight, that 5-10% seller-funded discount eats into profitability fast – especially if subscribers don’t stick around long.


4. Inventory gaps from fake demand

Sudden influxes of new subscribers can look like a win, but if they cancel before the second cycle, you’re left holding extra stock – and the cost.

Subscribe & Save is worth it – but only if you’re watching the right signals. Sellers who actively track churn, forecast accuracy, and real vs. fake LTV can adjust faster and keep it profitable. Those who don’t? They often spend months chasing numbers that were never real to begin with.


Where Recurring Meets Reality – WisePPC Makes It Visible

Subscriptions bring volume – but not always clarity. Behind every repeat order is a mix of real loyalty, discount-driven churn, and unpredictable behavior. To manage that with confidence, you need more than basic reports. That’s why we built WisePPC – to give sellers a sharper, more complete view of what’s really driving performance.

With WisePPC, you can track actual reorder volume, spot early churn, compare forecasted vs. delivered units, and measure how discounts impact profit across products, placements, and keywords. We store long-term data, update in real time, and separate organic from paid results – so you can manage Subscribe & Save based on truth, not assumptions.

For ongoing tips, feature rollouts, and walkthroughs, we post regularly on Facebook, Instagram, and LinkedIn. If you’re serious about scaling subscriptions, we’re building the tools to keep it measurable – and manageable.


Setting Up Subscribe & Save in Seller Central Without Overcomplicating It

The good news? Amazon makes enrollment fairly straightforward – especially if you’re already using FBA. The platform will auto-enroll eligible SKUs by default. But if you’re trying to fine-tune the experience, choose your own discount tiers, or figure out why a product didn’t get enrolled, there are a few things to know.


Start with the Basics

Head to the Subscribe & Save section inside Seller Central. You’ll land on the Manage Products tab. This is where you’ll:

  • See which SKUs are already enrolled
  • Adjust default discounts (0%, 5%, or 10%)
  • Manually edit product-level settings
  • Spot eligibility issues if something didn’t make the cut

By default, Amazon sets new products at 0% seller-funded discount. That means unless the customer has five or more active subscriptions scheduled for the same delivery date, there’s no extra discount from Amazon – only your base offer applies.

You can choose from five base funding options: 0%, 5%, 10%, 15%, or 20% to make your Subscribe & Save offer more attractive from the start.


For FBM Sellers (Yes, You Can Still Use It)

If you’re fulfilling orders yourself, it’s not automatic. You’ll need to:

  • Submit a request per ASIN from within Seller Central
  • Meet performance criteria (on-time delivery, tracking rate, order defect rate, etc.)
  • Stick to the rules for at least three months before your product qualifies

FBM sellers also need to offer free domestic shipping and stay under five days on delivery promises. If your logistics are tight, it’s doable. If not, you might hit a wall.


One More Thing: Check What’s Blocking You

If a product isn’t showing up as eligible, Amazon won’t always tell you why upfront. But there’s a self-service tool inside the same Manage Products tab. You plug in the ASIN and get a breakdown of what’s missing – maybe it’s stock rate, maybe it’s price volatility, maybe your listing isn’t buyable yet.

Once you’re set up, everything runs from that dashboard. Discount controls, product eligibility, and eventually, performance tracking. It’s not flashy, but it works. Just check in regularly – things change, and Amazon doesn’t always send a heads-up.


Spotting the Abuse Before It Tanks Your Metrics

Not every subscriber is a real one. Some shoppers sign up just to grab the discount, get one delivery, and cancel before the next cycle. Others cycle through multiple accounts to do it again. At a glance, the numbers might look fine – order volume goes up, subscriptions tick higher – but underneath, you’re left with unreliable forecasts, inflated CAC, and inventory tied up in false demand.

The only way to stay ahead is by reading the patterns. If your subscription sales dip but total sales don’t, something’s off. If refund rates climb right after discounted deliveries, that’s another clue. Big gaps between forecasted and actual S&S shipments usually mean subscribers are canceling early or skipping deliveries. None of these signs are obvious in isolation, but when they stack up, you’ll know it’s time to tighten the system – whether through stricter return rules, smarter discount logic, or just better oversight.


Practical Moves to Grow Your Subscribe & Save Revenue

Running Subscribe & Save well isn’t about doing more – it’s about doing the right things consistently. Most sellers set a discount, walk away, and hope for retention. But the ones who grow it into a dependable revenue stream are usually more hands-on. Here are a few proven ways to get more out of it:

  • Start with a 5% discount and test from there: If you jump to 10% right away, you might burn margin on low-LTV customers. Start small, check performance, and only scale when it pays off.
  • Use reorder coupons to bring buyers into subscriptions: Target past buyers who didn’t subscribe. A one-time coupon tied to a subscription can convert fence-sitters without sacrificing your full margin upfront.
  • Keep stock levels stable: Nothing breaks S&S momentum like a missed shipment. Even short stockouts can trigger cancellations or lower confidence in your brand.
  • Monitor churn by product: Not all SKUs behave the same. Some might hold subscribers for 6+ months. Others lose them after the first shipment. Use that data to decide where to push discounts – and where not to.
  • Avoid sudden price spikes: Even small price increases can trigger auto-cancellations. If you need to raise prices, do it gradually or pair it with a loyalty offer.
  • Clean up deadweight: If a product has high churn, low margin, and zero subscriber retention, pull it from the program. It’s okay to cut what doesn’t stick.
  • Stay close to performance data: Subscriber count is just a vanity metric if the LTV is poor. Focus on retention curves, reorder frequency, and actual net profit – not just volume.

Growing Subscribe & Save isn’t about tricks – it’s about building systems that hold up month after month. Keep it lean, track what matters, and adjust before small problems get expensive.


Conclusion

Subscribe & Save can absolutely work in your favor – when it’s treated like a system, not just a bonus feature you turn on and forget. The recurring revenue, better customer retention, cleaner inventory forecasting – all of that is real value. But so are the downsides. Subscription abuse, soft churn, out-of-stock penalties, margin erosion – they creep in fast if you’re not watching the right metrics.

The sellers who succeed don’t just offer discounts – they watch the data closely. They cut what doesn’t convert, adjust discounts when demand softens, and make sure inventory always keeps pace with recurring volume. They treat Subscribe & Save like a flywheel: one that builds momentum only if you keep it tuned. With the right structure, it shifts your focus from chasing orders to building reliable, long-term growth.


FAQ

1. Can I use Subscribe & Save without FBA?

Yes, but you’ll need to meet stricter performance benchmarks. That includes fast shipping, a high tracking rate, and low cancellation metrics – consistently. Each product also has to be manually approved through Seller Central.

2. How do I know which products are eligible?

There’s no single list, but most recurring-use items like household goods, supplements, pet care, and beauty products qualify. If a SKU isn’t showing up, check your in-stock rate, listing health, and pricing stability.

3. Is it worth offering a 10% discount right away?

Not always. It depends on your margins and how long subscribers usually stick around. Starting at 5% gives you room to scale strategically instead of overspending on customers who cancel after one shipment.

4. What if customers keep subscribing and canceling just to get the discount?

It happens. That’s why monitoring churn timing matters. If most cancellations come after the first cycle, you’re likely attracting discount hunters. In that case, dial back discounts or test reorder-only coupons instead.

5. Can Subscribe & Save hurt my inventory planning?

Only if you’re not tracking actual reorder behavior. If forecasted demand looks good but people cancel or skip deliveries, you end up with excess stock. That’s where tighter data helps – watching patterns before they create problems.

6. Is there a way to reward long-term subscribers?

You can get creative. Add reorder-only coupons, early access to new products, or bundle incentives that only unlock after a few successful cycles. These extras make long-term commitment feel worthwhile – and they help filter out the one-and-done crowd.

Amazon USA vs Europe: What Sellers Should Know Before Expanding

Selling on Amazon looks different depending on where you’re doing it. In the U.S., everything runs through a single market with shared tax systems and one language. Europe? It’s a mix of countries, currencies, and regulations and each one plays by slightly different rules. For experienced sellers, it’s not just about where the buyers are. It’s about how ready your business is to handle the shift.


One Platform, Two Very Different Playing Fields

Selling in the U.S. and Europe might happen under the same Amazon brand, but the setup, scale, and seller experience feel completely different once you’re in it.

  • Amazon US is massive and fast-moving: Approximately 1.65 million active sellers (Marketplace Pulse estimate as of end of 2025) compete across the marketplace. One tax system. One language. One FBA network. You move fast, or you fall behind.
  • Europe is fragmented-but full of opportunity: You’re not selling in “Amazon Europe.” You’re listing in Germany, France, Spain, Italy, and the UK – each with its own rules, shopper habits, and tax authorities.
  • The U.S. has volume: In recent years (e.g., North America segment reached $426.3 billion in 2025), it drives significantly higher volume than EU markets combined. But it also comes with saturation. Standing out means aggressive pricing or heavy ad investment.
  • Europe rewards precision: Less competition in certain categories (like Home & Kitchen or Pet Supplies) means sellers who do the work – translations, VAT setup, localized branding – can carve out space without a price war.
  • Growth paths are different: U.S. expansion tends to be about scaling products that already work. In Europe, it’s more about adapting to fit each country and optimizing for longer-term diversification.

Sometimes the biggest difference isn’t the size of the market: It’s how many steps you need to take to reach the customer. And that shift changes everything about how you plan, track, and optimize performance.


How to Actually Start Selling in Europe

Getting into Amazon Europe isn’t hard. But it’s not one-click either. The process works – if you know what to expect. Here’s how sellers typically make the jump from the U.S. to Europe without spinning their wheels.


Register a Selling Account for Europe

You’ll need to set up a European account through Amazon Global Selling. This doesn’t mean you get one master account for all of Europe: You’ll still be selling into individual countries like Germany, Italy, or France. What the global setup does is let you manage it all through one login and one central place in Seller Central. Start by going to the “Sell Globally” tab under Inventory. From there, you can register for new marketplaces and begin syncing listings.


Translate Listings and Match Local Categories

Europe isn’t just one audience. Your U.S. listings won’t carry over word-for-word. Amazon requires that you translate your listings into the local language of each country where you sell. That includes bullet points, product titles, descriptions – everything the customer sees.

Also, product categories don’t always map cleanly. A product that’s listed under “Patio, Lawn & Garden” in the U.S. might fall under a completely different structure in the German marketplace. You’ll need to recheck placement to keep discoverability intact.


Consider Where You’ll Ship From

Some U.S. sellers ship cross-border directly from U.S. warehouses to European customers. Others use Fulfillment by Amazon in Europe. Each has pros and tradeoffs:

  • Shipping from the U.S.: No need to register for VAT up front, but slower delivery and higher costs. Works better for low-volume tests.
  • Pan-European FBA: Faster delivery, local shipping rates, but requires VAT registration in each country where inventory is stored. More upfront work, better customer experience.

If you’re serious about scaling in Europe, Pan-EU FBA is the smoother long-term move – even if it’s more setup early on.


From Data Chaos to Control – WisePPC and Cross-Market Clarity

Selling across multiple Amazon regions sounds like scale. In reality, it often means juggling disconnected dashboards, short data windows, and guessing where your actual profit comes from. It’s too easy to lose the thread when each marketplace tracks performance differently.

That’s exactly why we built WisePPC. Our platform connects directly with Amazon to give you real-time performance insights, historical trends, and campaign-level clarity – all in one place. You can compare marketplaces side by side, track organic vs. ad-driven sales, and spot wasted spend before it turns into a pattern. Whether you’re expanding into Europe, growing in the U.S., or doing both, we help you stay grounded in the data that matters.

We’re not just another dashboard. WisePPC is a toolkit built to simplify complexity for brands scaling across borders. You can follow updates on Facebook, Instagram, or LinkedIn, or reach out directly with a question. We pay attention to feedback, and it shapes how the product evolves.


Selling Across Borders Means Understanding VAT

If you’ve only sold in the U.S., VAT is going to feel like a curveball at first. Unlike U.S. sales tax – which gets added at checkout – Value Added Tax is baked into the listed price. It’s charged at every stage of the supply chain, not just the final sale. And it’s not optional: if you’re storing or shipping inventory in Europe, you’re going to need a VAT number in each country where that happens.

Rates vary depending on the country – around 19% in Germany, closer to 20% in the UK or France. That means your margins shift, and your pricing has to account for that. On top of that, there’s distance selling thresholds to keep in mind. If you’re shipping cross-border from one EU country into another and pass a certain revenue threshold, you’re legally required to register for VAT there too.

None of this is meant to scare you off. The system is navigable. Amazon offers tools like the VAT Calculation Service to automate the math, and there are local advisors and accountants who specialize in marketplace sellers. The key is to approach it early – don’t wait until your first EU payout to realize you needed a VAT number six weeks ago.


Tax and Trade Rules You Shouldn’t Ignore

Selling in Europe isn’t just about uploading a product and watching sales roll in. Every country has its own layer of rules – some straightforward, others less so. Miss one, and it could delay shipments or trigger account issues down the line. Here’s what sellers often overlook:

  • Customs and import duties: If you’re shipping from outside the EU, expect duties at the border. These depend on product classification, declared value, and shipping terms.
  • Labeling requirements: Each country may require specific labels – recycling icons, CE marks, language compliance, or even safety certifications depending on product category.
  • Product regulations: What’s legal to sell in the U.S. isn’t always allowed in Europe. That includes things like electronic devices, supplements, and toys. EU safety directives apply by default.
  • Environmental compliance: Some EU countries require that you register for packaging waste or electronics recycling schemes. This isn’t handled by Amazon – it’s on you.
  • Parallel import restrictions: If you’re selling branded items, check if they’re protected by IP laws in that region. You could run into blocked listings or even legal complaints.
  • Export control laws: Selling cross-border sometimes triggers rules around encryption, dual-use goods, or restricted countries. It’s niche, but worth knowing if you’re in a sensitive category.

If you’re not sure how to handle these, Amazon’s Service Provider Network is a decent starting point. There are vetted local firms who specialize in keeping marketplace sellers compliant – so you can stay focused on inventory, pricing, and performance.


Selling in a Dozen Languages

If you’re expanding into Europe, English only gets you so far. Amazon requires that your listings match the native language of the marketplace you’re targeting – German for Amazon.de, Italian for Amazon.it, and so on. That’s not a suggestion. It’s a basic part of discoverability, customer trust, and even compliance in some categories.

But it’s not just about translation – it’s about getting the tone right. German buyers tend to favor precise, technical product details. French shoppers often care more about how something looks and feels, and Spanish customers might look for a more practical, benefit-driven format. One-size-fits-all copy written for the U.S. rarely works without adjustments. Literal translations miss intent. That’s why many sellers end up investing in localized copywriting, not just language services.

Treat every listing like a performance metric: it either converts or it doesn’t. And just like you’d test bids or placements, it’s worth testing your messaging across markets too. Language isn’t just a barrier – it’s part of the sales strategy.


Timing Is Different Everywhere

Promotions don’t land the same way across borders. Prime Day might be global, but everything else – from back-to-school timing to Mother’s Day – shifts depending on where your customer is. The U.K. celebrates Mother’s Day in March. Germany’s peak shopping periods don’t fully match France’s. Even Christmas cutoffs vary based on local carriers and shopping behavior.

If you’re running ads or prepping inventory based on U.S. timing, you’ll likely miss your window. That’s where data starts to matter. Watch your country-level conversion rates. Track when traffic spikes. Look at year-over-year trends once you have a full cycle of European sales. It’s less about copying your U.S. calendar and more about rebuilding one that fits each region.

Treat timing like you would any other performance signal: track, test, adjust. Because in Europe, being early or late – by a week can make a measurable difference in ROI.


Staying Compliant Without Losing Your Mind

Once you start listing products across borders, compliance becomes part of the day-to-day. Every country has its own safety rules, documentation needs, and category-specific standards. Ignore them, and you’re not just risking a policy warning – you’re risking blocked listings and lost sales.


Start with “Manage Your Compliance”

Amazon’s built-in tool shows what’s required per product – safety documents, test results, certifications – and when it’s due. You can upload files in bulk, check status, and respond to requests without jumping between tabs.

What matters most is timing. It’s easy to forget compliance until something goes wrong, but by then, it’s already affecting sales. Before you launch a new product or ship into a new country, check if documentation is needed. It’s faster to handle upfront than after something’s been flagged.


Use the “Compliance Reference” Tool to Save Time

This one’s for early-stage planning. If you’re not sure what’s required for your category in, say, Germany versus Italy, this tool gives you a searchable list by ASIN, category, or product type. It also links out to vetted service providers who can help with testing or certification.

It won’t fill out the forms for you, but it’ll save hours of searching across forums, PDFs, and conflicting advice.


Keep It on Your Radar

Compliance doesn’t end after you upload a document. Requirements can change. Amazon can update policies. What passed in 2024 might need updates in 2026. Build this into your product workflow – check documents the same way you check performance metrics. You don’t need to micromanage it, but you do need to stay in the loop.


Conclusion

There’s no universal answer here. The U.S. is still Amazon’s biggest market, with infrastructure and volume to match. It’s fast, competitive, and familiar to most sellers who’ve already found traction. Europe, on the other hand, is more complex – but the friction comes with room to grow. If your team has the bandwidth to handle VAT, language, and logistics, Europe can become a long-term play for diversification and margin stability.

What makes the difference isn’t just geography – it’s clarity. If you can see what’s actually driving performance across regions, manage your inputs, and act fast when something shifts, both markets are viable. Just not with the same playbook.


FAQ

1. Do I need a separate Amazon account to sell in Europe?

Not entirely. Amazon lets you manage U.S. and European accounts through a unified Global Selling setup. But each region still has its own backend rules, local settings, and tax obligations. You’re technically working within one interface, but you’re running multiple marketplaces.

2. Is VAT registration required before I start selling?

It depends where your inventory is stored. If you’re fulfilling from outside the EU and shipping orders one by one, you might not hit registration thresholds right away. But once you store products in an EU country or cross a revenue limit, you’ll need a VAT number – and that’s not optional.

3. Can I use the same product listing across all countries?

Not really. You’ll need to translate each listing into the local language, and in many cases, rework the structure to match how customers in that region search, read, and buy. What works in the U.S. might feel tone-deaf or incomplete elsewhere.

4. How do returns work in Europe compared to the U.S.?

EU law gives buyers 14 days to return most items, but Amazon’s policy is usually 30 days. You don’t always have to cover return shipping – it depends on the reason and your policy – but if you sell from outside Europe, return logistics need planning.

What Makes a Good Brand About Us Page (and How to Write One That Works)

If someone’s reading your About page, they’re curious. They’ve already made it past the product shots and price tags – they want to know who you are and why you’re doing this. It’s not a pitch. It’s a quiet moment where trust is either built or lost. A good About page doesn’t try too hard. It just makes sense. It’s clear, grounded, and lets people see what matters to your brand – without making them dig for it.


Why Your About Us Page Deserves More Attention

It’s easy to treat the About Us page like an afterthought – just another tab to check off. But here’s the thing: customers actually read it. Not all of them, sure. But the ones who do? They’re often the ones on the fence – deciding whether they trust you, whether your brand feels real. And when they land there, they’re not looking for marketing fluff or over-polished language. They’re scanning for signs of life. A signal that someone’s behind the curtain who knows what they’re doing – and cares enough to show up.

From a business perspective, the About page carries more weight than it gets credit for. It’s often the first place where tone, values, and credibility click into place. It shapes perception, builds trust, and can quietly push someone from browsing to buying – especially on platforms like Amazon, where attention spans are short and storefronts are crowded. It doesn’t need to be long. It just needs to be honest. Tell them who you are, why you started, and what keeps you going. That kind of clarity? It’s what makes people stay.


WisePPC as the Operational Layer of Your Storefront

Writing a strong About page is one thing. Knowing if it’s doing anything is another. Most brands never check. They add a few paragraphs, maybe a photo, and call it done – no feedback loop, no idea if it’s pulling its weight.

At WisePPC, we don’t track storytelling, but we do track what happens after. If you’re driving traffic to your Amazon storefront or product pages, we show you how that attention behaves – where it goes, what converts, and what stalls out. It’s not about judging your copy. It’s about giving you the clarity to connect the dots between message and momentum.

We’re built to help marketplace brands grow smarter, not louder. If your About page is part of a larger storefront or funnel, we help you see what’s working – across ad placements, organic flow, and even cross-platform activity. You’ll find us where your customers already are: on Amazon, in your analytics, and occasionally sharing small updates over on Facebook, Instagram, and LinkedIn.


What to Include: Core Elements That Make a Difference

Your About page isn’t a dumping ground for generic blurbs – it’s a tool. Treat it like one. A well-built page gives people the right context, clears up confusion, and quietly nudges them toward trust. No big gestures. Just a clean, intentional layout with the right pieces in the right order. Here’s what actually matters.


1. A Quick, Clear Origin Story

Not your life story – just the part that makes someone go, “Okay, I get why this exists.”

Share when and why the brand started. Focus on the moment something clicked: a gap you noticed, a problem you kept seeing, or a reason you knew you had to build this. If it was born out of frustration or curiosity, say that. The goal isn’t drama. It’s honesty.


2. What You Actually Do (And Who It’s For)

It sounds obvious, but you’d be surprised how many brands bury this. Spell out what you offer and who benefits from it. Not as a pitch – just as facts. Imagine someone new clicks the page and thinks, “Cool backstory, but what am I even buying here?” Answer that, clearly and quickly. If you have a niche, name it. If your products solve a specific pain point, say how. This is the section where people either connect – or click away.


3. Mission, But Make It Make Sense

Avoid the sentence salad of “We believe in delivering excellence with passion and integrity.” Nobody remembers that. If you care about something – quality, access, sustainability, real data, whatever – write it plainly. One or two lines is enough. And skip the word “passionate” unless you’re talking about coffee.


4. The People Behind the Brand

Even if it’s just you in a spare room with a laptop, show your face. Or name. Or something that proves this isn’t a ghost operation. Larger team? Great. Show a few team members, with roles or a short line about what they do. Doesn’t have to be formal – just real. Humans trust humans. Especially in a feed full of logos and stock images.

5. Credibility Signals

If you’ve got press mentions, testimonials, milestones, or data points – this is where they live. But don’t stack them like trophies. Pick the ones that give a clearer picture of progress or value. Examples that work:

  • “Trusted by over 500 small businesses”
  • “Built in-house by ex-Amazon ad specialists”
  • “Featured in [source]”
  • “Used by sellers in 12 countries”

Even one or two solid signals beat ten vague ones.


6. Visuals That Add Clarity, Not Clutter

Photos, timelines, product shots, or short video clips can help break up text and give your message more depth. But only if they support the copy. Avoid filler visuals or lifestyle clichés. If it feels like it could be anyone’s brand, it’s not helping yours.

Keep the layout clean. Keep the copy honest. And remember: people don’t need everything – they just need enough to trust that you’re not wasting their time.


Speak to Customers, Not Just About Yourself

It’s easy to treat the About page like a spotlight. But if the whole thing reads like a monologue, people tune out fast. Customers don’t show up wondering how impressive you are – they’re wondering what this has to do with them. If they don’t see themselves reflected anywhere, they leave.

That doesn’t mean turning your brand story into a sales pitch. It means writing like you’re in conversation with someone who has a need, a question, or a problem they’re trying to solve. You can still talk about your mission, your values, your team – but frame it in a way that connects. Why does it matter? Who benefits? What’s in it for them?

The strongest About pages feel like a mirror, not a resume. If someone reads yours and thinks, “Yep, that’s what I’ve been looking for”, you’re doing it right.


SEO Tips Without Killing the Vibe

You want your About page to be discoverable, but not at the expense of sounding robotic. The goal is to stay findable and human. Here’s how to thread that needle:

  • Use natural phrasing in your headers and intro: “About our brand” or “Who we are” works just fine if it actually sounds like you.
  • Include relevant terms where they fit: Keywords like “brand story,” “ecommerce About Us,” or “founder-led business” help, but only if they make sense in context.
  • Optimize your page title and meta description: They show up in search results, so make sure they’re clear, useful, and match the tone of your page.
  • Link to key pages inside your site: Mention a flagship product or service? Drop a link. It helps SEO and keeps users moving naturally.
  • Use descriptive alt text for images: Team photos, behind-the-scenes shots, timeline graphics – Google can’t “see” them without alt tags.
  • Make sure it’s clean on mobile: Layout, fonts, load time – Google cares, and so does everyone scrolling on a phone.

Don’t overthink the algorithm. Keep the experience honest, and search visibility usually follows.


What Strong About Pages Consistently Get Right

There’s no single template for a great About page. But when you strip away design trends and brand style differences, you start to see patterns. The pages that work are usually structured with intention. They’re clear, consistent, and built around what actually helps a visitor decide whether to trust the brand. Here’s what they consistently get right.


1. Clear and Focused Messaging

Strong About pages don’t wander. They avoid long autobiographies and unnecessary detail. Instead, they answer three practical questions: who the brand is, what it does, and why it exists. Every section supports that clarity. If something doesn’t add context or credibility, it’s removed. Focus builds trust faster than volume.


2. Consistent Brand Voice

The tone on the About page matches the rest of the site. If the brand is direct and data-driven, the page reflects that. If the brand is warm and community-oriented, the language supports it. What doesn’t work is switching into stiff corporate language just because the page feels “official.” Consistency signals stability. Stability builds confidence.


3. Proof Instead of Claims

Saying you value transparency is easy. Showing it is different. High-performing About pages include signals that back up their statements. That might mean real metrics, team photos, years in business, customer feedback, certifications, or specific milestones. They don’t rely on vague promises. They provide evidence. Even a small, concrete detail can carry more weight than a paragraph of polished language.


4. Clean Structure and Readable Layout

Design supports the message, not the other way around. Clear headings, short paragraphs, and logical sections make the page easy to scan. Visitors should be able to understand the brand in under a minute if they need to. Overdesigned pages with too many effects tend to distract. Simplicity performs better.


5. A Logical Next Step

Strong About pages don’t end abruptly. They guide the visitor forward. That might be a link to products, a team page, a case study, or a contact form. The transition feels natural. Not pushy. Just clear. When the structure makes sense, people stay longer. And when they stay longer, trust has room to build.


Conclusion

A strong About page doesn’t need to be long or dramatic but it does need to feel real. It’s your chance to step out from behind the product and say, “Here’s who we are. Here’s why this matters.” When a customer clicks that tab, they’re not looking for polished marketing speak. They’re looking for something human. A reason to believe you’re worth their trust, their time, or their money.

The most effective About pages don’t ramble. They don’t oversell. They say just enough – with clarity, personality, and intent. If yours sounds like a conversation you’d have with someone genuinely curious about your brand, you’re doing it right. And if it helps one more person feel like they’re in the right place, that’s more than worth the effort.


FAQ

1. How long should an About Us page be?

There’s no magic word count, but one to two scrolls is plenty. Get to the point, add proof where it helps, and cut anything that feels like filler.

2. Can I write it in first person?

If your brand is personal or founder-led, first person can work well. “I started this company because…” feels natural. For larger brands, “we” usually makes more sense.

3. What if I don’t have a big story to tell?

That’s fine. Just be clear about what you do and what you care about. It’s better to be honest and direct than to stretch a story that isn’t there.

4. Do I really need to show my team or face?

You don’t have to, but people trust people. Even a single name or photo makes the brand feel more grounded.

5. Should I include SEO keywords on the page?

Yes, but lightly. Use relevant terms in your headings and copy where they naturally fit. Don’t jam them in – it’s obvious when you do.

6. Is it okay to link to products or other pages?

Absolutely. Internal links help with SEO and make it easier for visitors to explore more once they’ve got a sense of who you are.

FBA Shipment Tracking: How to Stay Ahead of Inventory Delays and Delivery Issues

If you’re sending inventory into Amazon’s fulfillment network, tracking those shipments isn’t optional – it’s what keeps everything else in sync. Whether you’re running a lean operation or managing dozens of SKUs, knowing where your stock is (and what’s actually been received) makes all the difference. Timelines shift, boxes go missing, and sometimes checked-in doesn’t mean sellable. The sooner you understand what’s happening behind those shipping statuses, the better you can plan, react, and protect your margins.


Where FBA Shipments Start: What They Are and Why They Matter

An FBA shipment is exactly what it sounds like – the inventory you send into Amazon’s fulfillment network so they can take care of storage, packing, and delivery for you. It’s how products get into Amazon warehouses in the first place. You prep your boxes, create a shipping plan in Seller Central, print the labels, and hand it off to a carrier. From that point on, the inventory is officially on its way to being available for Prime delivery. Sounds simple. But the process has more moving parts than it lets on.

Each shipment kicks off a chain of events: scanning, transport, check-in, receiving, and – eventually – inventory becoming sellable. And not all stages move at the same speed. One box might get processed in a day, another might sit at the dock for a week. That’s why understanding how FBA shipments actually work isn’t just helpful – it’s essential if you care about performance, timing, or staying in stock during high-traffic weeks. You don’t need to micromanage the system, but you do need to read it right.


Understanding FBA Shipment Status: What Each Stage Actually Tells You

When you’re tracking an FBA shipment, the status you see in Seller Central isn’t just a label – it’s a signal. Each one reflects a specific step in how Amazon processes your inventory behind the scenes. But not all statuses are equally clear, and some can hang there longer than expected. Here’s what each one really means, and when you should pay attention.


1. Working / Shipment Created

This is the starting point – you’re building or editing the shipping plan. No inventory has moved yet, but Amazon now knows what to expect. Once box contents are confirmed and labels are printed, the shipment progresses to the next stage.


2. Ready to Ship → Shipped

Ready to Ship appears when you provide the carrier’s name and tracking information or confirm the shipment through the Amazon Partnered Carrier program. It means your part is done – now it’s on the carrier. The status changes to Shipped once the carrier scans the boxes or you confirm drop-off. If that scan never happens, the shipment stays stuck. Always double-check that pickup or drop-off was properly recorded.


3. In Transit

At this stage, Amazon knows the shipment is on the move. This doesn’t mean it’s close – just that tracking data from your carrier confirms movement. It could still be crossing the country. If it stalls here too long, check with the carrier directly, not Amazon.


4. Delivered

Your shipment made it to the fulfillment center… in theory. “Delivered” means it arrived at the building – not that anyone’s touched it. Sometimes it sits in the yard for days before check-in starts, especially during peak volume weeks.


5. Checked In

This means your boxes have been scanned at the dock. It’s a signal that warehouse staff is starting to process them. Still doesn’t mean units are ready for sale – it’s more like being next in line at the DMV. Progress, but not done.


6. Receiving

Here’s where Amazon begins scanning individual items into inventory. Some SKUs go live right away. Others might get rerouted to different warehouses before becoming available. You’ll often see partial receiving at this stage – not a glitch, just how FBA works.


7. Closed

The shipment’s lifecycle is done. Either all items were received, or Amazon automatically closed the shipment after 90 days for domestic shipments or 90 days for international shipments since the shipment creation date. If the numbers don’t match what you sent, this is when you start reconciling.

Each status is a breadcrumb, not a full picture. But when you learn to read them right, you’ll catch delays early, flag receiving issues faster, and stop guessing where your inventory’s stuck. It’s not about micromanaging Amazon’s process – it’s about knowing when to dig in and when to wait.


From Inventory Delays to Budget Adjustments with WisePPC

When shipments don’t move as expected, the impact isn’t limited to logistics – it shows up in your sales, ad performance, and margins. That’s why WisePPC connects the dots between what’s happening in your FBA pipeline and what you’re seeing in your marketplace dashboards. We give sellers the visibility to catch delays early, adjust campaigns in real time, and stop spending on products that aren’t actually available to ship.

Our platform separates organic from paid sales, tracks real-time metrics like TACOS and profit, and highlights inventory-related ad waste – so you know exactly when fulfillment issues start to drag down performance. Whether you’re running Sponsored Products, managing multiple accounts, or juggling ad pacing with restock schedules, we help you stay ahead instead of reacting late.

You’ll find us on Facebook, Instagram, and LinkedIn, where we post insights, small fixes, and product updates to help sellers run tighter, smarter systems. At the end of the day, the goal isn’t to flood you with data – it’s to surface what matters and make it easier to act on it.


How to Actually Track an FBA Shipment (Without Guessing)

Tracking an FBA shipment shouldn’t feel like chasing a moving target – but sometimes it does. The good news is, Amazon gives you multiple ways to monitor where your inventory is and what’s happening to it. The trick is knowing where to look and what each view is actually telling you. Here’s how to get answers without digging through five tabs or waiting for something to go wrong first.


Start in Seller Central: Your Shipping Queue

This is your launchpad.

  • Go to Inventory in the top nav.
  • Click Manage FBA Shipments.
  • You’ll land in the Shipping Queue, where all your inbound shipments live.

For each one, you’ll see a status (like “In Transit” or “Receiving”) and a button labeled Track Shipment. That’s your way in.


Use “Track Shipment” to See the Full Trail

Clicking that button takes you to a Shipment Summary – which has two key tabs:

  • Shipment events: This is your event log, with timestamps for every scan and transition.
  • Contents: Shows what Amazon thinks it received – useful later if the numbers don’t match.

Watch for gaps in the timeline. If you see “Delivered” but nothing after, your shipment might still be waiting to be checked in – normal, but worth watching if it drags past a few days.


Cross-Check with the Carrier

If the shipment is still in transit, Amazon’s view can lag. That’s when you go straight to the source.
Grab the tracking number (it’s listed in the summary) and plug it into UPS, FedEx, or whichever carrier you used. You’ll get location updates, expected delivery time, and sometimes delay flags.

  • Quick tip: Amazon’s Partnered Carrier Program usually syncs well, but third-party freight can be slower or missing scans altogether.


For High-Volume Sellers: Automate the Watchtower

If you’re sending frequent shipments or managing multiple accounts, manual tracking breaks down fast. You need a system that not only shows where inventory is but also connects delays to performance drops and missed revenue. You’ll still check shipment statuses in Seller Central, but now you can also:

  • Spot stockouts before they tank your ACOS
  • See if poor delivery timing is messing with your best-performing SKUs
  • Correlate slow receiving times with missed sales targets

Inventory doesn’t move in isolation – and tracking shouldn’t either.

Staying on top of shipment movement is part of the job now. But it doesn’t have to be a guessing game. The more you check early, the less you chase problems later.


Fewer Surprises, Less Scrambling: How to Avoid FBA Inventory Headaches

The quickest way to mess with a strong ad campaign? Inventory issues that should’ve been caught before shipping. You print the labels, send the boxes, and hope for the best – but small prep errors can spiral into delays, stockouts, and wasted spend. Most of it starts early. Here’s what to watch for:

  • Mislabeled units or missing barcodes: Amazon needs clean, scannable barcodes. If even one unit shows up with the wrong label (or none at all), the whole box might get flagged. Use Amazon-approved labeling or have Amazon do it for you.
  • Wrong product, right SKU: You entered the correct SKU in the shipping plan – but the actual item doesn’t match. Double check every variation before you seal the box. Sizes, colors, and bundles get mixed up more than you’d think.
  • Under-shipping or over-shipping: If you say you’re sending 50 units and only send 48 (or 52), the receiving process stalls. Stick to exact counts. If you’re using a distributor, make sure they’re aligned on quantity and cutoff dates.
  • Inaccurate box content details: Box-level information isn’t optional – it’s how Amazon knows what’s in each box before opening it. Skip this step, and your shipment will get slowed down at the dock.
  • Damaged packaging or unapproved materials: Avoid shrink wrap confusion, fragile items without bubble wrap, or loose units in oversized boxes. Amazon expects specific prep depending on product type. Cut corners here and you’ll pay with delays – or worse, removals.
  • Wrong fulfillment center: If you manually change the ship-to address or override Amazon’s suggested locations, expect pushback. It can lead to refusals or split shipments that delay check-in.

Fixing these things after the fact is slow, expensive, and usually comes with a support case. Catching them early is a workflow issue – and a visibility issue. If your system doesn’t track this stuff clearly, you’re just hoping for the best. That’s not a strategy.


When the Numbers Don’t Match: How to Handle FBA Shipment Discrepancies

Sometimes Amazon says they received fewer units than you sent. Or they log an item you never packed. It’s frustrating – especially when your inventory, rankings, or ad campaigns are tied to those missing products. But it’s fixable. The key is knowing where to look, what to click, and when to step in.

Start by opening the shipment in Seller Central and heading to the Contents tab. You’ll see expected vs. received units side by side. Hover over the numbers to check details. If the shipment is marked “Closed” and there’s still a mismatch, look for the Action Required dropdown – that’s where you start a reconciliation.

Amazon might ask for proof of shipment, invoices, or tracking docs. Upload what you’ve got and submit the case. After that, watch for updates under Case Submitted – and follow up if it stalls. This part isn’t fun, but if your margins depend on it, don’t wait it out. Track it like you track your campaigns.


Pro Tips to Make Your FBA Tracking Actually Work for You

If you’re treating shipment tracking like a background task, you’re already behind. The most effective sellers use it as an early warning system – a way to flag risks before they impact revenue. These aren’t hacks. They’re small habits that shift you from reactive to proactive. Here’s how to sharpen your tracking process:

  • Check the Shipping Queue daily – even if nothing’s “wrong”: Stalls usually show up in status changes. Catching a shipment stuck in “Delivered” before it turns into a support case saves time and inventory headaches.
  • Set internal deadlines earlier than Amazon’s window: Don’t rely on Amazon’s check-in timeframe. Build buffer time into your ops calendar so campaigns don’t go live before stock is actually sellable.
  • Tag shipments tied to high-performing SKUs: If an inbound box contains your top sellers, track it like a campaign. These shipments deserve more attention than your slow-moving units.
  • Pair shipment tracking with ad pacing: If stock is running late, slow down spend. Otherwise, you risk pushing traffic to products that aren’t even available – and burning budget with nothing to show for it.
  • Keep your prep routine locked in: Labeling errors and missing box content info are still the top reasons shipments get delayed. Standardize your packing process – or outsource it if needed.
  • Document everything – even when it’s boring: Save tracking numbers, shipment plans, and prep invoices. When discrepancies happen (and they will), the fastest resolution comes from being organized, not right.

Smart tracking isn’t about watching every box. It’s about setting up enough visibility so you only have to step in when it matters.


Conclusion

FBA tracking isn’t about obsessing over where every box is at all times. It’s about having enough visibility to spot delays before they become stockouts, to fix small prep issues before they become expensive support cases, and to understand how fulfillment speed affects everything else – including your ad performance.

You don’t have to be perfect. But the sellers who grow the fastest usually aren’t the ones guessing. They’re the ones watching signals early, tying operations to results, and making quiet adjustments before problems hit the surface. Shipments are part of your system. Track them like they matter – because they do.


FAQ

1. How often should I check my Shipping Queue in Seller Central?

If you’re shipping regularly, once a day is enough. It only takes a minute to spot a stalled status or a delayed check-in – and catching it early means fewer problems later.

2. Why does my shipment say “Delivered” but nothing is being received?

“Delivered” just means it reached the fulfillment center, not that anyone’s touched it yet. It can sit there for a few days (or longer during peak weeks) before it’s checked in.

3. Can I start a reconciliation if the shipment isn’t marked “Closed”?

Nope. You’ll have to wait until Amazon officially closes the shipment. That’s when the “Action Required” dropdown becomes available, and that’s your signal to start the process.

4. What if I accidentally sent the wrong number of units?

Be honest during reconciliation. If you over- or under-shipped, select the matching option and upload whatever proof you have. Trying to fake it rarely works out.

BFCM 2026 Strategy Guide: How to Prepare Your Amazon Store for Peak Traffic, Sales, and Pressure

Black Friday and Cyber Monday come with more than just higher traffic – they bring pressure, expectations, and a ticking clock. Inventory needs to be in place, campaigns polished, pages tested, and tools ready to catch what breaks before it breaks you. The upside? It’s also the moment when well-prepared sellers pull ahead – not with gimmicks, but with solid execution. Here’s how to set up, scale, and stay calm through it.


What Makes BFCM 2026 Different (and What Hasn’t Changed)

Some things stay the same – BFCM still delivers the year’s highest traffic spikes, shortest buyer attention spans, and most aggressive pricing. But 2026 is showing new signs of maturity. Shoppers are earlier. Ads are pricier. And backend mistakes get noticed faster. Here’s what’s shifted – and what sellers still need to get right, regardless of the year:

  • The season starts earlier: Promotions don’t wait for Friday anymore. Many brands launch discounts two or three weeks ahead, which means customers are primed – but also pickier.
  • Mobile is the default: The vast majority of shopping happens on phones now. If your product page stutters or your filters feel clunky on mobile, that’s game over.
  • Ad spend is up, but so is noise: CPCs are climbing, especially on high-volume keywords. The winners are the ones who track what’s actually working – and shut off what’s not.
  • AI is doing more heavy lifting: From dynamic pricing to predictive targeting, AI isn’t just a trend – it’s shaping campaigns in real time. But if your data’s a mess, the outputs won’t save you.
  • Performance still wins: Pages that load fast, sites that don’t break, inventory that doesn’t run out – none of that’s new, but it’s still what separates solid sellers from scattered ones.
  • Customer trust is fragile: Confusing discounts, broken links, or delayed shipping can burn a new buyer for good. Clean execution matters more than ever.

BFCM doesn’t give second chances. What changed in 2026 is that there’s less room to recover mid-flight. Smart prep is still the edge – just more so.


Plan Your BFCM 2026 Strategy Early

The sooner you start planning, the fewer surprises you’ll have to manage later. That applies to everything – discounts, inventory, landing pages, even support shifts. Once the sale starts, the last thing you want is to be fixing broken links or scrambling to restock a product you already advertised. The prep window is now, not mid-November.

Begin with your promo structure. Which products are you featuring? Are you offering a straight discount, bundle, or tiered deal? Set clear dates and test every rule ahead of time. A single conflicting code can wreck a margin or break the checkout flow entirely. It’s small stuff – until it’s not.

And don’t overlook the ripple effect. If your ad team builds campaigns without knowing what’s in stock, or your pages don’t reflect the live offers, it’s friction for the shopper and missed conversions for you. When planning starts early, coordination gets easier, and the whole system runs cleaner.


Smarter Campaigns, Less Waste: WisePPC for BFCM Prep

When BFCM traffic spikes, what usually breaks isn’t the offer – it’s the structure behind it. Sellers end up flying blind mid-campaign, toggling between reports, unsure what’s actually driving performance. That’s where visibility starts to matter more than ambition.

At WisePPC, we built the platform specifically to give sellers control before the pressure hits. You can see how ads impact both paid and organic sales, adjust bids without leaving your dashboard, and compare performance across key metrics without exporting a single file. We separate real signals from noise – so when it’s time to scale, you’re not guessing. Campaigns, placements, even keyword-level trends – everything’s centralized and built for speed.

We also stay connected across channels. You’ll find us on Facebook, Instagram, and LinkedIn, where we share platform tips, updates, and practical ways to squeeze more clarity out of your data. Whether you’re prepping for BFCM or reviewing what worked after, we’re here to help you run smarter, not just louder.


Prepare Your Amazon Storefront and Listings

You don’t need a full redesign for BFCM – but everything the shopper sees should be cleaned up, synced up, and built to handle pressure. The goal is simple: no confusion, no dead ends, and no extra clicks between curiosity and purchase. Here’s where to focus.


1. Check the Basics First

Make sure every product you plan to promote is fully updated: titles, images, bullet points, and pricing. If your listing was last edited six months ago, it probably needs a refresh. Fix any inconsistencies across variants – size, color, price – and double-check inventory is linked to the correct ASINs. Out-of-date listings don’t just look sloppy – they drive bounce.


2. Optimize for Mobile

Most buyers are shopping from their phones. If your A+ Content doesn’t stack well or your images take too long to load, they’re gone before the carousel even scrolls. Stick to clean layouts, clear images, and short-form copy that works on a 6-inch screen. If something feels clunky on mobile, assume it costs you sales.


3. Use Your Brand Store Wisely

Your Amazon Brand Store should feel like a calm, well-organized landing zone – not a homepage crammed with everything at once. During BFCM, shoppers don’t have time to hunt. Create a separate BFCM collection page or highlight deal categories up top. The layout doesn’t need to impress. It needs to help people find what they’re looking for, fast.


4. Sync Creative and Campaigns

If you’re running ads to a product or Brand Store page, it needs to match what the shopper expects. Use consistent language, pricing, and visuals across your creative. A banner saying “25% off” needs to be reflected immediately on the page – not buried in the fine print. Every mismatch adds friction. And BFCM traffic isn’t patient.

Get this part right, and your backend work – campaign structure, budgets, bids – actually has a chance to convert. Get it wrong, and you’ll be paying for clicks that bounce.


Technical Readiness Checklist (Based on FPWD)

A great BFCM offer won’t matter if your site crashes or your promo code doesn’t fire. These are the details that don’t show up in campaign reports – but they’re exactly what sink conversions when traffic spikes. Here’s a no-fluff checklist to pressure-test your setup before it’s too late:

  • Run a full storefront audit: Check page load speed and performance metrics. Remove old scripts and apps that don’t serve a clear purpose. Clean setups move faster, crash less, and convert better.
  • Test discount logic ahead of time: Trial your promotions like a customer would – from landing page to checkout. Watch for overlapping codes, broken timers, and anything that sounds good but doesn’t apply cleanly.
  • Review all active apps and extensions: Some third-party tools inject heavy scripts or conflict with recent platform updates. If it’s not helping you convert or fulfill, consider removing it for the season.
  • Confirm payment and certificate validity: Expired SSLs or broken payment credentials can quietly block sales. Recheck domain renewals, Apple Pay certs, Stripe/Shopify keys – the invisible stuff that has very visible consequences.
  • Don’t launch updates last minute: Any theme changes, new app installs, or DNS edits should happen well before the sale. Deploying changes on BFCM weekend is a gamble you don’t need.
  • Stress-test integrations under load: If you’re syncing with CRMs, custom APIs, or fulfillment partners, simulate high-volume flows. Missed webhook calls and rate-limit errors don’t show up until the rush hits.
  • Track real conversions, not test noise: Make sure analytics filters out bots and staging data. If you’re feeding AI systems or dashboards with junk, the recommendations won’t help – and might mislead.

This is the stuff people skip. But it’s what keeps the lights on when orders start stacking up. Clean, predictable systems beat last-minute scrambles – every single time.


Stay in Stock, Ship on Time: Smart Inventory Moves for BFCM

Running out of your best-selling item on Day 2 of BFCM isn’t just lost revenue – it’s momentum you won’t get back. Once shoppers move on, they usually don’t circle back. That’s why inventory planning isn’t just about stocking up – it’s about forecasting demand, watching lead times, and knowing what can break if things move faster than expected.

Start with your historicals. What sold last year? What trended upward last quarter? Use that data to build a reorder strategy that doesn’t lean on guesswork. If you’re using FBA, check deadlines early and build in buffer time for delays. And if you’re fulfilling yourself, make sure your packaging, labels, and team can scale under pressure – because same-day pickups won’t wait for a print queue.

Also worth doing: spot-check your listings for stock sync issues. If you’re using third-party tools or syncing across channels, make sure quantity tracking is live and stable. A product that shows “In Stock” but isn’t actually available is one of the fastest ways to kill trust during high-volume weeks. Clean inventory data keeps things moving and helps your ad spend land where it should – on products that can actually ship.


BFCM Campaign Execution: Ads, Coupons, and Urgency

Once the prep is done, it’s time to go live – and that’s where timing, clarity, and pressure all start working together. Your campaigns don’t need to be flashy. They need to work, load fast, and land the message before the scroll gets swiped away. Here’s how to approach it.


Build Ad Campaigns That Don’t Waste Spend

Start with your high-intent products and work outward. Don’t spread budget across your full catalog unless you’ve got the data to back it. Pull in performance metrics from past sales cycles – if certain targets ate spend and didn’t convert last year, cut them loose.

Track ACOS, CTR, and blended ROAS in real time. Adjust in bulk where needed, pause underperformers fast, and don’t get sentimental about low-volume SKUs during a peak week.


Use Coupons and Deals with a Clear Hook

Coupons, Lightning Deals, and Prime Exclusive Discounts all work – if shoppers can see the value right away. Keep it clean: percentage off, stackable if needed, and visible in the first two lines of the product detail page. Avoid promo copy that makes people hunt for the actual offer.

Also, test your discount logic ahead of time. A misfiring coupon on Black Friday will not be forgiven.


Don’t Fake Urgency – Use It Where It Helps

Urgency tools like countdown timers, “limited stock” labels, and flash deal overlays still work – but only when they’re honest and minimal. If everything’s urgent, nothing is. Use these tactics on your key deals or seasonal bundles.

And make sure they’re synced across your campaigns. If the ad says “Ends in 2 hours,” the landing page better match. Shoppers notice. So does the algorithm.

Execution is what turns clicks into orders. You don’t need dozens of campaigns – you need a few that are sharp, tested, and monitored in real time. Let the metrics guide what stays running and what gets turned off. Keep the pressure where it counts.


Post-BFCM Follow-Up: Don’t Waste the Momentum

BFCM might be over, but the real value often comes after the rush. You’ve got fresh traffic, new buyers, and data that’s still warm. What you do next decides whether that spike was a one-off or the start of repeatable growth. Here’s how to keep the momentum rolling:

  • Retarget the right segments: Not every buyer needs a full-funnel campaign. Split audiences by behavior – first-time customers, high spenders, coupon users – and build tailored follow-ups that actually make sense.
  • Thank customers like a human would: A simple follow-up email with clear order info, delivery expectations, and maybe a small bonus offer builds trust. If they had a good experience, they’re more likely to come back before Q4 ends.
  • Check what actually worked: Run a clean post-mortem. Which campaigns drove revenue, not just clicks? What offers converted best? Where did inventory fall short? Use this data to adjust the rest of your holiday strategy – not just next year’s.
  • Restock fast – but smart: If something sold out during BFCM, check whether it was promo-driven or truly high-demand. Reordering just because it moved quickly can backfire if the volume came from a one-time discount.
  • Keep ad pressure on top performers: Don’t kill your campaigns too early. If a product performed well and inventory’s solid, let the ads keep running into December – especially for giftable or winter-relevant items.
  • Clean up your backend: Deactivate expired promos, archive BFCM-specific creative, and check your integrations. A clean system now avoids headaches when Q1 hits and you’re already thinking about spring.

You did the hard part – now it’s about using that spike to shape smarter decisions going forward. Don’t just close the tab and move on. There’s still revenue on the table.


Conclusion

BFCM doesn’t reward chaos – it rewards preparation that feels invisible when it works. Clean listings, synced campaigns, tested flows, and decisions grounded in real data. That’s what gives sellers breathing room during the rush and clarity after it. The brands that win aren’t always the loudest – they’re the ones that know what’s working, why it’s working, and when to pivot.

If you’ve done the work – planned early, kept your systems tight, and tracked the right signals – the weekend won’t feel like a scramble. It’ll feel like execution. And that’s when growth starts to feel repeatable.


FAQ

1. How early should I start preparing for BFCM?

Honestly, as early as Q3. Good campaigns take time to plan and test. Inventory planning and promos should be locked in by early November at the latest.

2. Do I really need a Brand Store for BFCM?

You don’t need it, but if you’re brand registered, it’s one of the easiest ways to centralize your offers and give shoppers a cleaner path to browse. Just keep it focused – don’t overload it.

3. How do I know if my ads are actually driving profit?

Track TACOS and blended ROAS, not just clicks or ACOS. You need visibility into how advertising impacts total revenue, including organic sales. That broader view is what shows whether your campaigns are scaling profitably or just increasing spend.

4. What if I don’t use FBA?

You can still win BFCM, but fulfillment becomes a bigger variable. Make sure your logistics are airtight. Buyers will bounce if delivery estimates look shaky.

5. Should I pause campaigns after BFCM ends?

Not necessarily. If certain products are still converting and inventory is solid, keep them running. Just shift the messaging – urgency might drop, but intent often lingers.

How to A/B Test Your Products the Right Way

A/B testing sounds technical at first, but at its core it is simply a way to stop guessing and start learning from real customer behavior. Instead of changing something and hoping it works, you compare two versions and let the data tell you what actually improves performance. Sometimes the difference is obvious. Other times the results surprise you, and that is usually where the real insight lives.

For product teams and sellers, testing becomes less about chasing quick wins and more about building confidence in decisions. A small change to an image, title, or message can shift how people respond, but without testing it is almost impossible to know why. A structured A/B testing approach helps reduce risk, uncover patterns in customer behavior, and gradually improve results over time without disrupting what already works.


What A/B Testing Really Means in Practice

In everyday work, A/B testing is less complicated than it sounds. At its simplest, it is a controlled experiment designed to answer one question: which version works better for real users. Instead of changing something for everyone at once, you create two versions of the same element and split your audience between them. One group sees the original version, often called the control, while the other sees a modified version, known as the variant. Everything else stays the same so that the impact of the single change can be observed clearly.

What makes this approach reliable is that it removes opinion from the process. Teams often make decisions based on experience, preferences, or internal discussions, but customers do not always respond the way we expect. A product image that looks cleaner to a designer might feel less trustworthy to a buyer. A shorter description might seem easier to read but leave important questions unanswered. A/B testing replaces assumptions with observable behavior. Users vote through their actions rather than their feedback.

Another important detail is that A/B testing is not about guessing the winner in advance. It is about creating a fair comparison. Traffic is usually divided randomly so that each version is exposed to similar types of users. Over time, patterns emerge. If one version consistently leads to more clicks, purchases, or engagement, the difference is unlikely to be accidental. That is when teams can make changes with confidence instead of hope.


Why Product A/B Testing Matters More Than Ever

Products no longer compete only on features or price. They compete on clarity, trust, and how quickly users understand value. In an environment where customer attention is short and expectations change constantly, small improvements can make a noticeable difference, which is exactly why structured testing has become essential rather than optional.


Changing Digital Environments Require Continuous Validation

Digital environments do not stand still. Customer expectations shift quickly, competitors adapt, and platforms evolve. A product page that performed well last year may quietly lose effectiveness without anyone noticing immediately. Small declines compound over time, and performance rarely drops all at once. More often, it fades gradually as user expectations change. A/B testing helps detect and correct these slow shifts before they become larger problems.


A/B Testing Prevents Stagnation and Encourages Progress

A/B testing acts as a safeguard against stagnation. Instead of waiting for performance drops, teams actively explore improvements through controlled experiments. This proactive approach creates momentum because optimization becomes part of regular work rather than an occasional redesign effort. Even minor gains matter. When small improvements are applied consistently across product images, messaging, layout, or pricing presentation, the cumulative effect can be significant over time.


Data Reduces Friction in Team Decision Making

There is also a psychological benefit inside teams that often goes unnoticed. Testing reduces friction in decision making. Discussions move away from personal taste and toward measurable outcomes. When data replaces debate, progress tends to accelerate because decisions no longer depend on hierarchy or opinion. Teams spend less time arguing about direction and more time refining what actually works for users.


What You Should Test First

When people first discover A/B testing, there is often a temptation to test everything at once. Colors, fonts, layouts, messaging, imagery. The result is usually noise rather than insight. Prioritization matters more than experimentation volume.

A good starting point is to look at moments where customers make decisions. These are points where uncertainty or hesitation can stop progress. The closer an element is to that decision moment, the higher its testing value.


High Impact Elements to Consider

  • Main product images or hero visuals
  • Product titles and value propositions
  • Pricing presentation or discounts
  • Call to action wording or placement
  • Key benefit descriptions
  • Social proof such as reviews or testimonials

These elements shape first impressions and influence trust. Visual polish matters, but clarity matters more. Customers need to understand what the product is, why it matters, and what to do next. Testing helps refine that path.


WisePPC: Advanced Analytics to Guide Your Product A/B Testing Strategy

At WisePPC, we see A/B testing as a natural extension of analytics. Testing only works when you clearly understand what is happening before and after a change. That is why our platform focuses on giving sellers full visibility into both advertising and sales performance in one place. When you run experiments on product listings, pricing, or campaign structure, you need to see how those changes affect real outcomes, not just surface metrics. By combining historical data, real time performance tracking, and detailed segmentation, we help identify whether a variation genuinely improves results or simply shifts numbers temporarily.

In practice, this means we allow teams to compare performance across campaigns, placements, and time periods without losing context. Long term historical data helps avoid common testing mistakes, such as judging results too early or missing seasonal patterns. Granular analytics and filtering make it easier to isolate what changed and why, while bulk actions allow quick adjustments once a winning version is identified. Instead of guessing which version performs better, we focus on helping sellers connect testing decisions with measurable business impact, whether that is improved ROAS, reduced wasted ad spend, or clearer understanding of what actually drives conversions.


How to Run an A/B Test Without Guesswork

A/B testing works best when it follows a clear sequence. Many teams jump straight into creating variations because that feels like progress. In reality, most failed tests happen before the experiment even starts. The difference between useful results and confusing data usually comes down to preparation, clarity, and patience.

This section walks through the full process in a practical way. Each step builds on the previous one, so skipping ahead often creates more problems later.


Step 1 – Define What Success Actually Means

Before changing anything, it is important to understand why the test exists in the first place. A/B testing without a clear objective turns into activity without direction. You might end up with data, but no real answer.

A strong testing goal connects directly to user behavior. Instead of vague intentions like improving performance, the goal should describe a specific outcome you want to influence. For example, more completed purchases, higher engagement with product details, or fewer users dropping off before checkout. 

What a Clear Goal Usually Answers

  • What user action are we trying to improve
  • Where in the journey the problem occurs
  • How success will be measured

When goals are clear, analysis becomes simpler later. You already know which metric matters most and why you are measuring it.

Examples of Focused Testing Goals

  • Increase product purchase rate by improving product clarity
  • Improve click through rate on the primary call to action
  • Reduce cart abandonment during checkout
  • Increase engagement with key product information

The clearer the goal, the easier it becomes to design a meaningful test.


Step 2 – Turn Observations Into a Testable Hypothesis

Once the goal is defined, the next step is explaining why a change might work in the first place. This is where many tests either become meaningful or turn into random experimentation. A hypothesis gives the test direction. It connects what you are seeing in the data with a specific change you believe could improve the outcome.

A hypothesis is not a guess or a creative idea. It is a structured assumption built on observation. Something in the current experience is not working as expected, and the hypothesis explains what might be causing that friction. For example, if users consistently leave a product page within a few seconds, the problem may not be the price or the design. It could simply be that visitors do not immediately understand why the product matters to them. In that case, the hypothesis might be that improving the clarity of the headline or opening message will help users stay longer and engage more deeply.

The most useful hypotheses usually come from patterns rather than opinions. Customer reviews often reveal confusion or missing information. Support questions highlight areas where expectations do not match reality. Analytics can show where users hesitate or abandon the process altogether. Even comparing high performing products with weaker ones can reveal differences in messaging or presentation that are worth testing. These signals help turn testing into problem solving instead of experimentation for its own sake. Keeping the hypothesis focused is important. Each test should aim to answer one meaningful question. When the scope stays narrow, the result becomes easier to interpret, and the insight gained can be applied confidently to future improvements.

Step 3 – Create Variants That Isolate the Change

This is the stage where many A/B tests quietly lose their value. When several improvements feel obvious, the natural instinct is to update everything at once. A new image, rewritten copy, adjusted layout, maybe even pricing changes. The problem is that once multiple elements change together, the results stop being clear. If performance improves, you cannot confidently explain why it happened.

A well structured A/B test keeps things intentionally simple. The purpose is not to redesign the entire experience but to isolate one meaningful difference between two versions. When only one variable changes, cause and effect become visible. The outcome becomes useful knowledge rather than a lucky result.

Control Version – the Current Product Page or Listing

The control version is the existing version that users already see. It serves as the baseline for comparison because its performance is already known. Nothing is changed here. Keeping the control untouched ensures that any difference in performance comes from the new variation rather than external factors.

Variant Version – Identical Except for One Intentional Change

The variant version introduces a single, deliberate adjustment based on the hypothesis. This could be a different product image, revised headline wording, or a new placement for social proof. Everything else remains the same so the impact of that one change can be measured accurately. Maintaining this consistency protects the integrity of the test and makes the result easier to interpret.

When variants are created this way, the insight gained becomes reusable. A successful change can often be applied across other products or pages because you understand what influenced user behavior, not just that performance increased.


Step 4 – Let the Test Run Long Enough to Be Trustworthy

One of the hardest parts of A/B testing is waiting. Early data often looks convincing, especially when one version starts outperforming the other quickly. Unfortunately, early trends are often temporary.

User behavior changes depending on timing, traffic sources, and even day of the week. A version that performs well during a short window may not perform the same way over time.

Reasons tests need time:

  • Weekday and weekend behavior differs
  • New and returning visitors behave differently
  • Campaign traffic fluctuates
  • Random variation can create short term spikes

Ending a test too early introduces risk. A decision made on incomplete data can lock in a weaker version and undo previous improvements. Patience protects against this.


Step 5 – Look Beyond a Single Metric

It is natural to focus on the primary metric tied to the goal. However, real performance is rarely one dimensional. Improvements in one area can create unexpected tradeoffs elsewhere.

For example, a more aggressive message might increase clicks while reducing purchase quality. Engagement rises, but long term value drops. Looking at supporting metrics helps reveal these situations before changes are rolled out broadly.

Metrics Worth Reviewing Alongside the Main Goal

  • Conversion rate
  • Revenue per visitor
  • Add to cart behavior
  • Time spent on page
  • Bounce or exit rates
  • Customer quality indicators

A balanced analysis considers both engagement signals and business outcomes. The best performing version is not always the one with the highest clicks. It is the one that supports sustainable results.


Common A/B Testing Mistakes to Avoid

Most A/B testing problems do not come from bad intentions or lack of effort. They usually appear when teams move too quickly or try to force conclusions before the data is ready. Testing feels simple on the surface, but small mistakes in setup or interpretation can lead to decisions that quietly hurt performance instead of improving it. Understanding where things typically go wrong helps keep experiments useful and reliable.


Testing Too Many Changes at Once

This is probably the most common issue, especially when teams are eager to improve results quickly. Several elements look weak, so everything gets updated at the same time. The page looks better, performance changes, and everyone assumes the test worked. The problem is that no one knows which change actually made the difference.

When multiple variables move together, the result becomes impossible to learn from. You may accidentally keep changes that hurt performance while removing the ones that helped. Over time, this creates inconsistent results and makes future testing harder.

A/B testing works best when each experiment answers one clear question. One change, one comparison, one conclusion.


Ending Tests Too Early

Early data can be convincing. A variant shows improvement after a few days and the temptation to declare a winner becomes strong. The issue is that early results are often unstable. Traffic patterns change throughout the week, campaigns shift, and user behavior varies depending on timing.

Stopping a test too soon increases the chance of choosing a false winner. What looks like improvement may simply be short term fluctuation. Allowing enough time for behavior to normalize helps ensure the result reflects real performance rather than coincidence.

Patience here is not wasted time. It protects you from rolling out changes that later need to be reversed.

Optimizing for the Wrong Metric

Not every improvement is actually an improvement. Sometimes a test increases activity without improving outcomes that matter to the business. For example, a more aggressive message might increase clicks while attracting less serious buyers, leading to lower overall revenue or retention.

This usually happens when teams focus on easy metrics instead of meaningful ones. Metrics should always connect back to the real goal of the product or campaign.

Common examples include:

  • Increasing click through rate while purchase rate declines
  • Improving add to cart numbers without improving completed orders
  • Reducing form friction but lowering lead quality
  • Increasing engagement time without increasing conversions

Looking at supporting metrics alongside the primary goal helps prevent these situations.


Assuming One Result Fits Every Audience

Another frequent mistake is assuming that one winning version works equally well for everyone. In reality, different audience segments often behave differently. New visitors may need more explanation, while returning customers prefer speed and familiarity. Mobile users may respond differently than desktop users.

Ignoring these differences can hide valuable insights. Sometimes a losing variant overall performs exceptionally well for a specific segment. Recognizing these patterns can lead to more targeted improvements instead of one universal change.


Conclusion

A/B testing is often described as a tactic, but in practice it becomes a way of thinking about improvement. Instead of making changes based on instinct or internal debate, you give real users a voice in the decision. Sometimes the results confirm what you expected. Other times they challenge assumptions you did not even realize you were making. Both outcomes move the product forward.

What matters most is consistency. One test will not transform performance overnight, and that is perfectly normal. The real value appears over time as small insights accumulate. You begin to understand how customers interpret your messaging, what builds confidence, and where friction appears in the buying process. Decisions become calmer, changes become safer, and progress becomes more predictable.

If there is one thing worth remembering, it is that testing is not about chasing perfection. Products evolve, audiences change, and new ideas always appear. A/B testing simply gives you a reliable way to adapt without guessing. Start with a clear question, test it honestly, and let the results guide the next step.


FAQ

How long should an A/B test run before choosing a winner?

There is no universal timeline because it depends on traffic volume and the number of conversions generated. In general, a test should run long enough to capture normal user behavior across different days and traffic patterns. Ending a test too early often leads to misleading conclusions, so it is better to wait until results stabilize rather than reacting to early trends.

Can small changes really make a difference in A/B testing?

Yes, and this is often where surprising improvements come from. A different image, clearer headline, or better placement of key information can change how quickly users understand a product. These changes may look minor internally but can significantly affect how customers make decisions.

What should I test first if I am new to A/B testing?

It usually makes sense to start with elements that directly influence buying decisions. Product images, value propositions, and calls to action tend to have a stronger impact than purely visual adjustments. Testing areas closest to conversion helps produce clearer results early on.

Is it possible for an A/B test to fail?

Absolutely, and that does not mean the test was wasted. A result that shows no improvement still provides information. It tells you that a particular assumption was incorrect, which prevents larger mistakes later. Over time, these learnings help refine future experiments.

Do I need special tools to run A/B tests effectively?

Tools help with tracking and analysis, especially as testing becomes more frequent, but the core idea does not depend on complex software. What matters most is having clear goals, isolating changes properly, and analyzing results carefully. Technology supports the process, but discipline makes it work.

success icon

Thank you for submitting request.

We will get back to you ASAP.