You don’t need a film degree or a massive studio budget to make a product video that does its job. What you do need is a clear plan, a bit of creativity, and a solid understanding of what your audience actually wants to see.
This guide walks you through each step of the process – from getting your story straight to hitting publish – so you can create a product video that feels real, looks good, and helps your customers feel confident hitting “buy.”
What Is a Product Video?
Let’s back up for a second. A product video is exactly what it sounds like: a short video that showcases your product. But that definition barely scratches the surface of what it can actually do for your business.
At its core, a product video helps your audience see the product in action – how it works, what it feels like to use, and why it’s worth buying. It gives life to the thing you’re selling. Instead of just reading about features or looking at static images, customers get to experience your product before they commit.
Think of it like a virtual salesperson that never sleeps, never forgets the pitch, and is always available on your product page, social media, or ad.
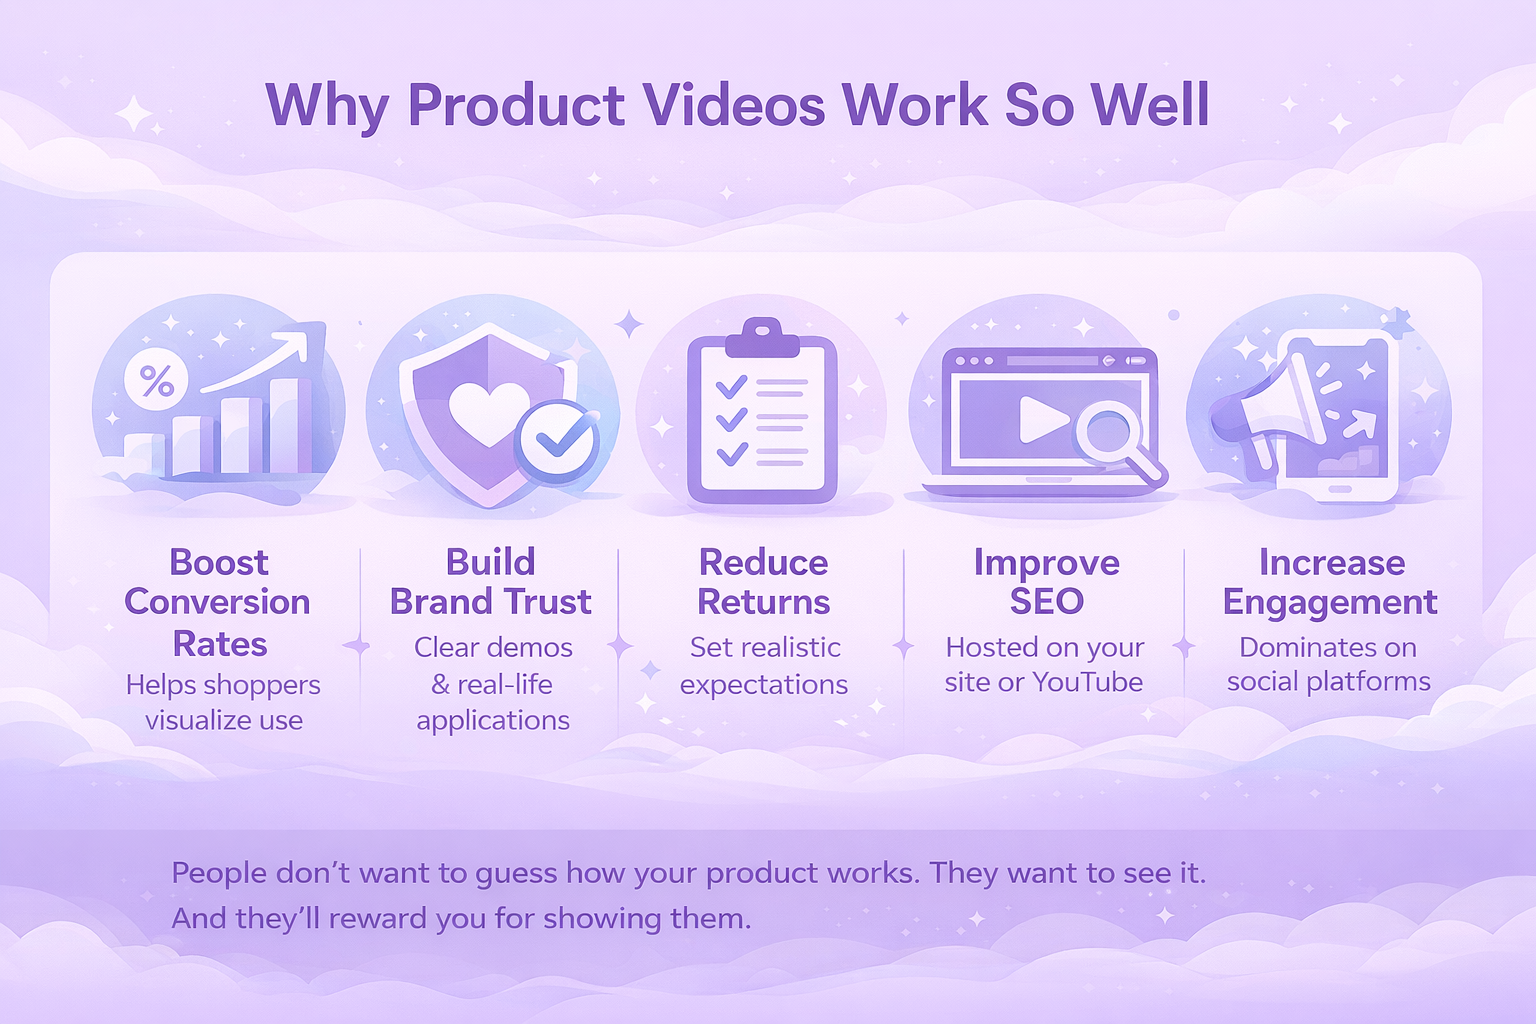
Why Product Videos Work So Well
Before we dive into the how, it’s worth understanding the why. Videos give buyers something no photo or paragraph ever can: context. They show your product in action. They cut through confusion. And most importantly, they build trust.
Here’s what a well-made product video can do:
- Boost conversion rates by helping shoppers visualize use.
- Build brand trust through clear demonstrations and real-life applications.
- Reduce returns by setting realistic expectations.
- Improve SEO when hosted on your site or YouTube.
- Increase engagement on social platforms where video dominates.
People don’t want to guess how your product works. They want to see it. And they’ll reward you for showing them.
What Equipment Do You Actually Need?
Good news: You don’t need a production studio or a $5,000 camera to make a solid product video. Most of the time, a simple setup is enough, if you know how to use it right.
Here’s a practical list of gear you might need depending on your budget.
Starter kit (for DIY creators):
- Smartphone with a decent camera (most iPhones or Android flagships are great).
- Tripod to keep your shots steady.
- Natural lighting or a basic ring light.
- Clip-on mic for clearer audio.
- Free editing software.
Mid-level setup:
- DSLR or mirrorless camera for more control and better depth of field.
- Softbox lights or LED panels for consistent lighting.
- Lavalier or shotgun microphone.
- Sturdy tripod or gimbal for smooth camera movement.
- Paid editing tools.
Nice-to-haves:
- Backdrop (neutral color or white sweep paper).
- Reflector to bounce light.
- Props that show the product in use.
- B-roll camera or second angle setup.
The key is clarity and control. If your viewers can clearly see and hear what’s happening, you’re already ahead of the game.
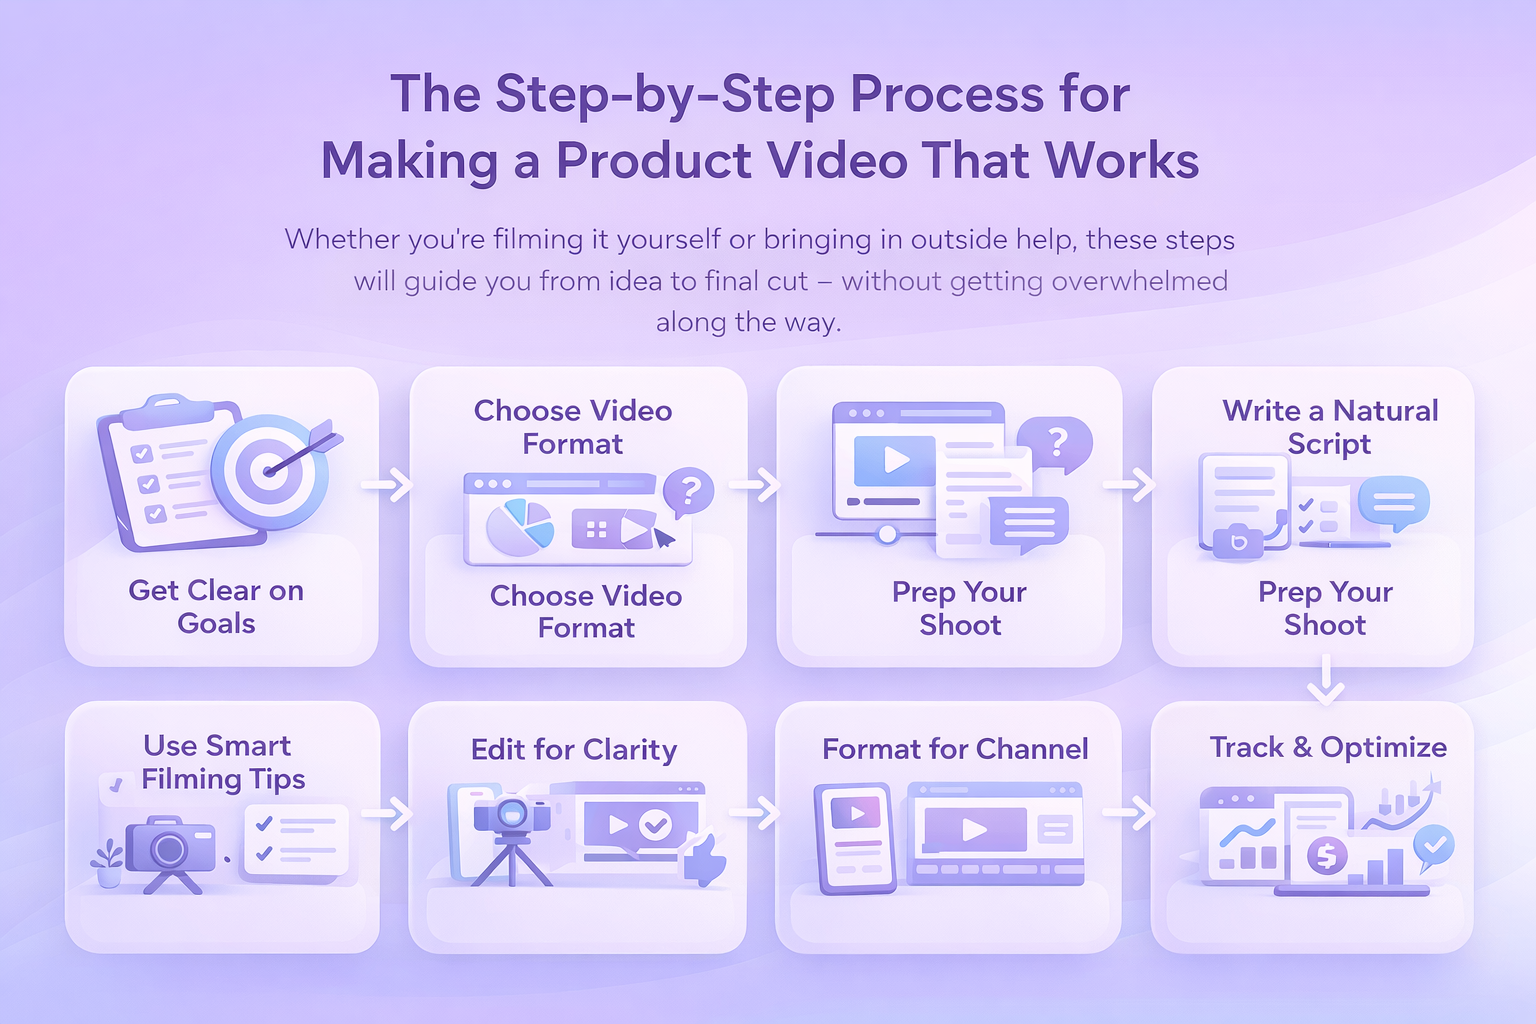
The Step-by-Step Process for Making a Product Video That Works
Whether you’re filming it yourself or bringing in outside help, these steps will guide you from idea to final cut – without getting overwhelmed along the way.
Step 1: Get Clear on Your Goal First
This might sound obvious, but you’d be surprised how many product videos are created without a clear goal in mind. Are you trying to drive purchases? Educate new users? Highlight a specific feature? Your entire approach – script, shots, editing – should match that goal.
Some common video goals include to generate awareness for a new launch, increase conversions on a product page, or reduce support tickets with a how-to video.
Pick one. Not three. Trying to do it all in one video usually ends in confusion.
Step 2: Choose the Right Video Type for the Job
Different products (and different stages of the funnel) call for different types of videos. Here’s a quick breakdown of the most useful formats:
- Product overview: A quick, no-fluff breakdown of what it is, what it does, and why it’s useful.
- Unboxing: A visual of the packaging, included items, and first impression. Great for building hype.
- How-to or setup guide: Ideal for more technical products. Helps customers feel confident and reduces support queries.
- Brand story: Focuses more on your values, team, or mission. Best for top-of-funnel and social content.
- Troubleshooting: Addresses common problems and how to fix them. Saves time for support teams.
- Comparison videos: Pits your product against others or shows it working across use cases.
If you’re only doing one video for now, a strong product overview with subtle storytelling usually delivers the best balance of clarity and engagement.
Step 3: Write a Script That Feels Like You
Good scripts don’t sound like scripts. They sound like someone talking to you directly – clearly, casually, and with purpose. You’re not making a documentary. You’re having a conversation.
One of the best ways to write a product video script that actually connects is to lead with the problem your product solves. Don’t wait too long to get there – those first five to ten seconds matter more than you think. Instead of rattling off features, zero in on the benefit your customer actually cares about. Speak like a human, not a pitch deck. That means ditching the jargon and buzzwords in favor of simple, clear language. And when it’s time to wrap, don’t leave people hanging. Whether it’s a purchase, a sign-up, or a click-through, let them know exactly what to do next.
Step 4: Prep Your Shoot Like a Minimalist
You don’t need a huge crew or a studio setup to shoot a good product video. But you do need to prepare. The goal is to keep things smooth, efficient, and mistake-proof.
Here’s a short checklist:
- Shot list: Know what scenes you’re capturing and in what order.
- Props: Anything the product interacts with should be ready and clean.
- Lighting: Use natural light if you can, or invest in a softbox or ring light.
- Backdrops: Clean, uncluttered, and context-appropriate.
- Camera setup: Tripod is a must. Smartphone or DSLR – either can work.
- Audio: Lapel mics or shotgun mics make a huge difference for clarity.
Also, think about locations. A kitchen table works fine for a mug or small appliance. A park bench could work for a backpack or stroller. Just make sure the environment matches how the product is used in real life.
Step 5: Filming Tips That Make a Big Impact
Once you start rolling, a few things make the difference between amateur and polished:
- Shoot from multiple angles: Get wide, medium, and close-up shots.
- Use the Rule of Thirds: Frame your product off-center for a natural look.
- Keep movements steady: Use a tripod or gimbal.
- Focus on hands: Show how the product is handled or used.
- Record more than you need: You can cut later, but you can’t go back and re-capture missing shots.
And don’t forget B-roll – those in-between shots that help with transitions or mood. Think: zoom-ins, packaging close-ups, or even the product in motion.
Step 6: Edit for Clarity, Not Just Style
Editing is where your raw footage becomes a real, usable video. It’s tempting to go heavy on effects or transitions, but clean, functional edits always win for product videos.
Here’s what to focus on:
- Keep it short: 30 to 90 seconds is the sweet spot.
- Cut ruthlessly: Trim anything that doesn’t add value.
- Add overlays: Use pop-up text to highlight key features or benefits.
- Balance audio: Ensure voice, music, and ambient sound don’t compete.
- Add captions: Many people watch with sound off, especially on mobile.
Free or low-cost editing tools are more than enough for most use cases.
Step 7: Format for Where It’s Going
A common misstep is creating one version of your product video and assuming it works everywhere. In reality, each platform has its own rhythm and visual language. What plays well on Amazon – think horizontal, polished, and benefit-focused – won’t necessarily land on TikTok, where short, vertical, and often casual clips dominate.
YouTube leaves more room for longer demos or how-tos in a classic landscape format, while your website or product detail page calls for a clean, fast-loading embed that speaks directly to the buyer’s intent. Even email requires its own approach, usually a GIF preview that links out to the full video.
Whatever the channel, make sure the video is compressed for quick loading, uses subtitles for silent viewing, and has a thumbnail that makes people want to click.
Step 8: Don’t Just Publish and Forget It
Once your video is live, your job isn’t done. You want to know what’s working, and what’s not.
Track metrics like view-through rate (VTR), average watch time, click-through rate (CTR), conversions or sales attributed to video, engagement (likes, comments, shares).
A/B test different intros or call-to-action phrasing. Even changing a single word can boost results. If you’re running ads, track how your video performs in different placements. And if people stop watching halfway through? That’s a signal to tighten your pacing or revisit your script.
Bonus: When to Outsource vs. Do It Yourself
There’s no one-size-fits-all answer here. DIY product videos are great for speed, authenticity, and cost. But if you’re short on time, launching a big campaign, or working with a high-ticket product, it may be worth hiring pros.
Outsourcing makes sense when:
- You need multiple videos shot at once.
- You want advanced editing, voiceovers, or motion graphics.
- You’re creating videos for multiple SKUs or product lines.
- Your internal team doesn’t have the time or skills.
Just make sure the video still feels like your brand. High production value means nothing if the message doesn’t land.
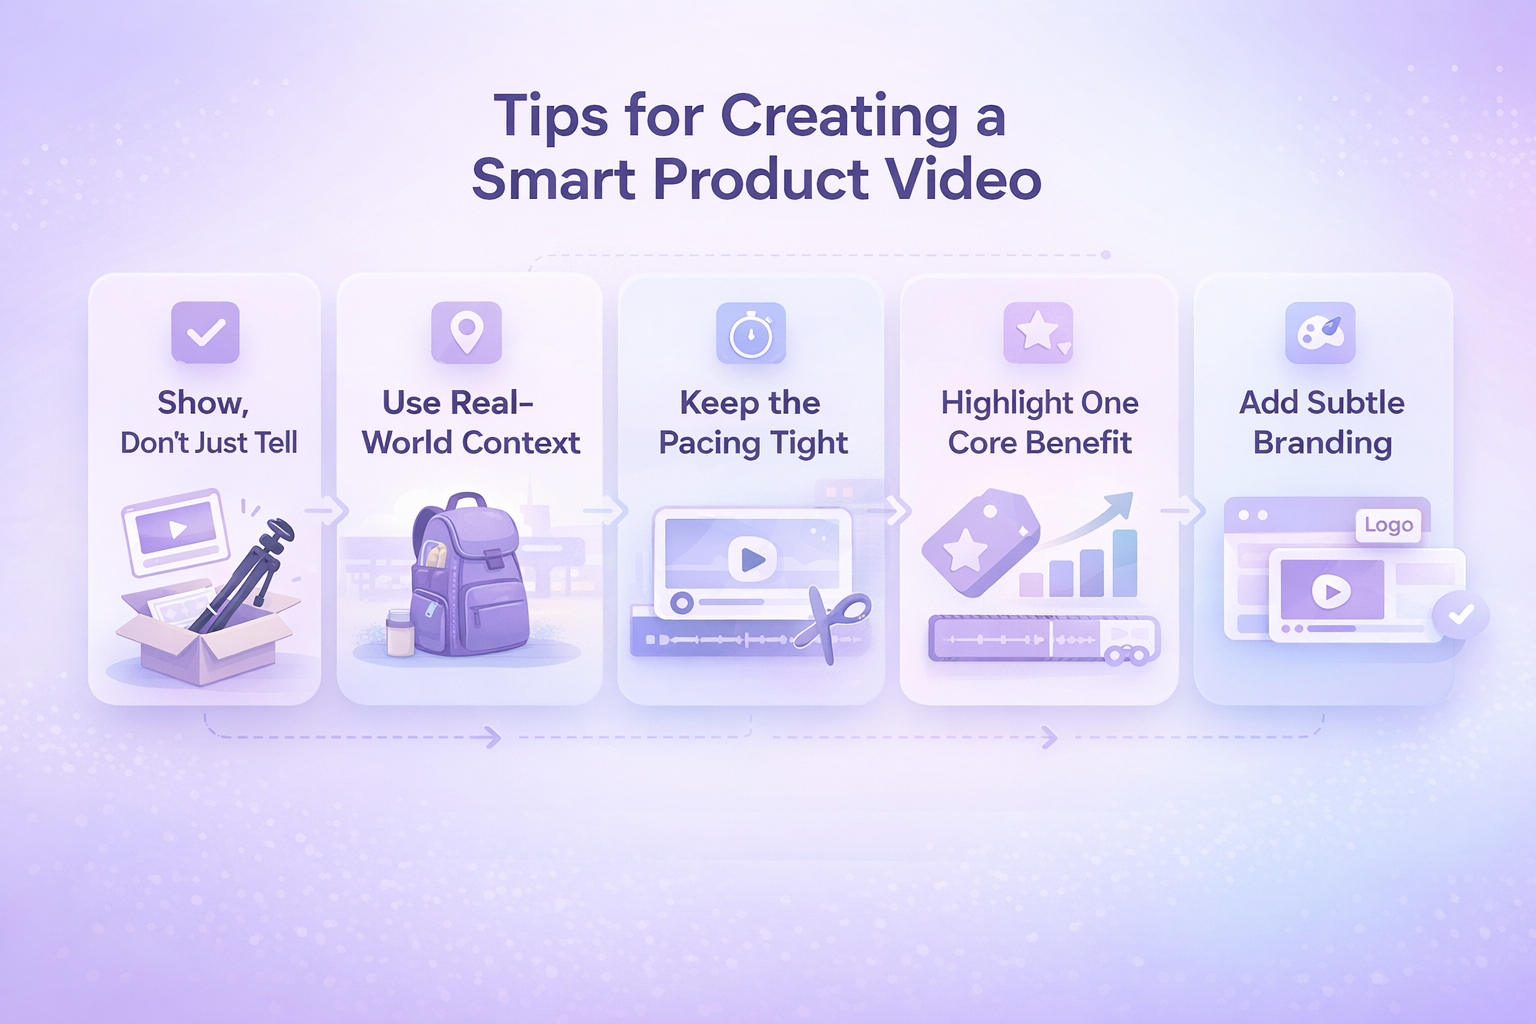
Tips for Creating a Smart Product Video
Whether you’re just starting out or you’ve done this before, a few smart choices can seriously level up your product video. These aren’t trendy hacks or flashy effects – just grounded techniques that work.
1. Show, Don’t Just Tell
It’s one thing to say your product is easy to use. It’s another to actually show someone unboxing it, setting it up in seconds, and getting value right away. Visual proof beats marketing claims every time. Don’t rely on narration alone – let the product demonstrate what it can do.
2. Use Real-World Context
Skip the sterile white background unless you’re selling lab equipment. People want to see the product in a setting that feels familiar and believable. If you’re showing a travel backpack, film it outdoors or in an airport, not on a rotating table under harsh studio lights. Authenticity makes your video relatable, and relatability builds trust.
3. Keep the Pacing Tight
This isn’t a movie trailer. Attention spans are short, and viewers don’t owe you their time. Trim any part of the video that feels slow or redundant. If you start watching it back and catch yourself thinking, “This could be shorter,” trust that instinct and tighten it up.
4. Highlight One Core Benefit
You don’t need to list every feature your product offers. In fact, doing that usually waters down your message. Focus on the single most important benefit – the thing that really solves a problem or sparks desire and let that lead the story. You can always cover additional features in follow-up content.
5. Add Subtle Branding
Your video should feel like it belongs to your brand, but it shouldn’t feel like an ad. Integrate your visual identity through logo placement, color palette, and tone, but avoid hitting people over the head with it. Subtle is stronger when it comes to trust.

Where Product Videos Meet Real Performance Data
We created WisePPC to focus on one thing: helping marketplace sellers make smarter decisions through real, actionable data. Product videos are a big part of your conversion story but they don’t live in a vacuum. Once you’ve put in the effort to create a great video, you need to know if it’s actually making a difference. Are viewers clicking through? Is ad spend backing up your video-driven growth? That’s where we come in.
![]()
We give you the tools to track how your content impacts both sales and advertising performance – down to individual campaigns, keywords, and even placements. Whether you’re running Sponsored Products on Amazon or managing multiple accounts across platforms, our dashboard helps you cut through the noise and see what’s really working. You’ll know if your new video is moving the needle or if it’s time to test something else. No guesswork, no fluff – just sharp insight into how your creative content and ad strategy work together.
Final Thoughts
A great product video doesn’t need to go viral. It just needs to do its job: make your product clear, compelling, and easy to understand. If it shows real use, solves a problem, and feels natural to watch, you’re already ahead of most of the competition.
Start with one video. Learn what resonates. Then make another. The more you do it, the easier it becomes.
And hey, if you’re reading this because you’re planning your first one, that’s already a solid step in the right direction.
FAQ
1. Do I need professional equipment to make a decent product video?
Not at all. If you’ve got a smartphone made in the last few years, you’ve already got a solid camera in your pocket. What matters more is how you use it – clean lighting, a stable shot, clear audio. A tripod and a basic mic can go a long way. You don’t need Hollywood gear to make a video that feels sharp and trustworthy.
2. How long should my product video be?
Keep it short enough to hold attention but long enough to show what matters. For most products, that’s somewhere between 30 and 90 seconds. If you’re doing a tutorial or demo, going up to two minutes is fine – as long as it’s useful the whole way through. No one sticks around for fluff.
3. Can I talk in the video, or should it just be visuals and music?
That depends on your style and audience. Talking can work great if it feels natural, especially for personal brands or handmade products. But if you’re not comfortable on camera, no pressure. You can stick to clean visuals, subtitles, and maybe a voiceover. Just don’t let awkward audio distract from your message.
4. What should I actually show in the video?
Show what buyers can’t learn from a photo. That might be how the product moves, fits, opens, connects, or solves a problem. Focus on real-life use, not just beauty shots. Bonus points if you can show it in someone’s hands or in the environment where it’s meant to be used.
5. Should I make different versions of my video for each platform?
If you can, yes. A square or vertical cut works better for Instagram and TikTok. A landscape version is ideal for your website, Amazon, or YouTube. You don’t need to shoot the whole thing multiple times – just plan your framing and edits with a few formats in mind. It’s worth the extra effort.
6. How do I know if my product video is working?
Watch what happens after it goes live. Are people clicking more? Are sales going up? Tools like WisePPC can help you track performance down to the ad, keyword, or product page. If you’re not seeing results, try tweaking the first 5 seconds or adjusting your call to action. Small changes can make a big difference.
 No credit card required