Best Tips to Improve Your Product Photos
Good product photos used to be a nice bonus. Now they sit right at the center of the buying decision. When shoppers scroll through pages of similar items, they rely on visuals to judge trust, quality, and whether a listing is worth clicking at all. A clear image can communicate texture, size, and detail faster than any block of text.
The opposite is also true. Poor lighting or misleading photos push people away and often lead to returns when the product doesn’t match expectations. Anyone who has unboxed something that looked different from the listing knows how fast that breaks trust. Strong photography isn’t just creative polish anymore. It’s a core part of ecommerce. Better images help customers understand what they’re buying, reduce hesitation, and prevent avoidable frustration down the line.
Setting Up Your Toolkit: What You Actually Need
You don’t need a studio full of fancy gear to take strong product photos. Most sellers get great results with a small setup that’s easy to assemble and doesn’t cost much. The trick is choosing tools you understand well enough to use consistently.
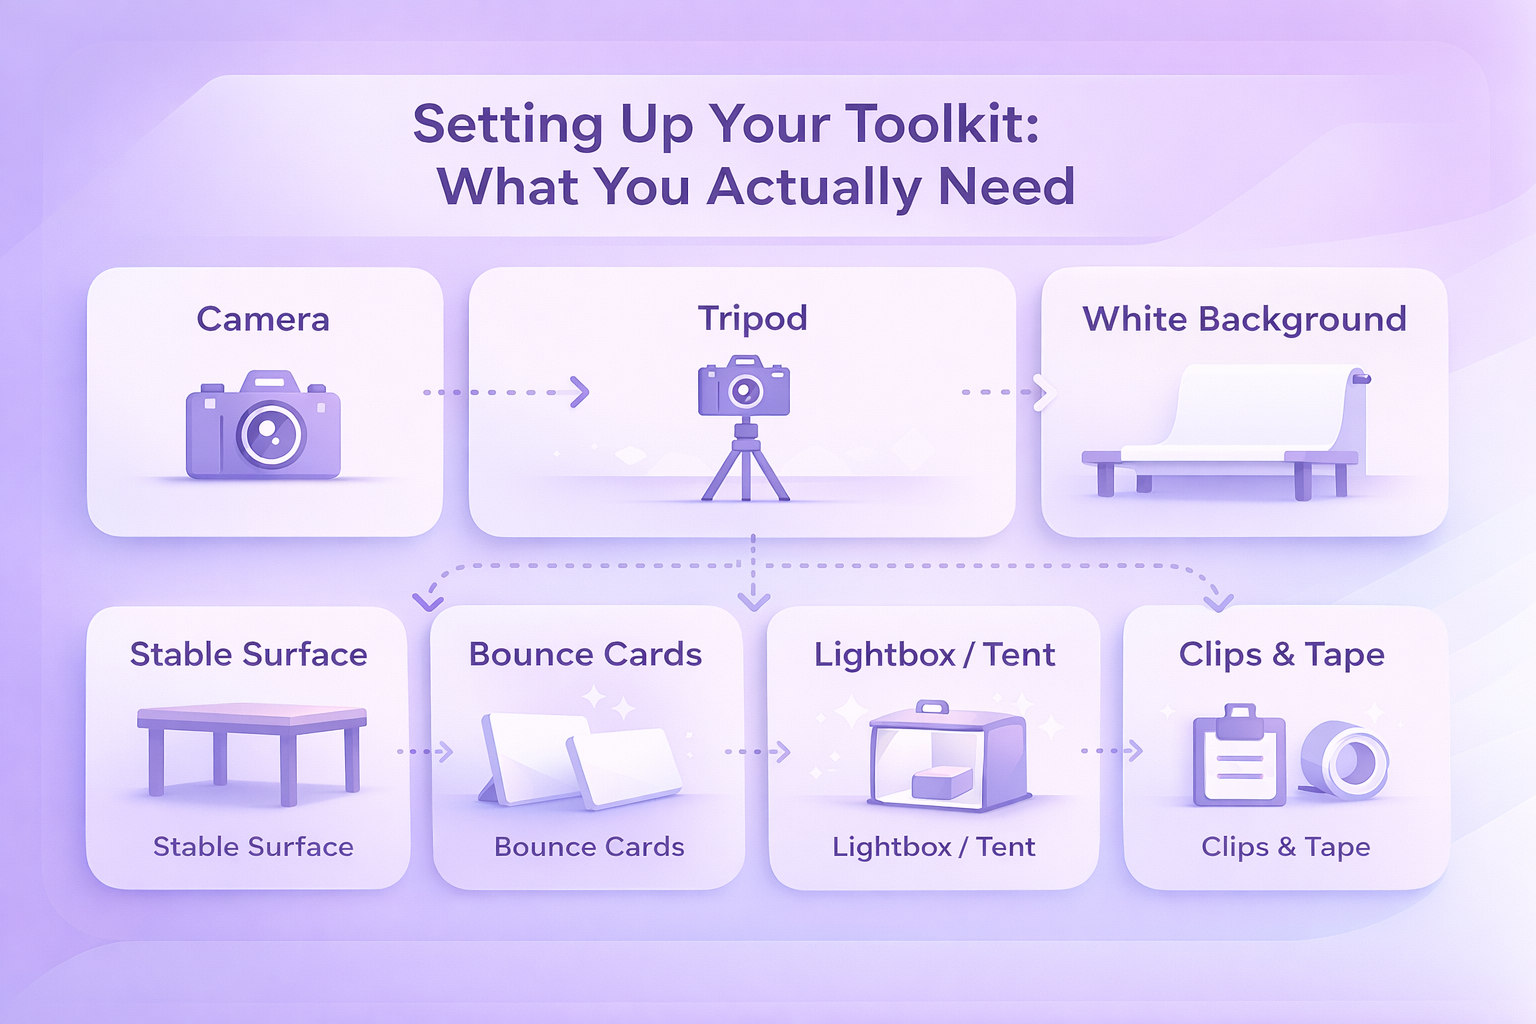
- Camera: A good camera helps, but it doesn’t have to be top shelf. A DSLR, a point-and-shoot, or even a newer smartphone will all work as long as the images look sharp and natural. Many people end up using their phones because they already know how to operate them and don’t need to navigate ten different menus.
- Tripod: This is worth every penny. A tripod keeps the camera steady and prevents the slight hand shake that leads to blurry details. Many affordable ones do the job perfectly fine.
- White background: A plain white background keeps the viewer’s attention on the product. Something simple like a roll of white craft paper or a bendable white sheet attached to a table creates that smooth, seamless backdrop most marketplaces expect.
- Bounce cards: White foam boards help soften shadows and brighten dark patches without adding extra lights. They’re one of the easiest ways to make a shot look more balanced.
- Lightbox or light tent: For smaller items, a lightbox creates an even, soft glow around the product so you don’t have to fight with harsh light or awkward shadows. It’s not essential, but it helps if you shoot often.
- A stable surface: A simple table is usually enough. For tiny items, people sometimes use the back of a chair against the wall to create a vertical-to-horizontal sweep.
- Clips, tape, or glue dots: Small tools that save you from frustration. They keep backgrounds from sliding and stop lightweight items from rolling around while you’re trying to get the perfect angle.
Once you’ve gathered these basics, you’re already most of the way toward producing photos that look clean, intentional, and consistent from shoot to shoot.

Connect Your Product Photos to Real Performance With WisePPC
At WisePPC, we know great product photos do more than make a listing look polished – they shape how customers interact with your ads and detail pages. Our analytics platform lets you see that impact clearly. You can track changes in CTR, conversion rate, and ad efficiency right after updating your images, instead of guessing whether your creative work made a difference. With long-term historical data, multi-metric charts, and placement-level performance insights, it becomes easier to understand how visuals influence real shopper behavior over time.
![]()
We also help you connect the dots across marketplaces. Whether you sell on Amazon, Shopify, or both, our tools show how each listing responds to new photos, which products benefit most, and where your team should focus next. Real-time metrics, automated optimization suggestions, and granular filtering give you a complete picture of how your creative decisions play out in the numbers. Better images drive better results, and we make those results easier to measure, compare, and scale.

Building the Shot: Composition, Style, and Picking the Right Angles
Once your setup is ready, the next step is shaping the actual image. Composition and styling decide what the customer pays attention to, how they interpret your product, and whether the photo feels believable.
Show the Product Clearly, From Helpful Angles
A single straight-on shot rarely tells the whole story. Try mixing angles that highlight different parts of the item:
- Front or head-on for the straightforward view.
- Three-quarter angle to show depth and shape.
- Overhead for items that lay flat or come as sets.
- Closeups for textures, finishes, or small functional details.
Placing the product in the center usually keeps things clean, but some sellers experiment lightly with the rule of thirds to create space and balance. As long as the item stays easy to understand, a bit of variation can make the shot feel more natural.
Use Styling Thoughtfully
Styling isn’t about decorating the photo. It’s about giving customers a sense of how the product fits into real life. A lifestyle shot of kitchen tools, for instance, might include a cutting board or a soft hint of ingredients in the background. Just keep the extra elements subtle so they don’t steal attention away.
Different shot styles can help you cover a wider set of customer questions:
- Individual shot: A clean, simple image of one item.
- Group shot: Useful for bundles or collections where customers need to compare variations.
- Lifestyle shot: Shows the product in context, helping people imagine how they’ll use it.
- Scale shot: Puts the size into perspective by showing the object next to something familiar.
- Detail shot: Ideal for jewelry, intricate patterns, or parts that matter to the buying decision.
- Packaging shot: For customers who care about presentation and the unboxing experience.
- 360-degree or rotational set: More advanced, but great for transparency and engagement.
If you sell, say, a ceramic planter, you might shoot it alone; then a group showcasing multiple colors; then a lifestyle moment where someone places a plant into it; and finally a closeup on texture or drainage holes. Together, these images build a rounded understanding of what the buyer is actually getting.
Lighting and Backgrounds: Creating Clarity Without Overcomplication
Lighting can make an average photo look polished, and it can also ruin a great product if it’s too harsh or uneven. Fortunately, you don’t need a studio setup to get lighting right. A bit of patience and a consistent routine usually do the job.
Keep the Background Simple
A white background remains the safest and most reliable choice. It keeps the focus where it should be and makes colors look cleaner. Most marketplaces expect at least one image on plain white, so it’s worth mastering that look.
For lifestyle photos, you can loosen things up. Introduce a bit of color, texture, or setting to signal your brand’s mood. A skincare brand might use soft beige tones; a tech accessory could sit on a modern desk surface. The goal isn’t decoration, it’s clarity. Let the background support the story, not overshadow it.
Use Light to Show the Product Honestly
Natural light works surprisingly well for many products. The sweet spot is often near a window where the light feels soft rather than direct. Morning or late afternoon light can create a more even, gentle tone.
If natural light isn’t dependable, artificial lighting gives you consistency. You can shoot whenever you need to, adjust warmth, and control where shadows fall. Even inexpensive LED panels can provide a steady, predictable result.
Bounce cards help more than people expect. A simple foam board can brighten a shadowy side or soften harsh light from a single-source setup. The small adjustments they make often go a long way in bringing out texture and detail without overexposing anything.
The main thing is to avoid lighting that distorts the product. If a shirt looks more vibrant under your lights than it does in person, customers will feel misled. Aim for accuracy first, enhancement second.
Preparing the Shot: A Practical Step-by-Step Workflow
Once you’ve set your lighting and backdrop, it’s time to bring the whole setup together. A little preparation goes a long way in preventing retakes later.
1. Position the Product Cleanly
Place the item on your chosen background and make sure it sits flat, straight, and centered. Tiny props like glue dots or small clips can stop objects from sliding or tilting. Clothing or accessories may need extra help from mannequins, hangers, or a simple stand.
2. Adjust Your Lighting
If you’re using natural light, move your table closer to a window and soften harsh sunlight with a thin sheet or piece of paper. For artificial light, set your primary light in front of the product and add a second light above or behind it to smooth out shadows. Bounce cards can brighten darker corners and reduce contrast.
It helps to take a quick test photo and adjust based on what you see rather than guessing. When you find a setup you like, jot down notes or take a photo of your lighting arrangement. You’ll thank yourself later when you want consistent shots across a new batch of products.
3. Set Up the Tripod
Place your tripod directly in front of the product and lock it in. This keeps your angles steady and helps maintain consistency across your images. Keeping the camera in the same position also makes retakes easier if you need them.
4. Dial In Camera Settings
Attach your camera or smartphone to the tripod and adjust basic settings so they match your lighting.
- Match the white balance to your light source so the colors stay true.
- Use a small aperture if possible to keep more of the product in focus.
- Turn flash off to avoid sharp, unrealistic reflections.
- If your camera allows it, shoot in RAW. If not, choose the highest-quality JPEG setting.
Aim for the product to fill at least 80 to 85 percent of the frame. Too much empty space weakens the image, but being too close can cut off essential details unless the shot is meant to be a closeup.
5. Take Multiple Angles
Even if you think you have the perfect shot, take several more from slightly different angles and distances. A small adjustment can uncover a more flattering perspective or reveal a detail that you missed earlier. Shooting extra now is easier than setting up everything again later.
Editing and Enhancing Your Photos Without Overdoing It
Editing isn’t about transforming your product into something it’s not. It’s about presenting it clearly, removing distractions, and making sure the colors and details match what buyers will receive. A light, steady hand usually gives the best results.
Adjust the Basics First
Start with simple corrections.
- Brightness and exposure: Bring up shadows if they swallowed important details, or lower highlights if the photo looks washed out.
- Contrast: Add a little definition to separate the product from the background.
- White balance: Make sure the background actually looks white and the product’s colors appear natural.
These small tweaks often fix 80 percent of issues.
Correct Colors When Needed
Sometimes the background or lighting adds a tint that wasn’t meant to be there. A shirt might lean too blue, or a wooden texture might appear dull. Adjust saturation and hue gently until the item resembles what you see in person. The key is to avoid pushing colors so far that the product looks unrealistic.
Sharpen Selectively
A touch of sharpening can help emphasize texture or edges, especially on jewelry, tools, or fabric. Too much sharpening, though, makes the image look brittle or noisy. Use just enough to give the photo a clean finish.
Crop With Intention
Cropping helps you create consistent shapes across all your photos and guides the viewer’s attention. Trim out empty space, stray styling elements, or anything that distracts from the product. Keep the item centered unless you deliberately want a different composition.
Remove Unwanted Artifacts
Even with good planning, small issues can sneak into the frame. Dust specks, a crease in a backdrop, a glare on sunglasses, these are the kinds of distractions that editing tools can remove. Masking and selection tools in most photo software make these cleanups quick.
Know When to Bring in a Professional
If editing isn’t your strong suit, it can be worth outsourcing final retouching. Over-edited or poorly retouched images can hurt your listing. A professional can clean things up without crossing into artificial territory.
Follow Marketplace Requirements
Every platform has image guidelines. For Amazon, photos must meet certain size, clarity, and file format standards. Larger images (1,000 pixels or more on the longest side) allow for zoom, which helps buyers inspect details and can improve conversions. Stick with JPEG whenever possible, since it balances quality and file size well.

Optimizing Images for Faster Loading and Better Search Visibility
You can take amazing product photos, but if they take too long to load or search engines can’t make sense of them, customers might never reach your listing. A bit of image optimization helps your photos perform well across devices and improves discoverability.
- Keep file sizes manageable: Large images slow down pages, especially on mobile. Compress your photos just enough to make them lighter while still looking sharp. Many editing programs and online tools handle this well.
- Choose the right file format: JPEG works for most product shots because it handles color well and stays small when compressed. PNG helps when you need transparency or super crisp edges, though the files are heavier. GIF is limited in color but useful for simple graphics or small animations. In practice, most sellers stick with JPEG for their main photos.
- Use clear, descriptive file names: Replace generic names like “IMG_3098.jpg” with something more meaningful, such as “stainless-steel-water-bottle-20oz.jpg.” Search engines pick up on these cues, and it helps your content get indexed correctly.
- Write helpful alt text: Alt text isn’t visible to shoppers, but it supports accessibility and SEO. Keep it brief and accurate, for example: “Blue ceramic planter with drainage tray.” A keyword or two is fine, but the goal is clarity, not stuffing.
- Use thumbnails wisely: Thumbnails help shoppers skim through colors, angles, or variations quickly. They also give search engines a better idea of the range of content on your product page.
- Add images to your sitemap: If you run your own ecommerce site, including images in your sitemap helps search engines discover them more easily. This can improve your presence in image search results.
- Make images responsive: A lot of browsing happens on phones. Responsive images ensure your photos load properly and display cleanly across desktop, tablet, and mobile without weird cropping or delays.
Common Mistakes to Avoid
Even a solid setup can fall apart if a few small details slip by unnoticed. These are the issues that quietly weaken the overall quality of product photos.
1. Skipping the White Background for Core Shots
Creative backgrounds are great for lifestyle images, but your primary photos should almost always use a clean white backdrop. It keeps attention on the product and aligns with marketplace expectations.
2. Letting Props or Models Steal the Spotlight
Styling can add context, but it shouldn’t overshadow the item you’re actually selling. If the viewer notices the props first, it’s a sign the composition needs adjusting.
3. Using Angles That Confuse Rather Than Clarify
Overly dramatic or artistic angles might look interesting, but buyers usually want simple, predictable views. Stick to clear angles like front, side, overhead, closeups, and soft 45-degree shots unless you have a strong reason to do otherwise.
4. Uploading Low-Resolution Images
Blurry or pixelated photos quickly turn shoppers away. High-resolution shots allow zooming and give customers confidence in the product’s details.
5. Ignoring Lighting Problems
Poor lighting leads to inaccurate colors and flattened textures. If something looks off, fix the exposure in editing instead of hoping it goes unnoticed.
6. Skipping the Tripod
Even small hand movements can add blur. A basic tripod removes that risk and helps you maintain consistent framing across shoots.
7. Forgetting SEO Basics
After all the effort of shooting and editing, it’s surprisingly easy to skip alt text or descriptive file names. These small SEO steps help search engines read your images and improve discoverability.
Final Word
Strong product photos aren’t just a final polish on your listing. They shape how shoppers understand your product, influence whether they click “add to cart,” and set honest expectations about what arrives at their doorstep. When your images are clear, well-lit, and consistent, customers feel more confident in what they’re buying. When they’re confusing or low-quality, you lose that trust before the conversation even begins.
As online shopping grows and the competition tightens, visuals become one of the simplest ways to stand out. You don’t need a huge studio or expensive gear to get there. What matters most is a thoughtful setup, accurate lighting, and a handful of images that show the product from angles and contexts that actually help the buyer.
If you treat photography as a core part of your ecommerce workflow rather than a last-minute task, you’ll see the difference – not only in how your listings look, but in how your customers respond.
FAQs
Do good product photos really increase sales?
Yes. Clear, accurate images help shoppers understand shape, texture, size, and overall quality. When people can evaluate a product visually, they feel more confident buying it, which usually leads to higher conversions and fewer returns.
Can I take product photos with a smartphone?
You can. Many recent smartphones have excellent cameras. Pair the phone with a small tripod, use even lighting, and adjust basic settings like white balance and focus. The quality difference between a phone and a DSLR is often smaller than people expect when the setup is done correctly.
How many photos should a product listing include?
Most listings benefit from at least six images. A solid mix might include a front view, an angled view, a few closeups, a scale shot, and a lifestyle or contextual photo that shows the product in use.
What background works best for product photography?
A clean white background is the safest choice for core images. It keeps the attention on the product and aligns with most marketplace requirements. Lifestyle images can use more creative backgrounds, as long as they don’t distract from the item.
What lighting should I use for product photos?
Soft, diffused light: natural or artificial, usually produces the most accurate results. Bright, direct light tends to create harsh shadows and uneven highlights. A simple diffuser or bounce card can help even everything out and show the product honestly.
Join the WisePPC Beta and Get Exclusive Access Benefits
WisePPC is now in beta — and we’re inviting a limited number of early users to join. As a beta tester, you'll get free access, lifetime perks, and a chance to help shape the product — from an Amazon Ads Verified Partner you can trust.
 No credit card required
Free in beta and free extra month free after release
25% off for life — limited beta offer
Access metrics Amazon Ads won’t show you
Be part of shaping the product with your feedback
No credit card required
Free in beta and free extra month free after release
25% off for life — limited beta offer
Access metrics Amazon Ads won’t show you
Be part of shaping the product with your feedback
